Purpose of the article: In this blog, we have explained how we can implement snow pipe in AWS cloud.
Intended Audience: This POC/Blog will help which kinds of people, like developers working on AWS and snowflake cloud
Tools and Technology: AWS services, Snowflake
Key words: Creating snow pipe by using snowflake on AWS
Objective:
To establish the Snowflake Snow pipe on an AWS stage.
Snow pipe:
- It’s a Snowflake continuous data ingestion service.
- It loads data within minutes once after files are added to a stage and submitted for ingestion.
- It enables loading data from files as soon as they’re available during a stage.
Advantages of Snow pipe:
- Snow pipe constantly offers fresh business data across all departments while avoiding workload issues.
- It is extremely cost-effective and charges customers per second with supported computing time.
- Snow pipe is extremely adaptable and enables simple customizations to load data.
The architecture of Snow pipe in AWS:

Steps to implement Snow pipe:
Step 1: Steps to make S3 Bucket in AWS:
- Log into the AWS Management Console.
- From the house dashboard, choose buckets
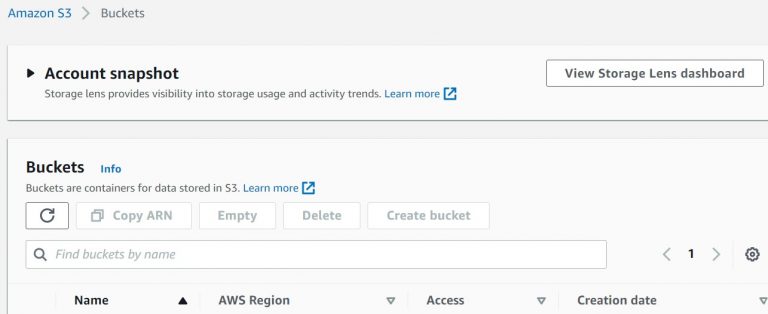
- Click on the’ create bucket’ option
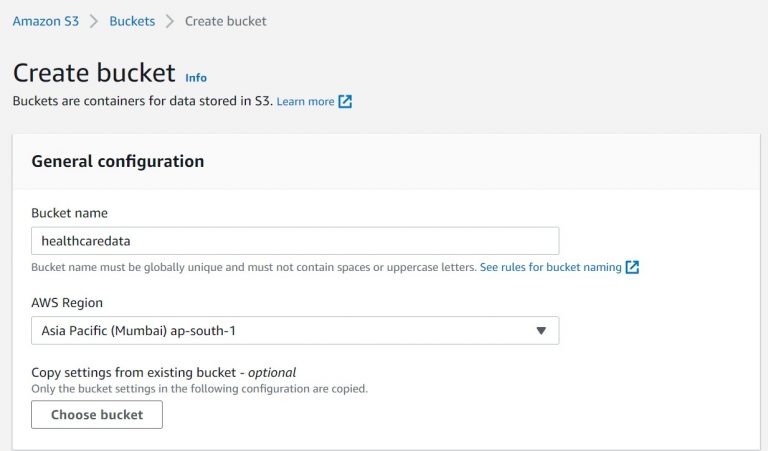
- Set the bucket name as healthcaredata and choose the region for storing it.
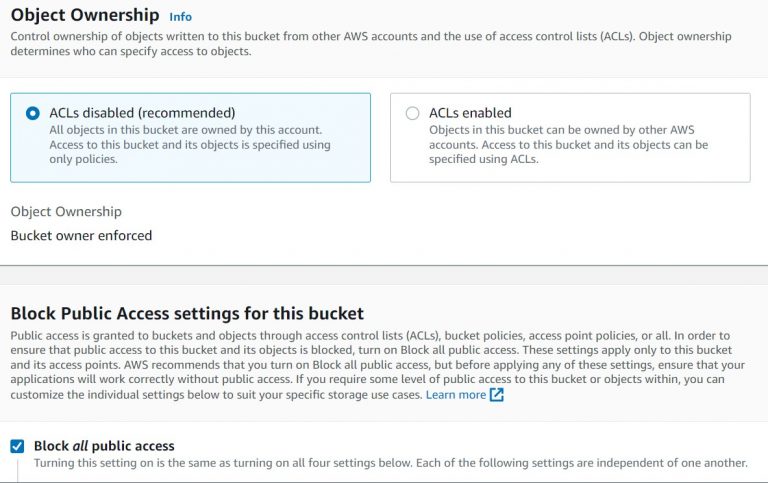
- For block public access settings, select the choice ‘Block all public access’ and set Bucket versioning and Default encryption to Disable. And now create the bucket.
Step 2: Steps to make Policy in IAM:
- From the house dashboard, choose IAM (Identity & Access Management)
- Choose a policy and click create a new policy
- Choose JSON and use code below given.

- Click on Next tags and Next review; set the policy name healthcare-Policy and make the policy.
Step 3: Steps to make User in IAM:
- From the house dashboard, choose IAM (Identity & Access Management).
- Choose the user, click on the create user option, and set the username as snowpipeingest-user.
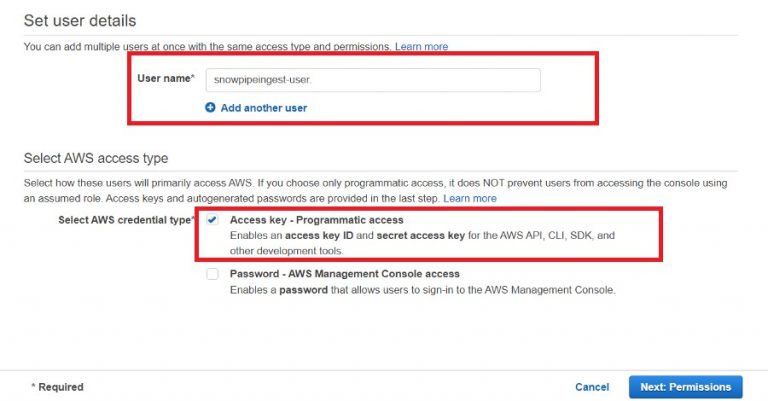
- Choose Programmatic access in Access type and click on the Next Permission.
- Click on Attach existing policies directly then select the policy created earlier named as healthcaredata-Policy and click on Next tags.

- Create the user and download the CSV file, which has the access key ID and secret access key.


Step 4: Creating a table in Snowflake:
- Redirect to the Snowflake account.
- Create a table in Snowflake to store the knowledge.
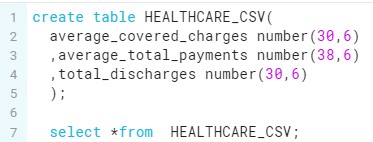
3. Create a stage using S3 bucket name with a proper file format that’s visiting be loaded.

- Creating a pipe (HEALTHCARE_SNOWPIPE_LOAD) using the stage layer (HEALTHCAREDATA_STAGE)

- Use the show pipes command and replica the Arn code from the notification channel column values
SHOW PIPES;
- Redirect to the S3 bucket page and choose the event notification under the properties.
- Click on the Event notifications and choose create event notifications.
- Set the event name as snowdailyingest-event and choose the All object create an event from Event Types.
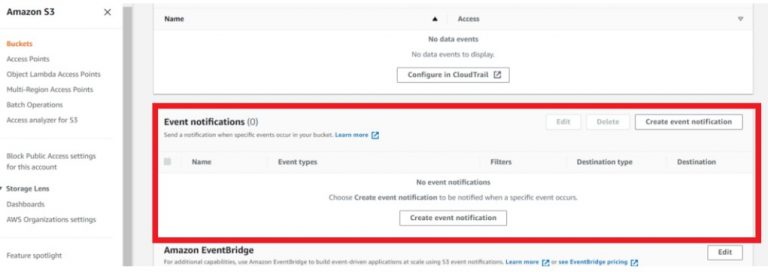
9. Upload the files into s3 bucket.
10. Redirect to snowflake and query the table to verify to ingest the data


In the Snowflake table, files are successfully loaded.
Step 5: Status of Snow pipe:
The status of the pipe to retrieve the current status.

Author Bio:

Jyothi MODI
Associate Software Engineer
An energetic, diligent and motivated person with a passion for innovation, Jyothi has 1+ years of experience in CHEP US automation project. She is also technically adept in Snowflake, AWS, Python, Flask, Matillion, ML, and Ms SQL.


