Purpose of the article: How we can create Web services using Fast API framework by adding basic authentication.
Intended Audience: Python Developers, Web developers, Backend Developers, Data Scientists & Machine learning engineers
Tools and Technology: VS Code, Python
Keywords: Introduction to Fast API, Building Fast API Web services using python
Introduction: Fast API emerges as a robust web framework tailored for crafting high-performance APIs using Python. Fast API empowers developers to swiftly and effectively construct applications. Leveraging the Starlette web server as its foundation, Fast API integrates functionalities simplifying web application development, including seamless data validation, error management, and interactive API documentation. Fast API is fully compatible with well-known standards of APIs, namely Open API and JSON schema.
Installation Steps of Fast API:
Step 1: Create a New Project using VS Code.
Step 2: The first step is to install Fast API
Step 3: Open the terminal and use the below command to install the Fast API framework.
pip install fastapi
Step 4: Use the below command to install Uvicorn to work as the server for Fast API.
pip install “uvicorn[standard]”
Python Installation Setup Requirements:
- VS Code
- A Python Interpreter
- Python extension from the VS Code Marketplace
- We can install Python using Homebrew on macOS with below command in Terminal prompt. brew install python3
Create Web Services Using Fast API:
Step 1: Create files with a .py extension supporting Python language in VS Code.
Step 2: Create a Model folder and place the model by creating for every API like in the screenshot below.
					from pydantic import BaseModel

class Plans(BaseModel):
    planName: str
    planDescription: str
    amount: str

Step 3: Create required web services by creating a new file named for example router.py & import required models and libraries while creating the service.
Step 4: Below is the example for creating the Get Request for Plans model.
					# Plans
# GET Request Method
@router.get("/plans", dependencies=[Depends(authenticate_user)])
async def get_plans():
    plans = list_serial_plans(collection_name_plans.find())
    return plans

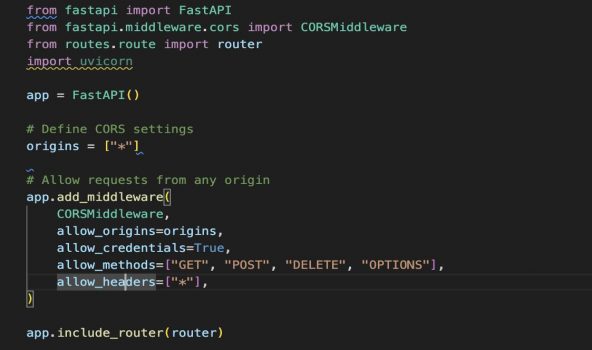
Step 5: Call the router file using fastapi in main.py like below.
					from fastapi import FastAPI
from fastapi.middleware.cors import CORSMiddleware
from routes.route import router
import uvicorn

app = FastAPI()

# Define CORS settings
origins = ["*"]

# Allow requests from any origin
app.add_middleware(
    CORSMiddleware,
    allow_origins=origins,
    allow_credentials=True,
    allow_methods=["GET", "POST", "DELETE", "OPTIONS"],
    allow_headers=["*"],
)

app.include_router(router)

Step 6: use the uvicorn main:app –reload in the terminal to run the Fast API web services.
- main: the file main.py (the Python “module”).
- app: To create the object inside of main.py we can write as app = FastAPI().
- –reload: using this restart the server.
Step 7: In the output, there’s a line with something like below.
INFO: Uvicorn running on http://127.0.0.1:8000 (Press CTRL+C to quit)
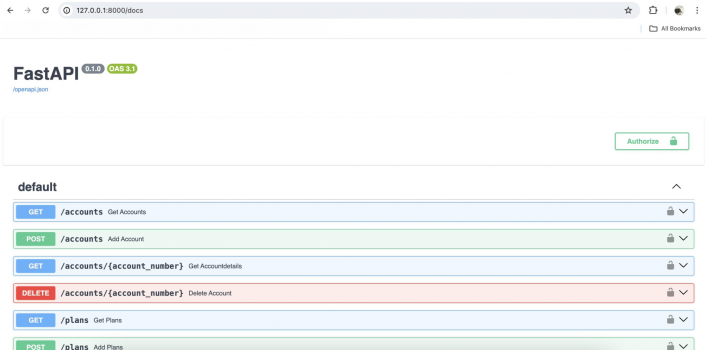
Step 8: You can verify using http://127.0.0.1:8000 in Postman or Swagger like below.

Add Basic Authentication for Services using Fast API:
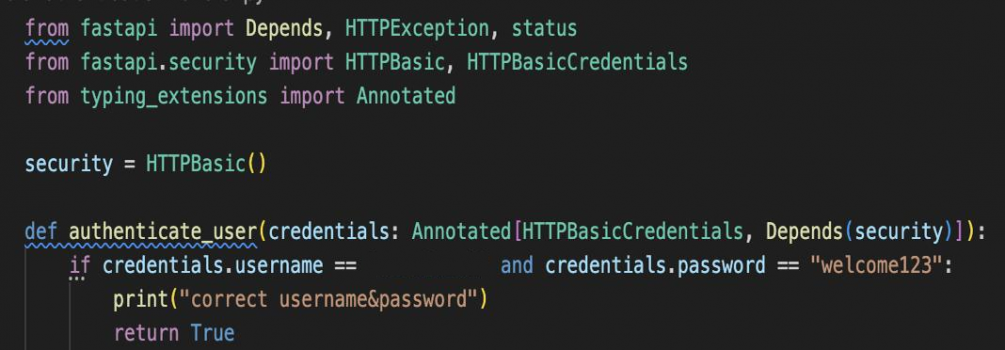
Step 1: Create a file for adding Basic Authentication for Fast API and import a few Libraries like HTTPBasic, HTTPBasicCredentials, HTTPException, Depends, Status from fastapi to work with this.
Step 2: Create an Object or instantiate HTTPBasic and write a function in Python to handle the credentials like Username and Password and check for whether the credentials are true or false.
					from fastapi import Depends, HTTPException, status
from fastapi.security import HTTPBasic, HTTPBasicCredentials
from typing_extensions import Annotated

security = HTTPBasic()

def authenticate_user(credentials: Annotated[HTTPBasicCredentials, Depends(security)]):
    if credentials.username == and credentials.password == "welcome123":
        print("correct username&password")
        return True

Step 3: use the uvicorn main:app –reload in the terminal to run the Fast API web services.
Step 4: In the output, there’s a line with something like below.
INFO: uvicorn running on http://127.0.0.1:8000 (Press CTRL+C to quit)
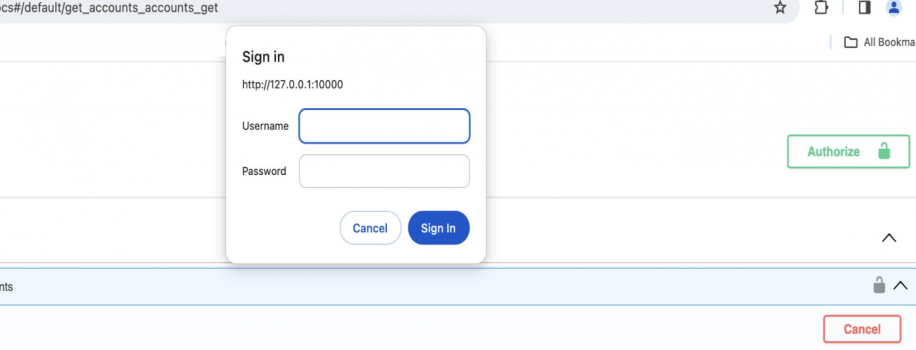
Step 5: Based on the status of true or false it will throw an HTTP Status code. You can verify the basic authentication in Postman or Swagger.

Conclusion: Fast API offers an efficient framework for developing web APIs with Python. Its intuitive design, asynchronous capabilities, and automatic Open API documentation generation make it a top choice for developers seeking efficiency and scalability in their projects. Whether you’re creating RESTful APIs, Web Socket applications, or microservices, Fast API empowers you to build with speed and confidence. With its vibrant community support and seamless integration with other Python libraries, Fast API opens doors to endless possibilities in web development.
Author Bio:

Rahul Kumar KALYAMPUDI
Mobility - Sr. Principal Software Engineer
I have 7+ years experience in mobile application development and having good experience in building immersive and intuitive mobile applications. I specialise in creating iOS native experiences that seamlessly blend functionality with a delightful user interface.


