
What Does OKTA React Native?
OKTA is Cloud-based user Authentication and Authorisation solution that makes. it easy to manage and secure user identities.
What is OpenID Connect?
OpenID Connect, as a layer within the OAuth 2.0 protocol, and enables clients to verify an end-user’s identity through Authentication by an Authorization server. Additionally, it facilitates the retrieval of basic profile information about the end-user in a standardized and REST-like fashion.
OpenID Connect is versatile, catering to a wide range of client types, including web-based, mobile, and JavaScript clients, allowing them to request and access data regarding authenticated sessions and end-users. These specifications are robust, providing participants the flexibility to utilize optional features like personalized login, OpenID provider discovery, and opt-out functionality.
OKTA in React Native Integration
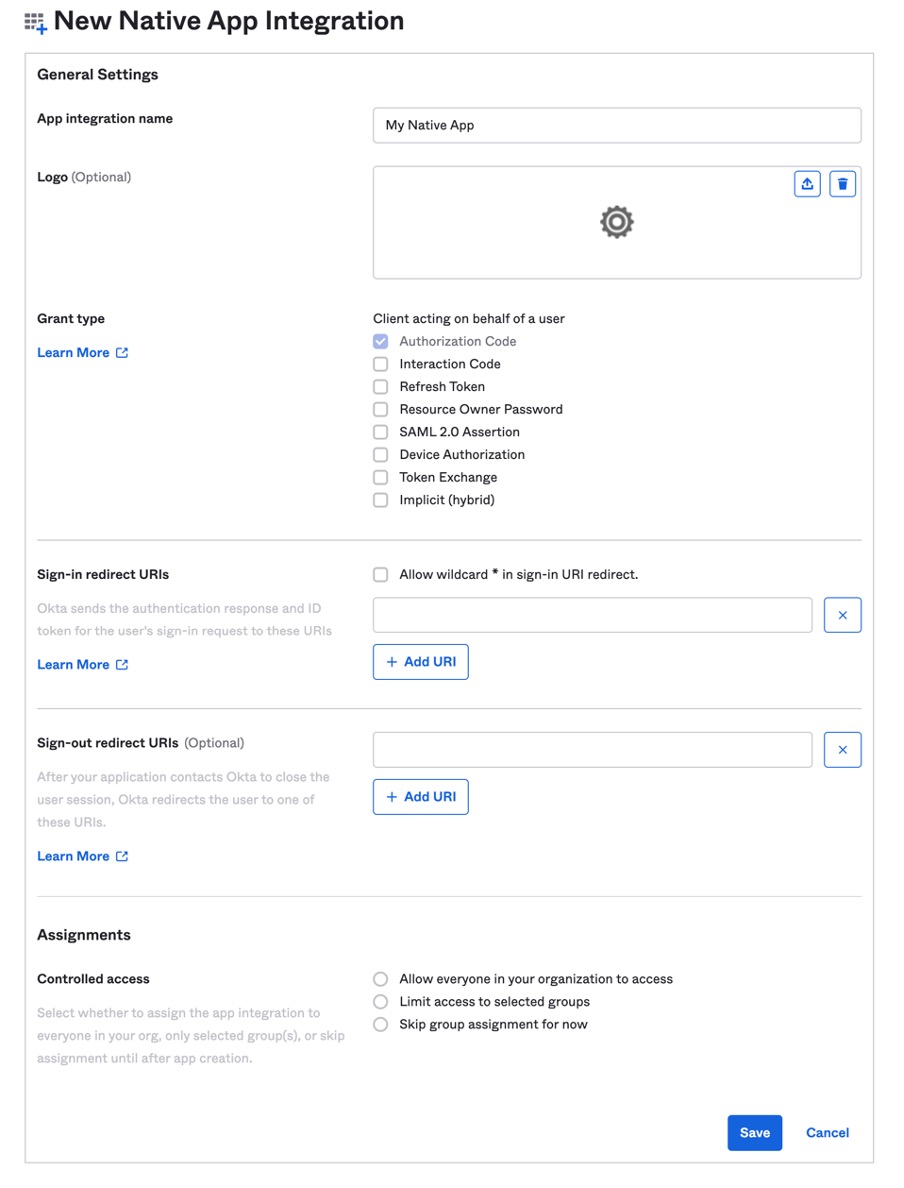
To start using OKTA, create an account on the registration page or log in if you already have an account. To create a new React Native app, you should go to Apps on the navigation side of the dashboard page and click on ‘Create App Integration’ and select ‘OIDC’ and select ‘Native App’

Click on the ‘Next’ button and it will be redirected to the new app integration page add ‘Sign-In’ and ‘Sign-Out’, redirect URLs, customize your configuration as per requirement and click on the save button to register the new React native app in the OKTA dashboard.
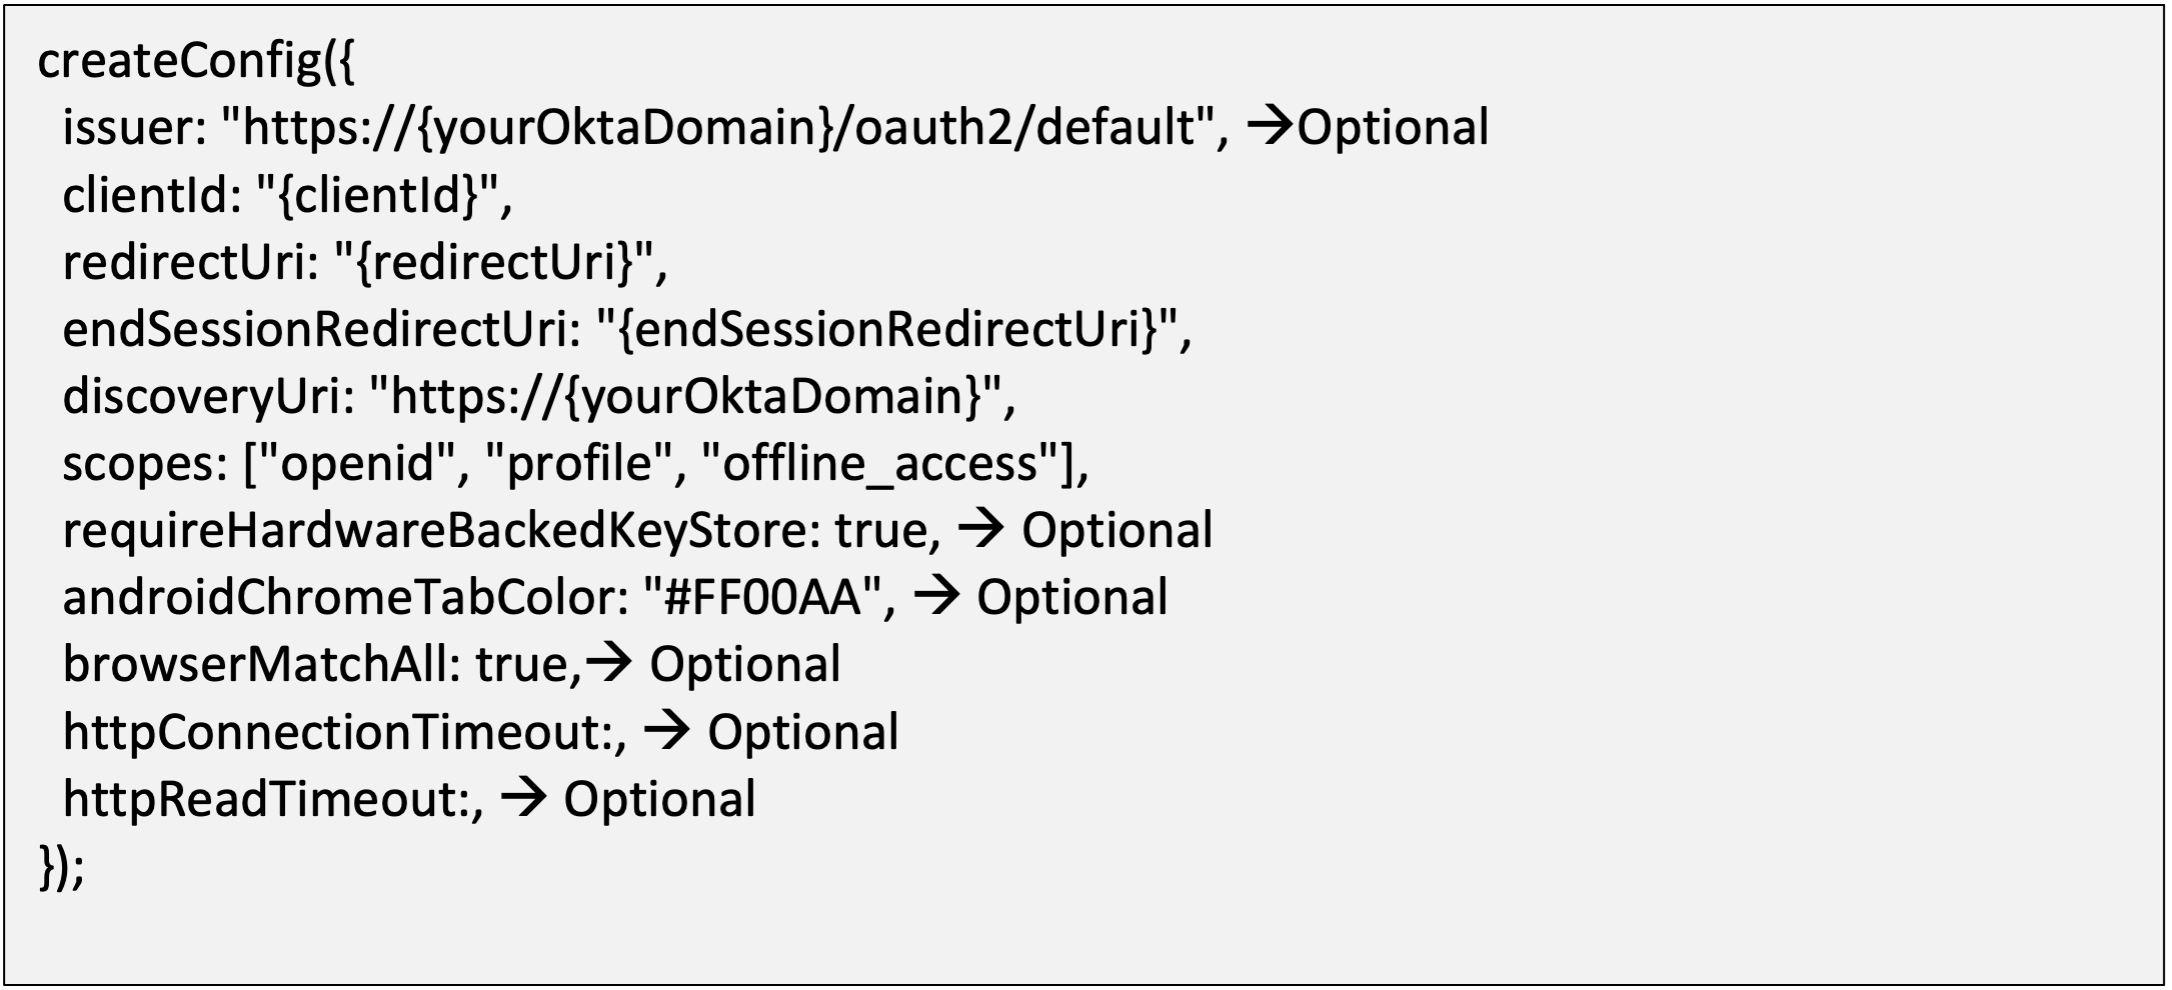
The most important part is where we define our config object to be used for OKTA authentication. You will need your issuer, ClientID, redirect URL, and so on, and they all can be retrieved from your OKTA application dashboard. Create a config.js file at the root of your project.
The Library supports two flows in your React Native application:
Browser Sign-In -This redirects the user to the OKTA browser login page of your organization which is for authentication. The user is redirected back to the React Native application after authenticating.
Custom Sign In – A React Native application that adopts native authorization to take control over authorization flow and/or provide custom UI.
Working with Browser Sign-In –
Installing dependencies

Setup for Android
To get started on Android devices from the project root directory, navigate to the Android directory and upgrade Gradle to the latest version.
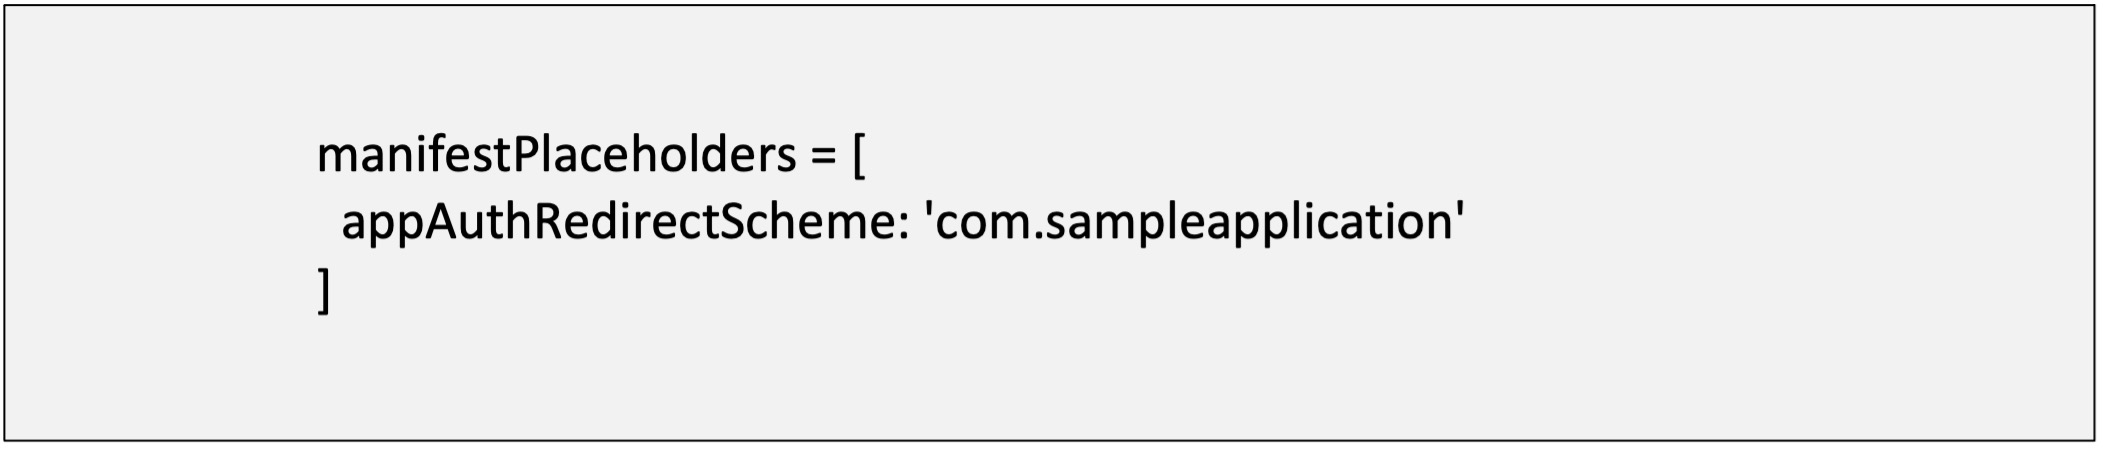
Add redirect scheme to authorization redirect. Add the below line of code in your android/app/build.gradle, in default config {}
Setup for iOS
Run the commands to install dependencies:
To Create a Browser Sign-In
Import sigInWithBrowser method from OKTA React Native and add the following code in click event like a button then the app is redirected to the browser and OKTA login page will be visible to the user.

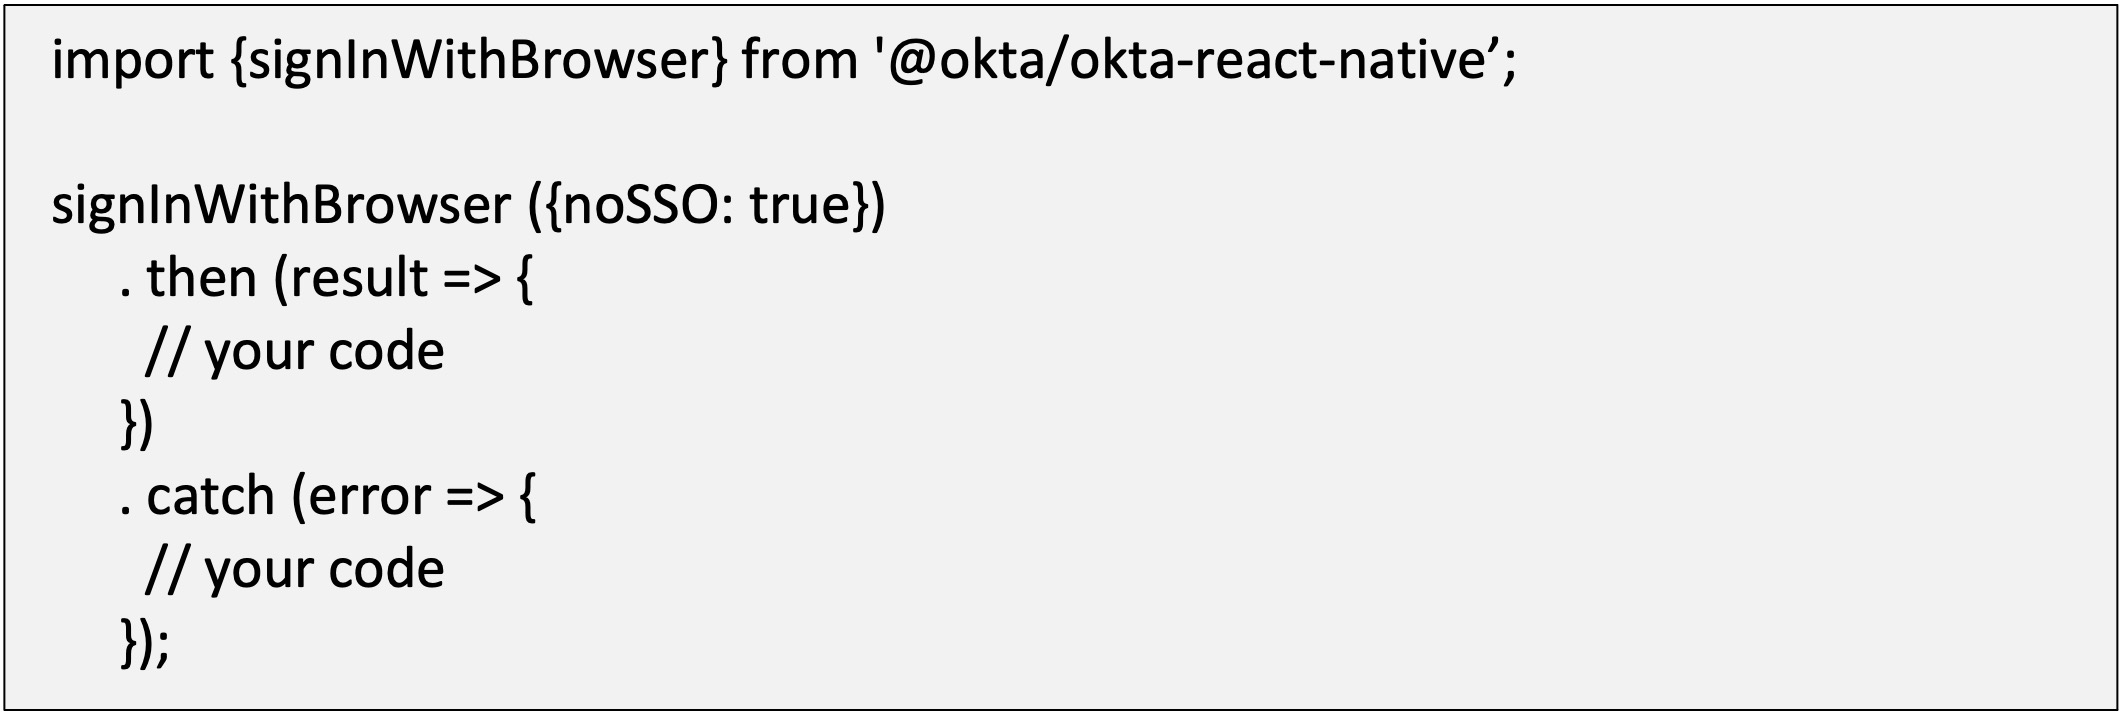
In the above code, if you want to get rid of the system sign-in and sign-out alert on iOS, pass the noSSO parameter when calling the signInWithBrowser method.
When sign-in is successful in response, we can receive two properties resolve type and access_token with resolve_type as authorized indicating user credentials are valid.
Refresh tokens using getAccessToken method:
This method returns a promise that will return the access token as a string. If no access token is available (either does not exist, or has expired), then the promise will be rejected.

Sample Response:
If the access token is available:

How to clear all tokens using sign-out method
Clears the browser session and the app session (stored tokens) in memory. Fires an event once a user successfully logs out.
browser-sign-in sample

Conclusion:
Implementing user authentication in a React Native app can be a complex and time-consuming task. However, with OKTA, you can simplify the process and ensure the security of your app. By following the steps outlined in this guide, you can quickly and easily integrate OKTA with your React Native app.
References: