
Purpose of the article: This article gives the details on how we can create a WhatsApp Business account and send business related information to it.
Intended Audience: Developers, Cloud Integration Developers and Dev-Ops
Tools and Technology: Java, Spring, AWS API Gateway, Lambda, SQS
Keywords: WhatsApp Business Solution
Prerequisites:
Business Mobile number and email ID
Required Developer Assets:
- Facebook Account
- Register as a Meta Developer
- Business Manager Account
- WhatsApp Business Account (WABA)
- Meta App
- Webhooks
- AWS App
- Graph API
Facebook Account
- Register with Facebook.
Register as a Meta Developer
Log in to your Facebook account and follow the link below to register as a Meta Developer using http://developers.facebook.com.
Register – App Development (facebook.com)
Purpose: Once registered, you can access the App Dashboard and all our products, SDKs, APIs, development tools, and developer documentation.
Business Manager Account
You can use Business Manager to control your Facebook assets and ensure the right people have access.
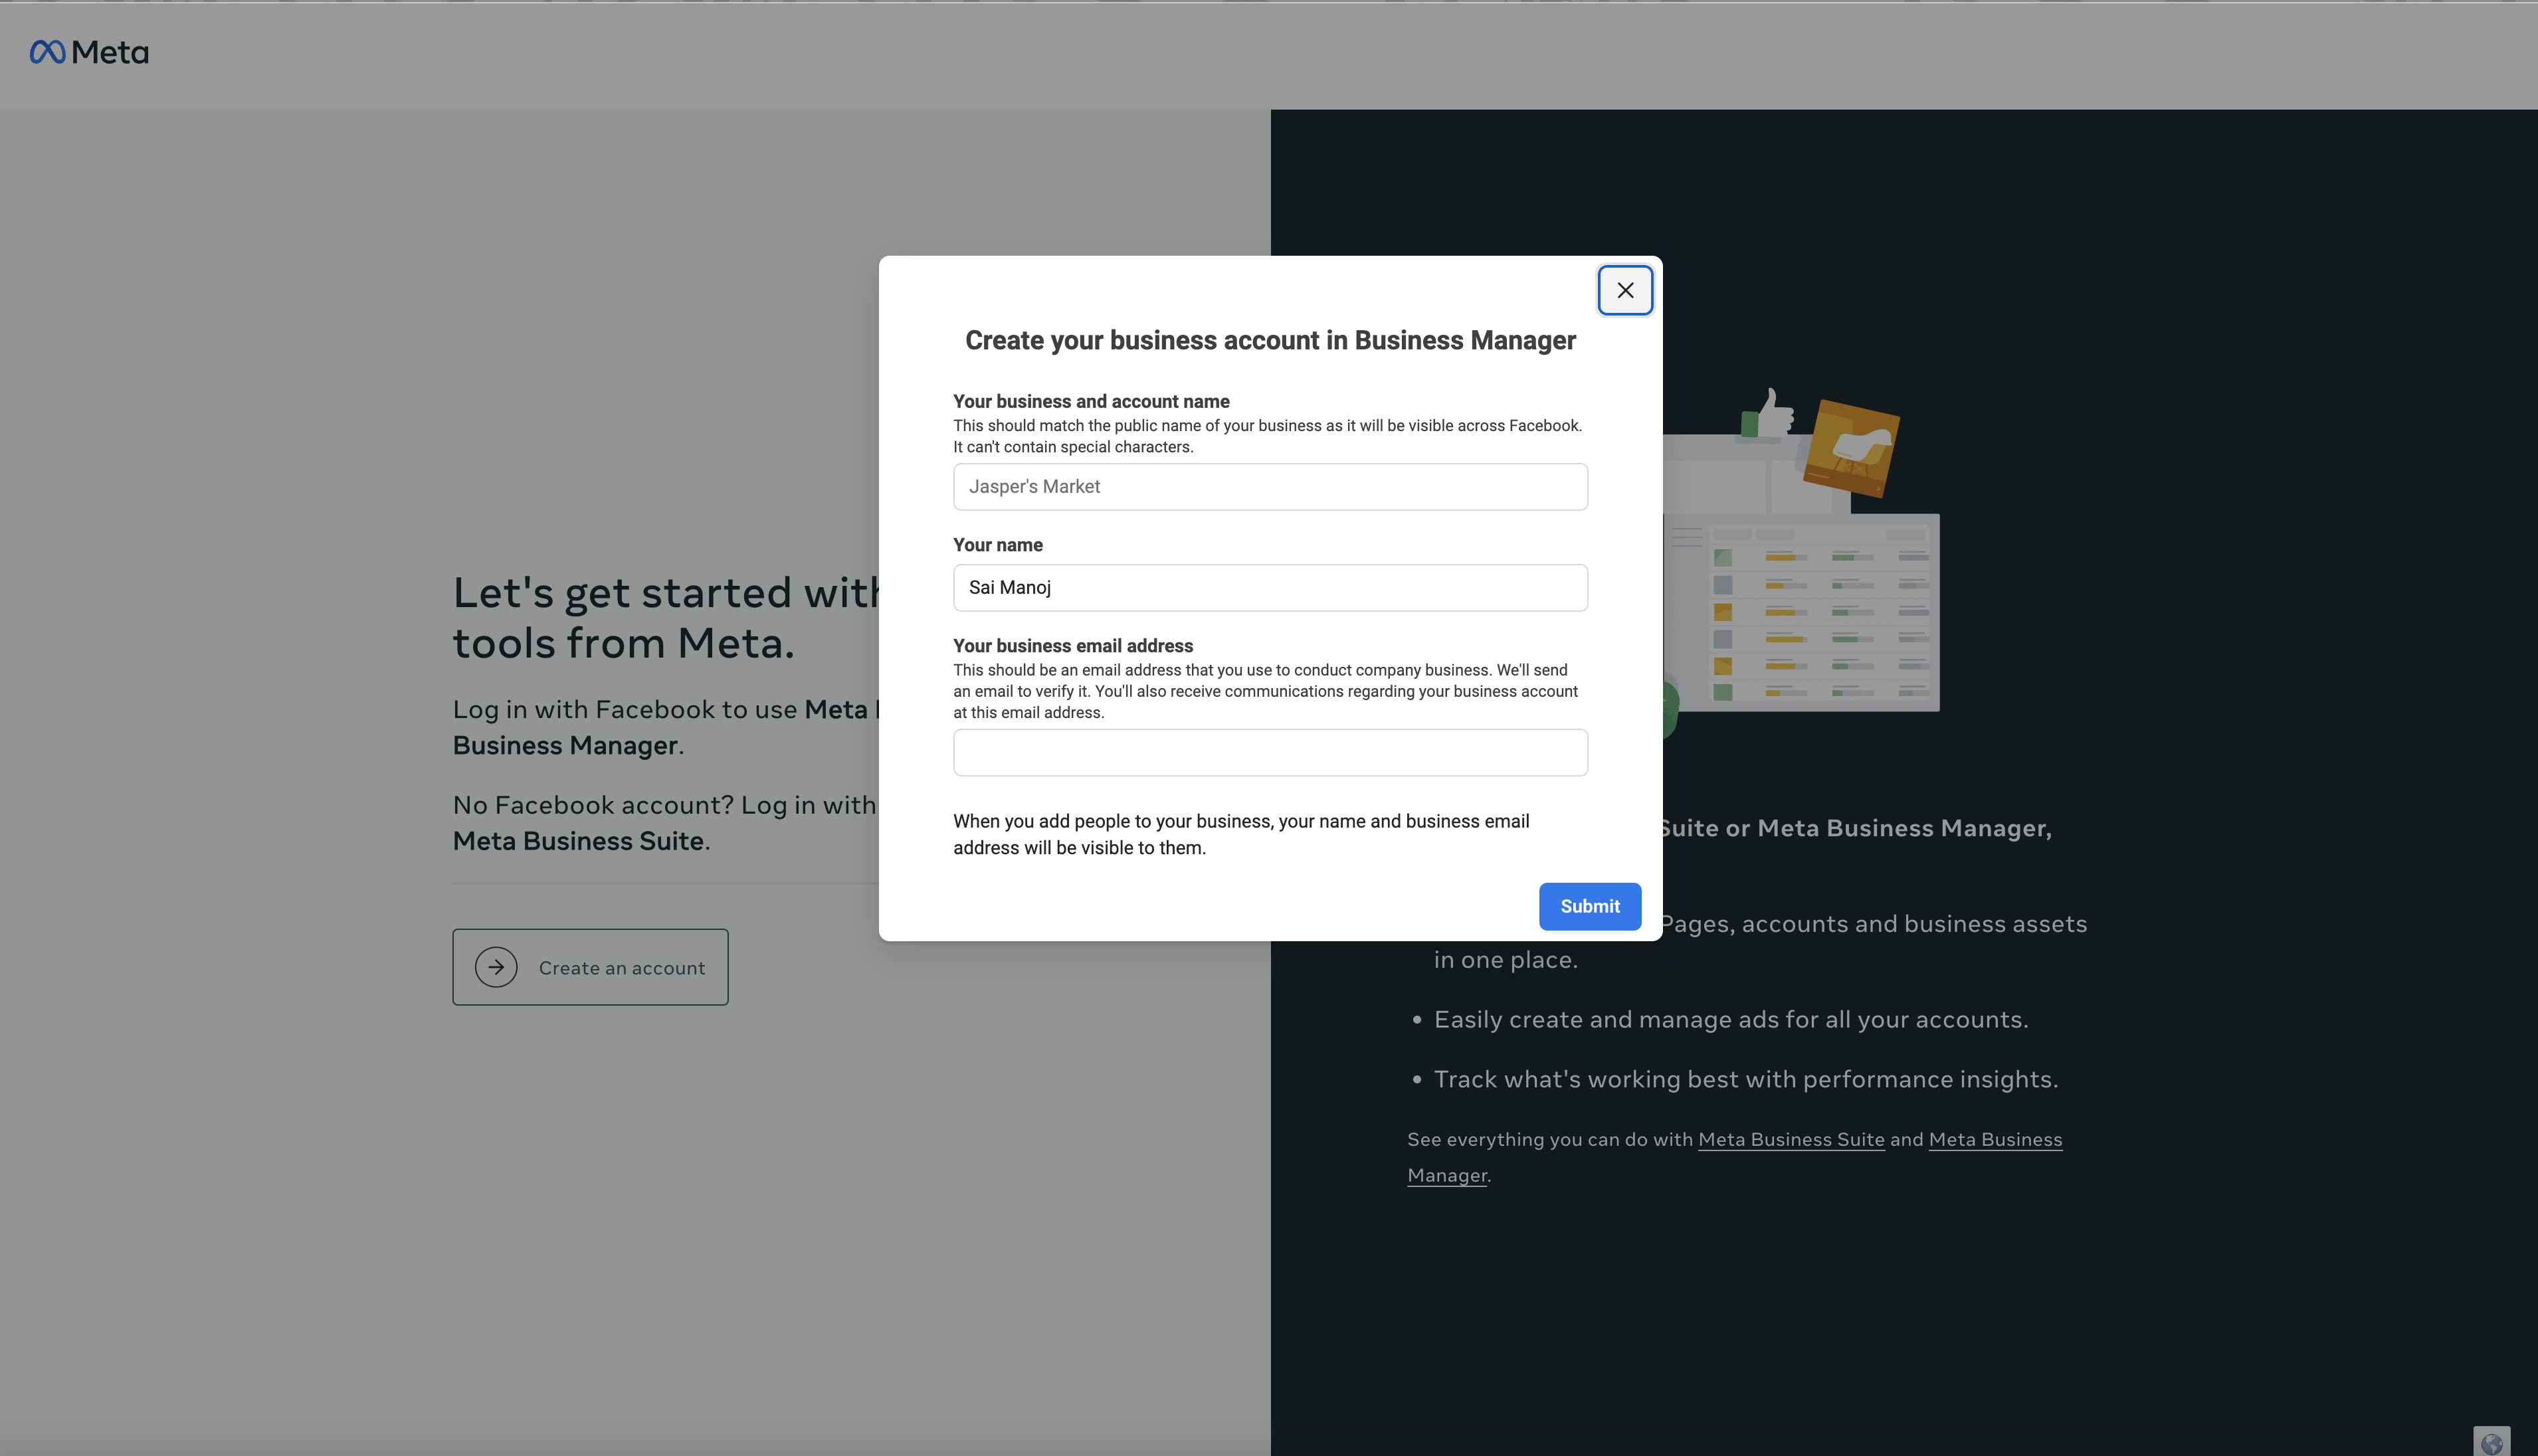
Signing up for Business Manager:
- Go to facebook.com/overview.
- Click on Creating an account.
- Enter all the basic information like the name of your business, your name and work email address, and click Next.
- Enter business and then click on the submit button.
Business verification will verify the below :
- Business as a legal entity: Your business should be appropriately registered with local authorities and have an official business phone number or postal address.
- Access to verify your business: You will receive a verification code sent to your business’s phone number or email address.
WhatsApp Business Account (WABA)
A WhatsApp Business account in Meta WhatsApp Manager lets your business use the WhatsApp Business platform features to communicate directly with your customers.
We’ll review your account once the above business verification has been completed. After it’s approved, you can create a WhatsApp Business account.
- In Business Manager, go to the WhatsApp accounts section of your business settings.
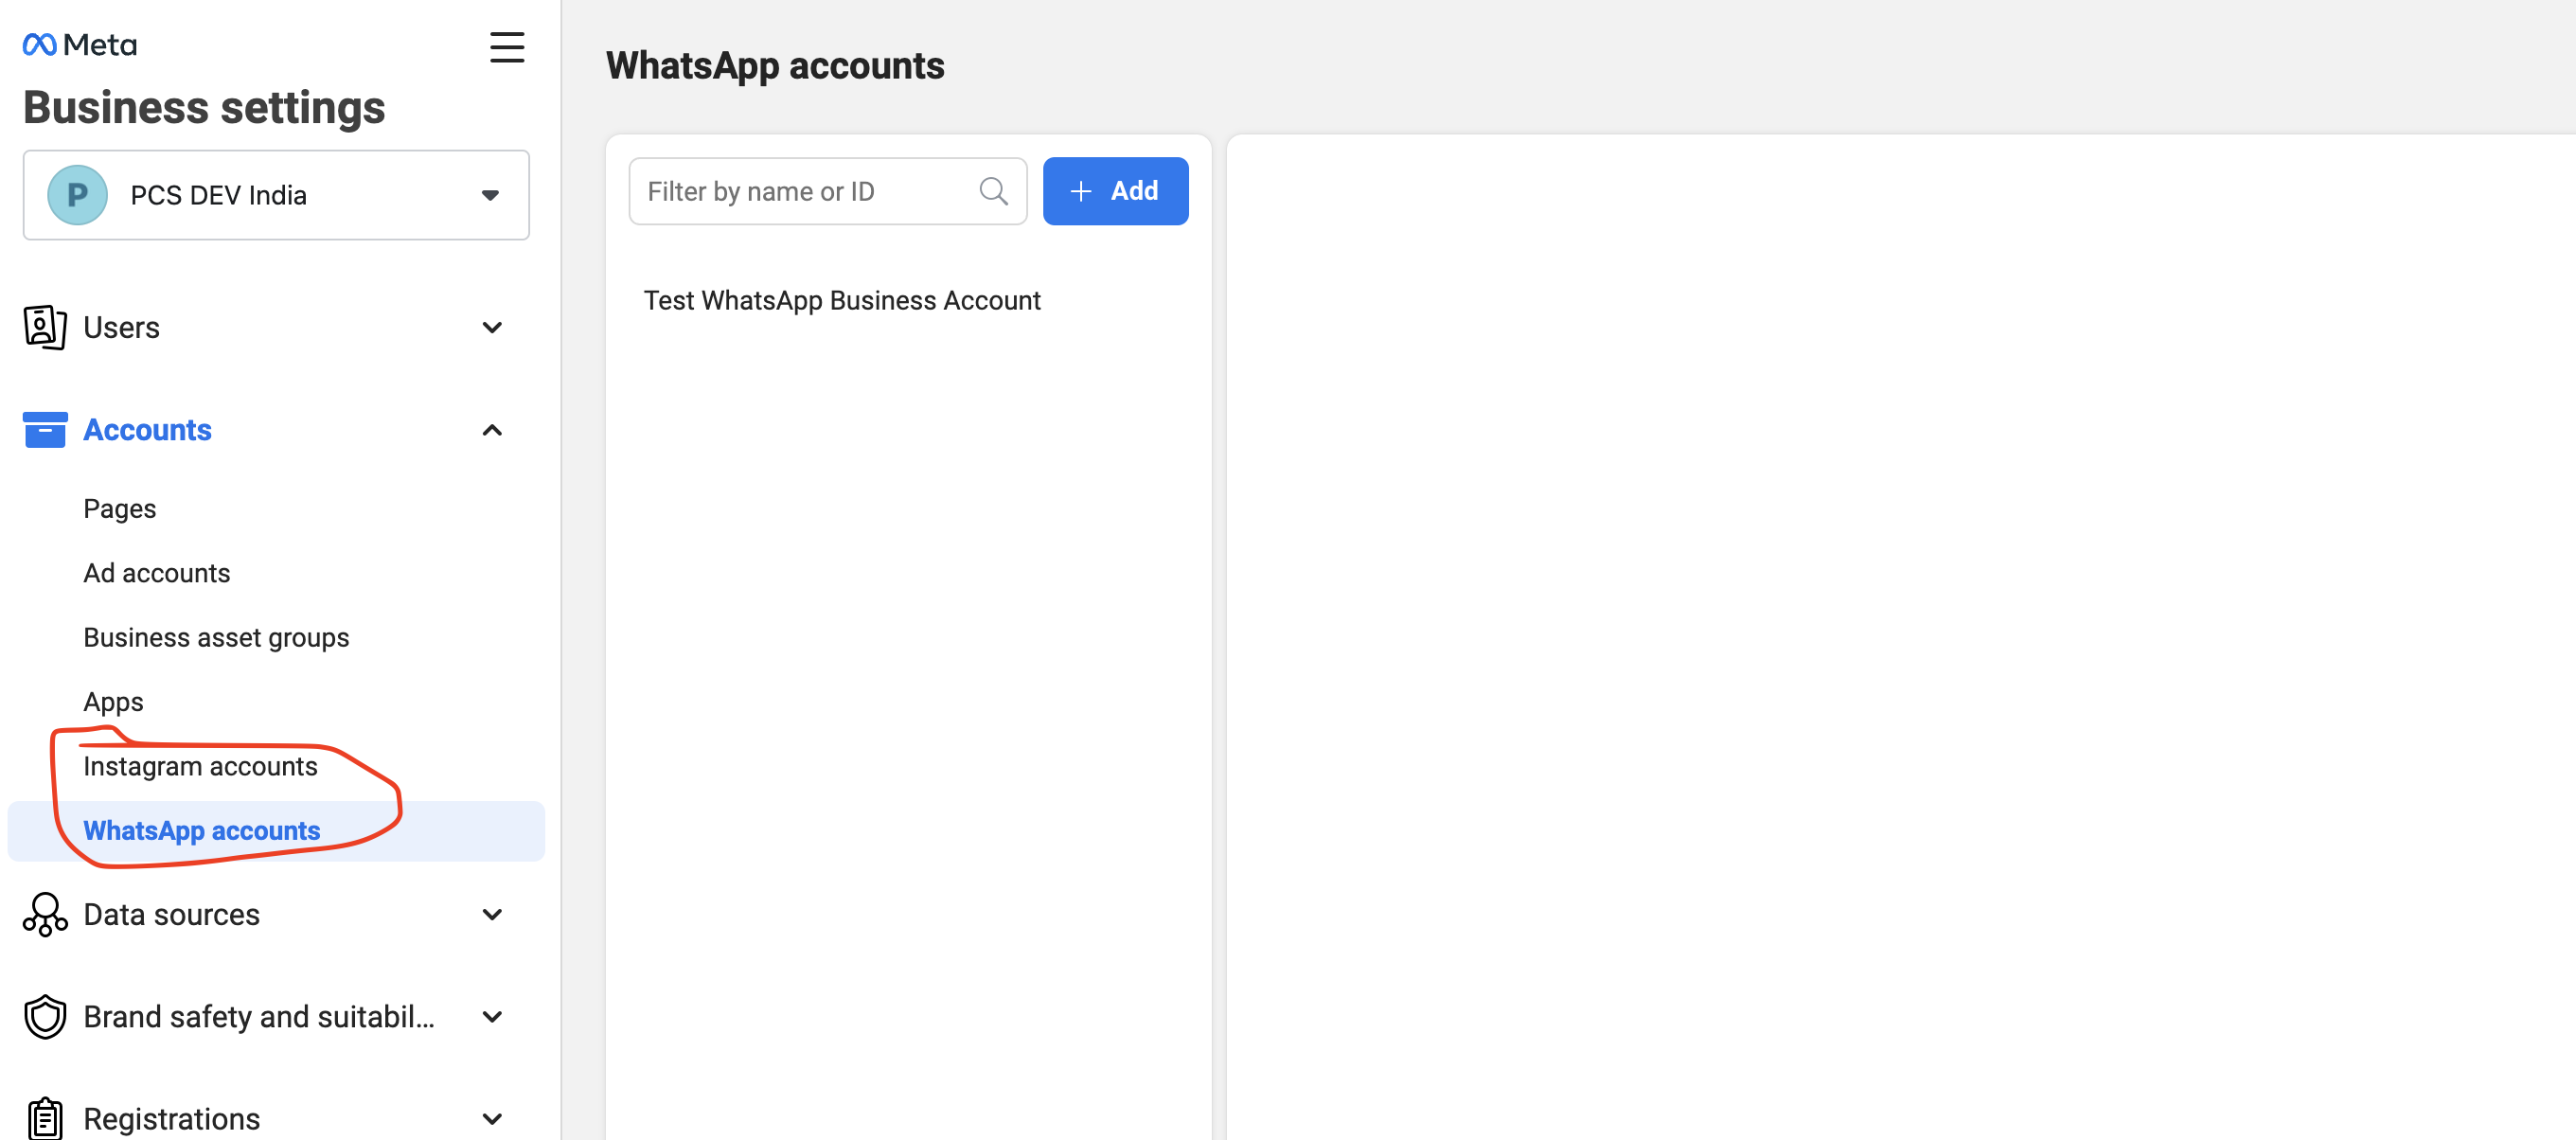
- Click Add and enter a valid phone number.
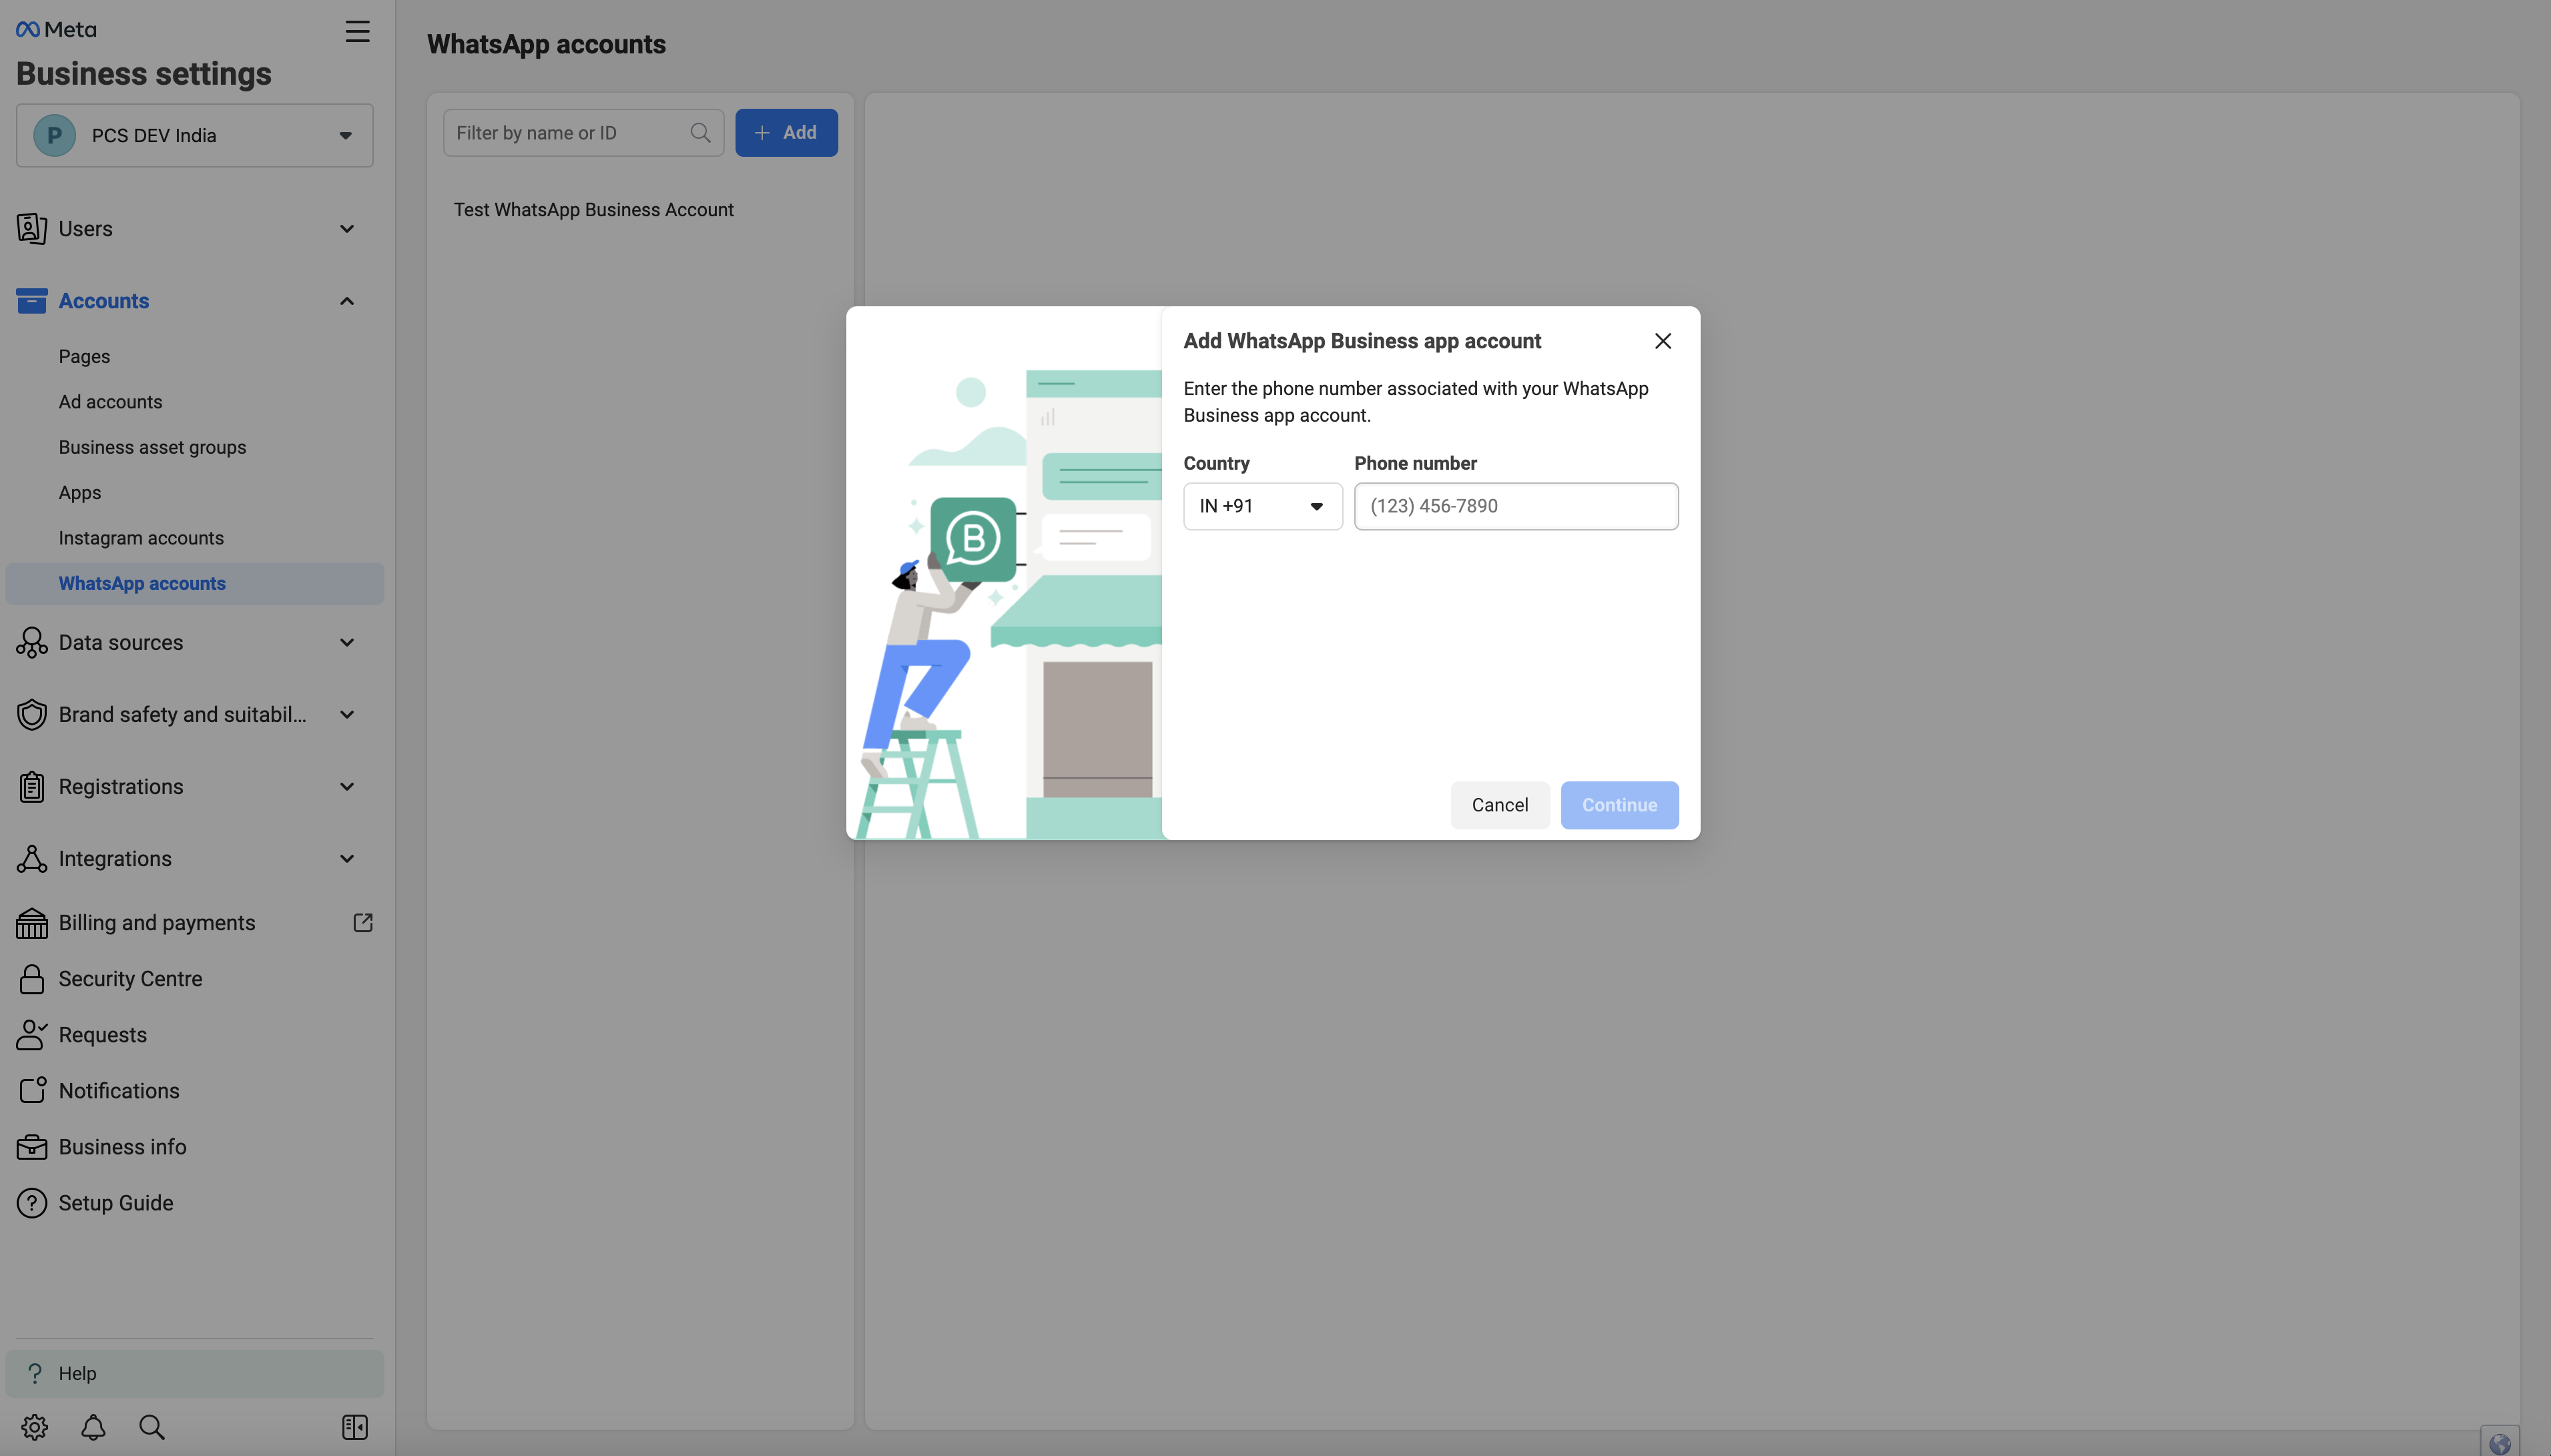
- Click Create a WhatsApp account.
- On the Create WhatsApp account screen:
1. Account name: Enter a name for your business.
2. Messaging: Select whether you’re creating the account for yourself or a client. You can select:
WA Biz API internal accounts to create an account for yourself.
Client’s history to create an account on behalf of a business. Enter the Business Manager ID, which is present under the Business Manager settings.
> Time zone: Business Located Time Zone.
> Currency: Select the local currency.
> Payment method: Select the type of payment like Credit Card or Debit Card.
> PO number: PO is the purchase order which is present in the invoices
>Click Done.
- Click On the Add people and set permissions screen:.
Select the type of permission level to assign to each person. You can select:
- Partial access
- Full control
Meta App
Create a Meta App:
Below is the link to create a Meta App
Create an App – App Development (facebook.com)
App Types
When you first create an app, you must choose an app type. After Selection of basic options, it should be sent for reviewal.
For Permissions Reference, please refer to the below link:
Request Advanced Access to the following permissions for WABA:
- whatsapp_business_management — For managing the phone numbers, message templates, registration, and business profiles under a WABA. For getting this permission, you must get your app reviewal.
- whatsapp_business_messaging — Used to send/receive messages from WhatsApp users and upload/download media under a WhatsApp Business Account. For getting this permission, you must get your app reviewal.
- business_management — The business_management permission grants your application the ability to access and manipulate data through the Business Manager API. This permission is intended for the management of business assets, including ad accounts and the claiming of ad accounts. Additionally, you can utilize this permission to seek analytical insights to enhance your application, as well as for marketing or advertising purposes using aggregated, de-identified, or anonymized information, ensuring that such data cannot be re-identified.
Set up Webhooks
Why Webhooks:
Webhook will provide real-time messages from customers.
To set up your Webhook, you must create a URL that should meets Meta’s and WhatsApp’s requirements.
Create an Endpoint
Your AWS API Gateway endpoint will be able to process two types of requests: Verification Requests and Event Notifications. Since both requests use HTTP, your server must have a valid TLS or SSL certificate configured and installed. Self-signed certificates are not supported.
Event Notifications
We must configure the AWS Lambda, API Gateway, and SQS to get event notifications.
- AWS Lambda is used for the responding hub. Challenge value to Facebook webhook product when subscribing to it.
- AWS API Gateway is used for validating the query string parameters, which is being sent by Facebook webhook while subscribing
- SQS captures the messages floating to the Business WhatsApp Account number.
Refer to the below links for configuration details:
Lambda :
https://ap-south-1.console.aws.amazon.com
SQS Role :
https://us-east-1.console.aws.amazon.com
API Gateway :
Verification Requests
WhatsApp Webhook will send a GET request that includes query String parameters
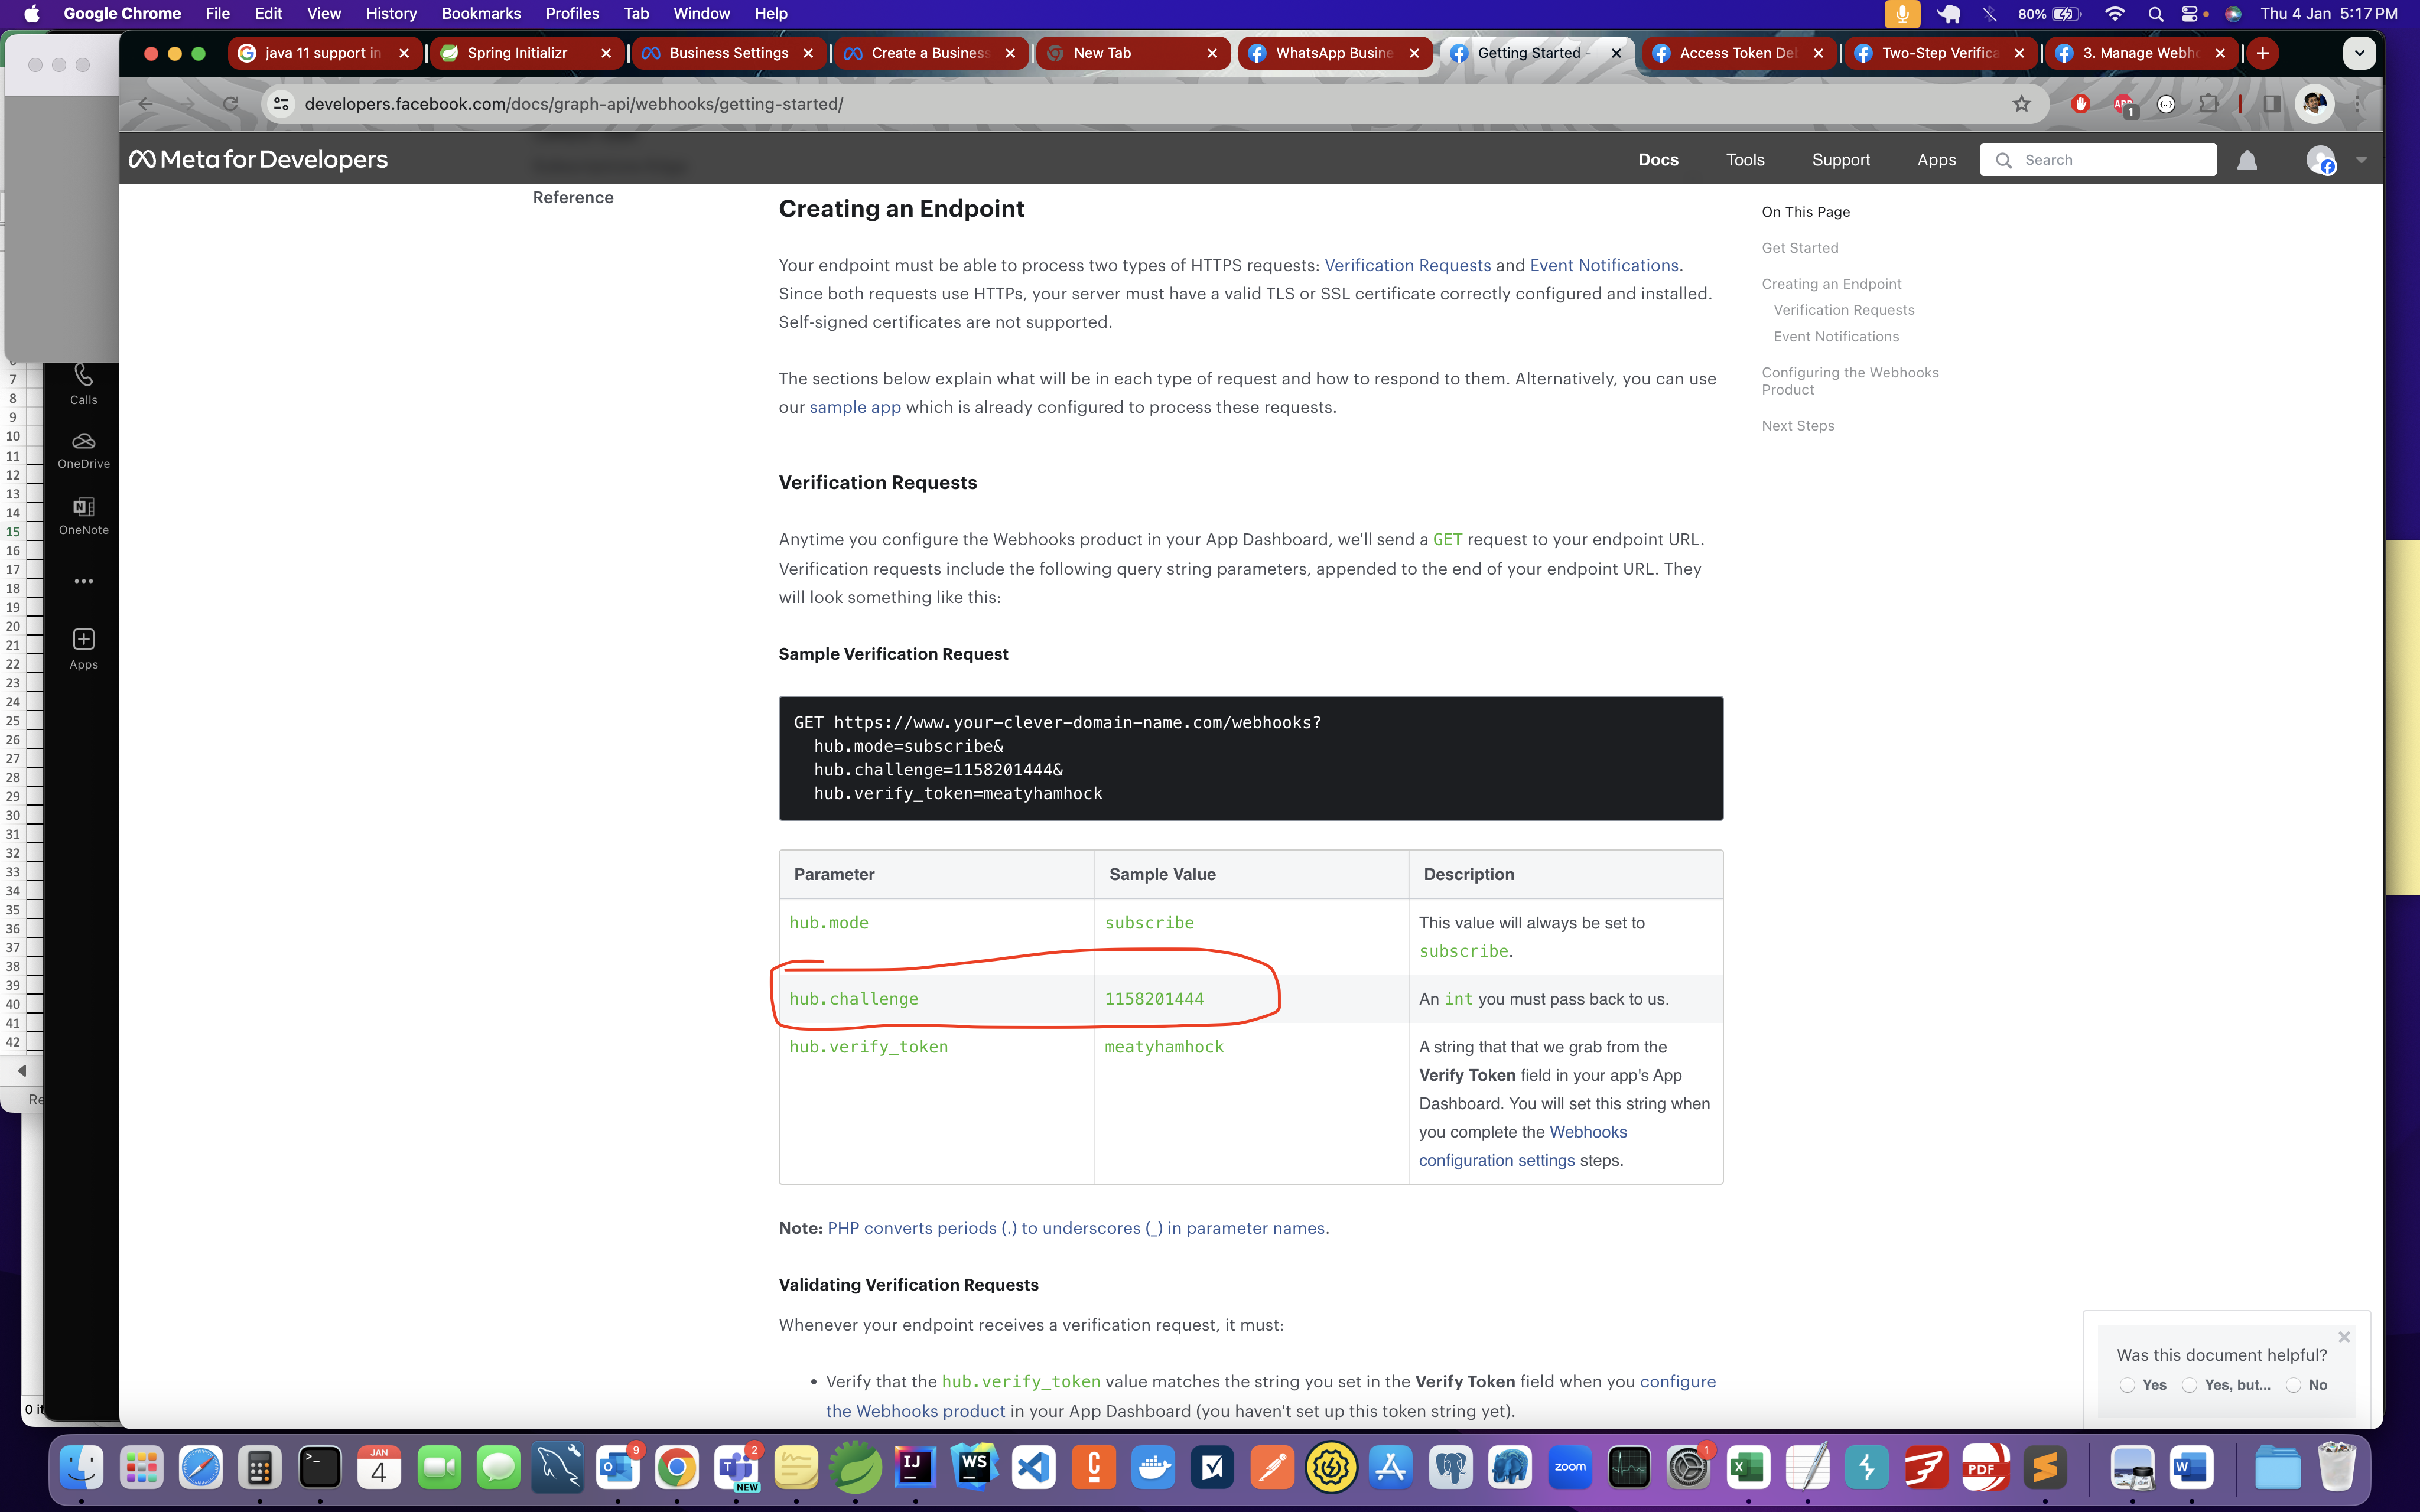
Validating Verification Requests
Verification should be done on hub.verify_token and this should be matched to token that we set in the WhatsApp Webhook Configuration. It should respond back with hub.challenge.
Configuring the Webhooks Product & AWS Gateway Subscription
A Webhook will be subscribed to any of the events happening
- Within the App Dashboard, Route to Products> Webhooks, please select User from the drop-down menu, then click on Subscribe to this object.
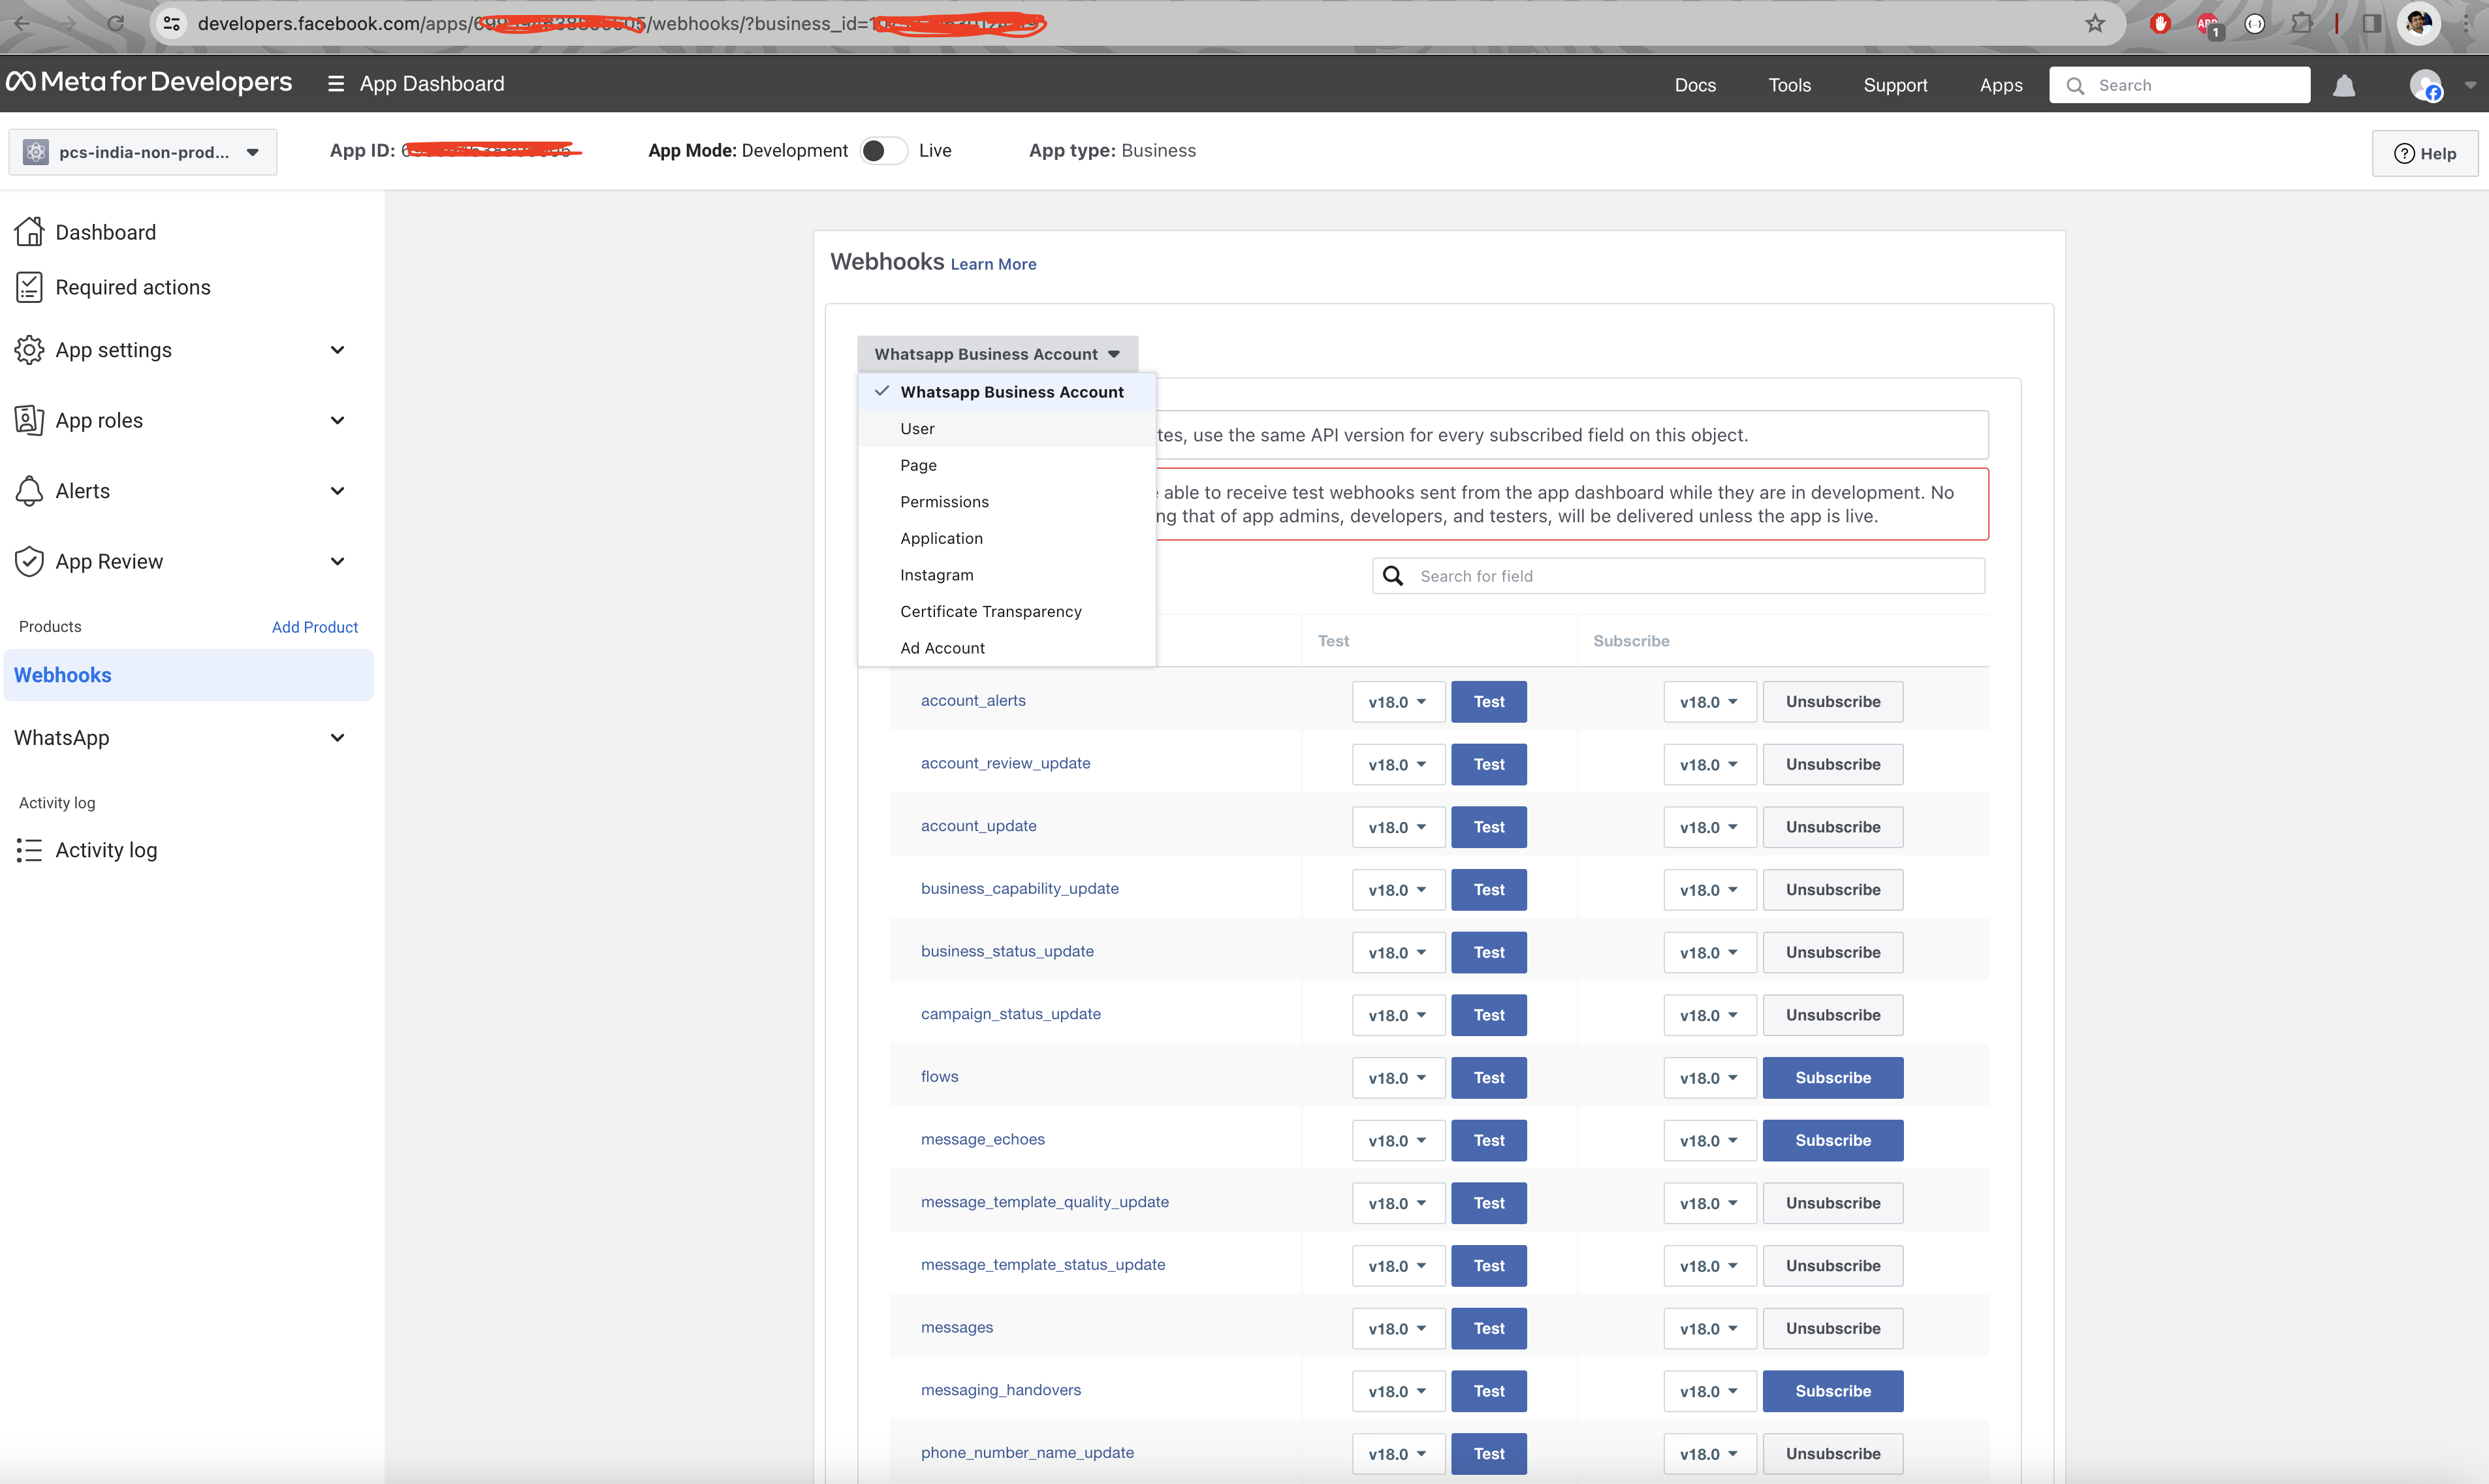
- Enter the AWS endpoint’s URL in the Callback URL field and enter a string (ex: myTokenOfVerification) in the Verify Token field Include Values Toggle is used to listen to the changes that are done in the fields.
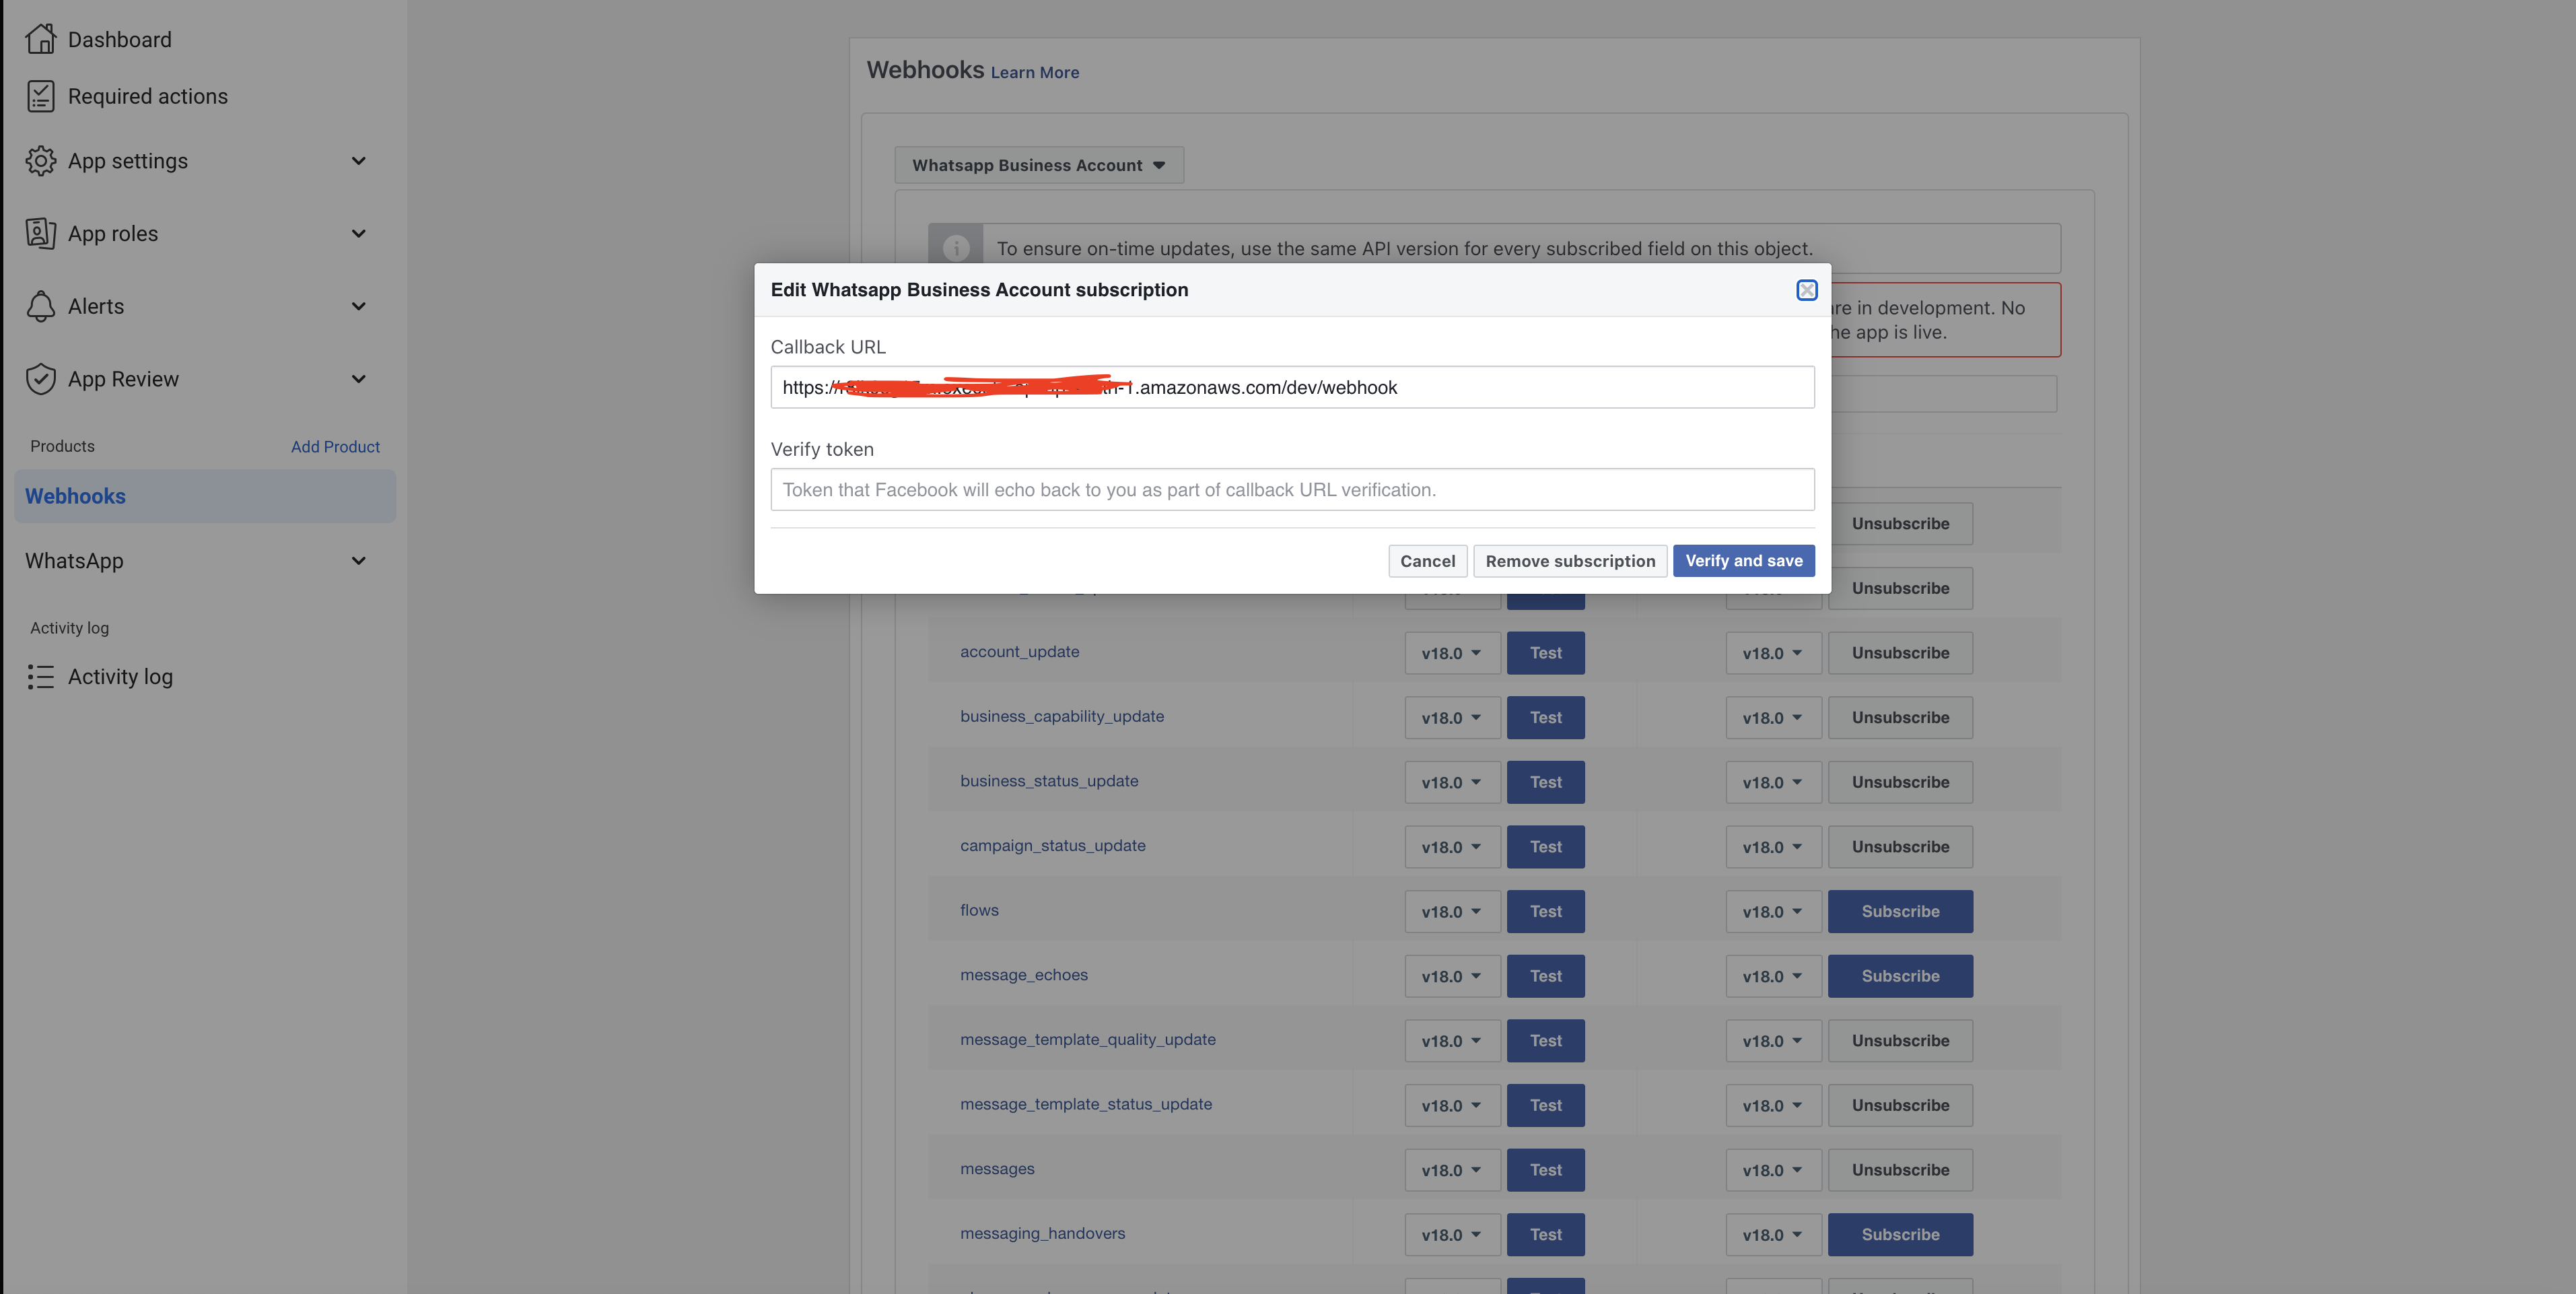
- Enter the AWS endpoint’s URL in the
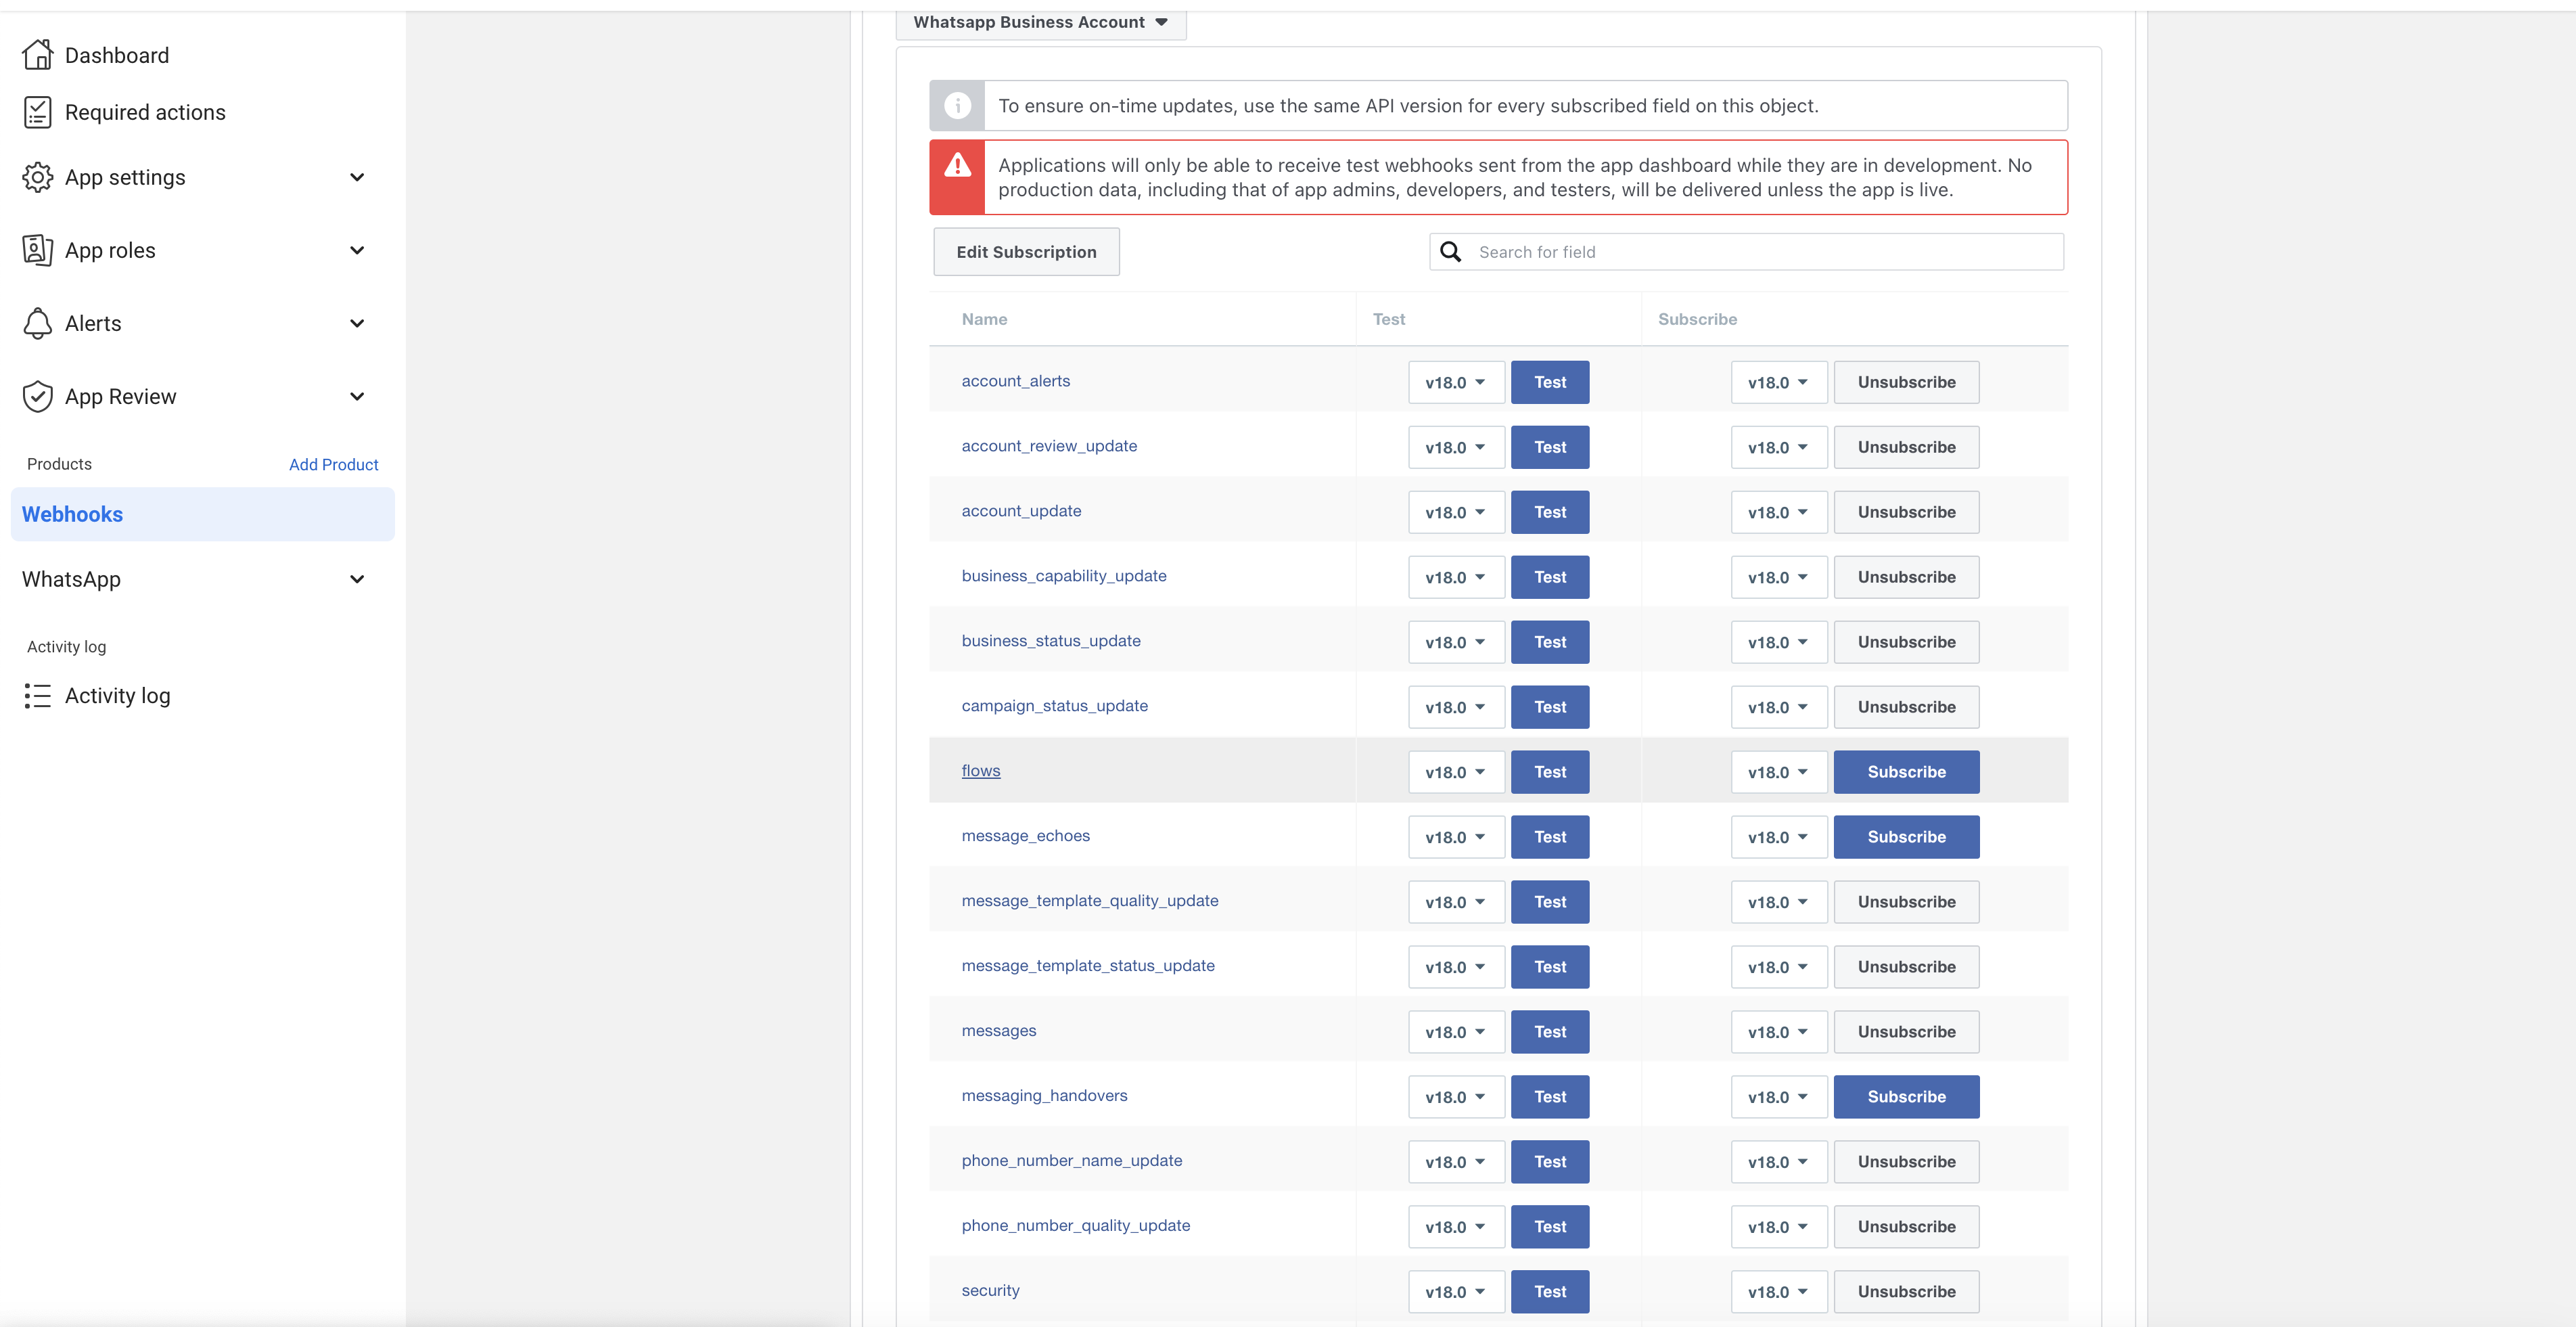
- The last step is to subscribe to individual fields. Subscribe to any of the fields and send a test Event Notification.
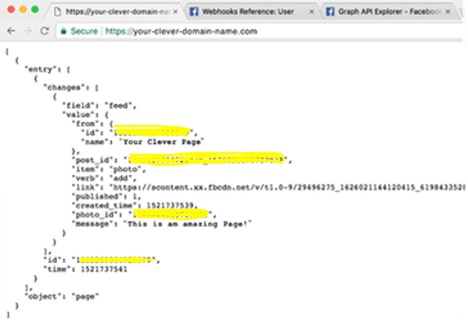
If the endpoint was set up correctly, then it should validate the payload and execute the code you have set it up to do upon successful validation. If you use our sample app, load the URL in your web browser. It should display the payload’s contents:
Graph API
Subscribe to the App (WABA) that we had created
curl -X POST \ ‘https://graph.facebook.com/‘ \ -H ‘Authorization: Bearer SYSTEM_USER_ACCESS_TOKEN’
The below response would be expected if the webhook event for the phone number is successfully done.
{ “success”: “true” }
To Get Phone Number ID
Firstly, we need to register the Phone Number to which you need to send messages
Before registering, you need to find that phone number’s ID. Get phone number’s ID, make the below following API call:
curl -X GET \ ‘https://graph.facebook.com/‘ \ -H ‘Authorization: Bearer SYSTEM_USER_ACCESS_TOKEN’
A Successful Response includes all phone numbers that were connected to your WABA:
{
“data”: [
{
“verified_name”: “Jasper’s Market”,
“display_phone_number”: “+1 631-5X5-XXXX”,
“id”: “19063X52XXX43451”,
“quality_rating”: “GREEN”
},
{
“verified_name”: “Jasper’s Ice Cream”,
“display_phone_number”: “+1 081-XXX-996”,
“id”: “191X623XXXX32103”,
“quality_rating”: “NA”
}
]
}
Register Phone Number
With the phone number we can register. The registration API call, has two actions simultaneously: Register the phone.
Set a 6-digit registration code — this code must be set from your end. Save the code.
Sample request:
curl -X POST \
‘https://graph.facebook.com/‘ \ -H ‘Authorization: Bearer SYSTEM_USER_ACCESS_TOKEN’ \
-d ‘{
“messaging_product”: “whatsapp”,
“pin”: “6_DIGIT_PIN”
}’
Sample response:
{ “success”: “true” }
If the above Graph API calls succeed, you can send/receive messages from the WhatsApp Business Account number using Graph API.
Author Bio:

Sai Manoj Karnatakapu
Manager - Digital- Cloud Transformation
Experienced Professional in working on Full Stack Cloud Development, Specialist in architecting robust, scalable applications that thrive in cloud environments .My Tech stack includes Java, Spring , Camunda, Angular, AWS and I’m always exploring new ways to innovate in the cloud space.