Purpose of the article- Regarding one way of triggering DMS tasks without a user interface and AWS configurations.
Intended Audience- For people working on AWS.
Did the blog/ Article get published elsewhere? As so many articles have been already published on the same topic – NO
DMS is a data migration AWS service that provides data migration from source engine to selected target engine such as Aurora, s3, SQL Server, PostgreSQL, Oracle, MySQL, s3, Redshift, and other databases. Perform data migration using DMS; either source or target should be an AWS service.
AWS DMS does not have a scheduling option. Therefore, the Automation of DMS task can do using AWS CLI commands. Adding user-defined policies to the IAM user will allow the user to start DMS tasks from the EC2 environment using AWS CLI, Windows PowerShell, Windows PowerShell ISE, and Task Scheduler without Access Secret key configurations.
Note: Create an IAM user(mouriuser@www.mouritech.com)
DMS User Policy:
- In the Root AWS account, for allowing AWS user access DMS task, go to servicesà IAMà Policies àCrete new Policy.
- Select JSON Instead of Visual editor.
- Remove the default JSON code and replace it with the below JSON code:
{
"Version": "2012-10-17",
"Statement": [
{
"Effect": "Allow",
"Action": "dms:*",
"Resource": "*"
},
{
"Effect": "Allow",
"Action": [
"iam:GetRole",
"iam:PassRole",
"iam:CreateRole",
"iam:AttachRolePolicy"
],
"Resource": "*"
},
{
"Effect": "Allow",
"Action": [
"ec2:DescribeVpcs",
"ec2:DescribeInternetGateways",
"ec2:DescribeAvailabilityZones",
"ec2:DescribeSubnets",
"ec2:DescribeSecurityGroups",
"ec2:ModifyNetworkInterfaceAttribute",
"ec2:CreateNetworkInterface",
"ec2:DeleteNetworkInterface"
],
"Resource": "*"
},
{
"Effect": "Allow",
"Action": [
"cloudwatch:Get",
"cloudwatch:List"
],
"Resource": "*"
 },
{
"Effect": "Allow",
"Action": [
"logs:DescribeLogGroups",
"logs:DescribeLogStreams",
"logs:FilterLogEvents",
"logs:GetLogEvents"
],
"Resource": "*"
}
]
}
- Add user policy name dms_user_access and create policy.
EC2 User Policy:
- For accessing DMS tasks from the EC2 instance, go to services à IAM à Policies à Crete new Policy.
- Select JSON Instead of Visual editor.
- Remove the default JSON code and replace it with the below JSON code, granting users permission to use the Amazon EC2 console to launch an instance with any role.
{
    "Version": "2012-10-17",
    "Statement": [
        {
            "Effect": "Allow",
            "Action": [
                "iam:PassRole",
                "iam:ListInstanceProfiles",
                "ec2:*"
            ],
            "Resource": "*"
        }
    ]
}
- Give policy name and save it as ec2_user_access.
Add new policies to the user:
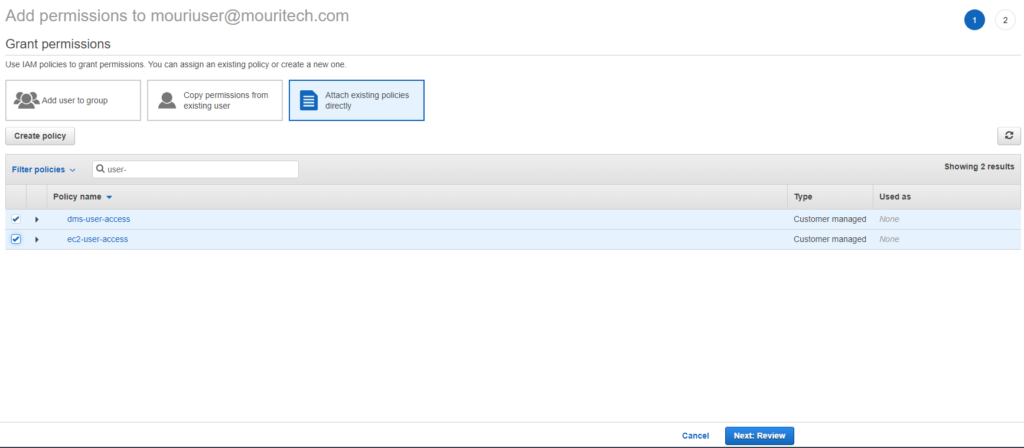
Attach policies to services -> IAM -> Users -> click on the username -> Add permissions.

- Select ‘Attach the existing policies’ directly and search dms_user_access and ec2_user_access and click on ‘Next: Review.’

- The policies will get attached to the user.
Allow EC2 to Access DMS Task without Access Key, Secret Access keys:
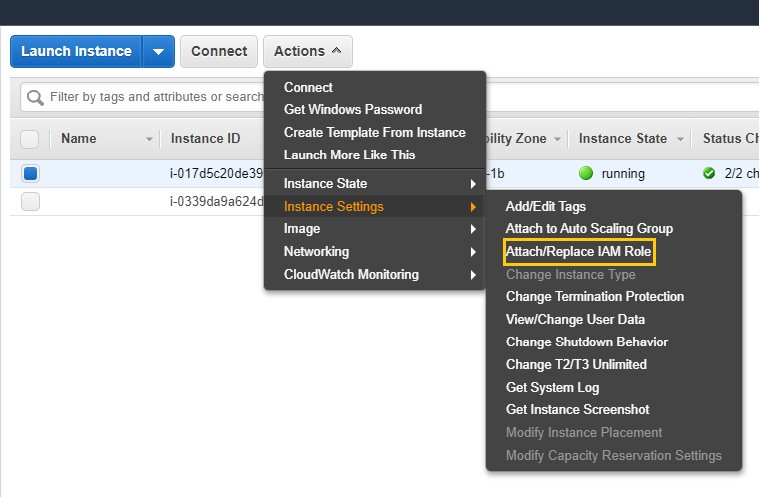
For EC2 to access DMS task without configuration from AWS CLI, create an EC2 IAM role (AWS-ec2-DMS-access), add DMS-user-access Policy to it, and attach the role to the EC2 instance. Select the Ec2 Instance -> Actions -> Instance Settings -> Attach/Replace IAM Role.

Prerequisite:
Download AWS CLI .msi file in EC2 instance.
- For triggering the DMS task through EC2, AWS CLI installation requires.
- In the EC2 environment, to check if AWS CLI installed or not, do as follows:
- Open the command prompt and type ‘AWS –version’ if it returns a version number, then it is installed; else, install the AWS CLI.
- Install the AWS CLI version from:
https://awscli.amazonaws.com/AWSCLIV2.msi
- In the command prompt, If AWS –version command returns the below statement, then the installation is successful.

Schedule DMS Task Using Task Scheduler:
Create a PowerShell ISE program code:
- Open the Windows PowerShell ISE program
- In the editor section, paste the following command.
aws dms start-replication-task --replication-task-arn <task-arn> --start-replication-task-type reload-target
replication-task-ARN: ARN of the migration task, which is triggered.
start-replication-task-type:
• Start-replication: If starting the task for the first time
• Resume-processing, start a stopped task
• Reload-target: If starting an already executed task.
- Save the file with file format as .ps1.
Schedule program code using Task Scheduler:
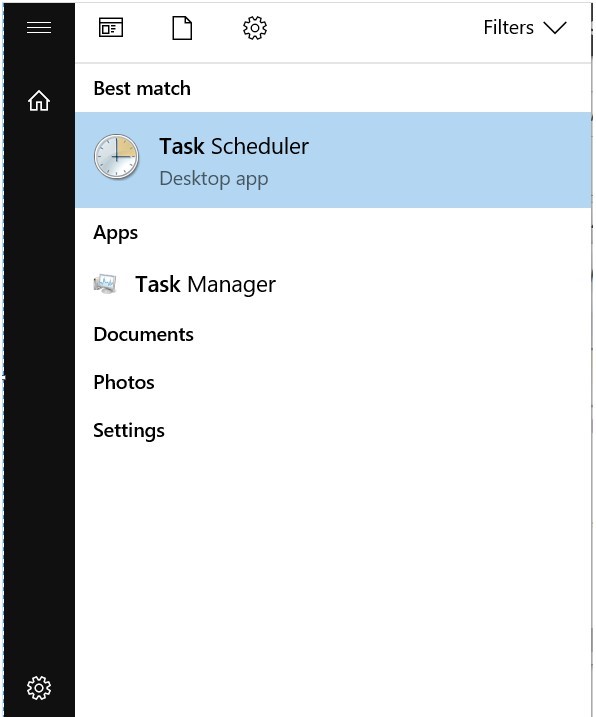
- From the Start menu, open Task Scheduler.

-
- Create Basic Task.
- Schedule the trigger as required.
- Select the action: A program code (.ps1 file) is executed; select ‘start a program.
- For Program/Script, give the windows path of powershell.exe.
- In Add arguments, add the file path in which the command to start the replication task is written as follows:
‘-ExecutionPolicy Bypass file path.ps1’
- Once the task develops, select the created task, right-click and select the properties.
- In General Tab, select ‘Run whether the user logs on or root,’ which allows running the task even if the user isn’t logged in the EC2 environment.
- Enable ‘Tasks History’ to view the status of the trigger.
- According to the specified start time, the task scheduler triggers the .ps1 file, which starts the replication (DMS) task.
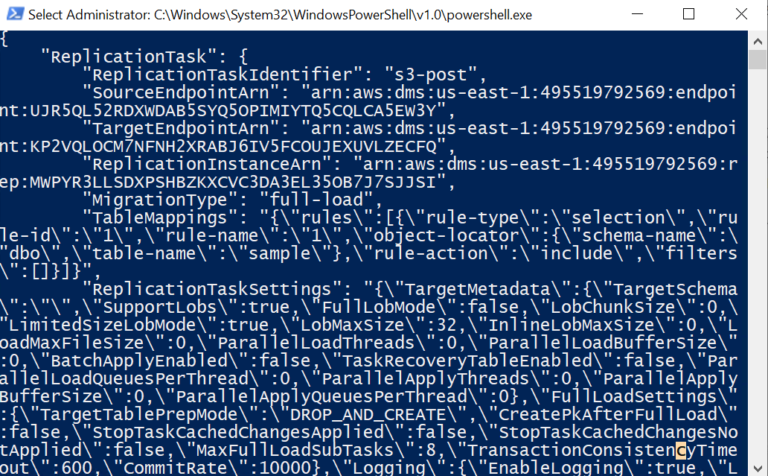
- When the task executes at the scheduled time, the below PowerShell prompt will be displayed on the screen specifying the start of the DMS task.

- Open AWS DMS console to check whether the DMS task is triggered.

References / Sources of the information referred to –
- · https://docs.aws.amazon.com/dms/latest/userguide/CHAP_Security.html#security_iam_id-based-policy-examples,
- · https://docs.aws.amazon.com/IAM/latest/UserGuide/id_roles_use_switch-role-ec2.html,
- · https://aws.amazon.com/blogs/database/automating-aws-dms-migration-tasks/
- Is your article related to any of our MOURITech services, if so: attach supporting link – https://www.mouritech.com/services/business-data-engineering-analytics-sciences
Sundara Vinya Dantuluri
Associate Software, Data Analytics.
MOURI Tech


