
- Intro
This article intends to explain the standalone components, directives, services, lazy loading, and routing with the help of a real-time application. So, please follow the steps and screenshots added below in each section, highlighted in red for the new changes I made in that individual file. You can Practice with me parallelly to get maximum output. Thank you in advance for following my instructions while going through my article.
- What Exactly Is a Standalone Component?
A Standalone component is not part of any Angular module. Before Angular 14 or 15, when you create a feature, you pass it in a series of module declarations. Angular will complain about it and only compile it if you do.
Apart from Standalone components, in Angular 14 or 15, we can create Standalone directives and Standalone pipes.
A Standalone component can be used with other Standalone parts and Module-based components. A Standalone component can be used to load the routes directly and can also lazily load the ways.
- Starting Setup & why we want Standalone Components
Before starting on Standalone Components, first, let’s create a basic angular application (V15) with ng-modules included. Then we will migrate it using Standalone components, directives, and services and use Lazy Routing and Lazy loading.
Follow the below steps:
- Create an Angular v15 Application
- command: ng new Angular Project
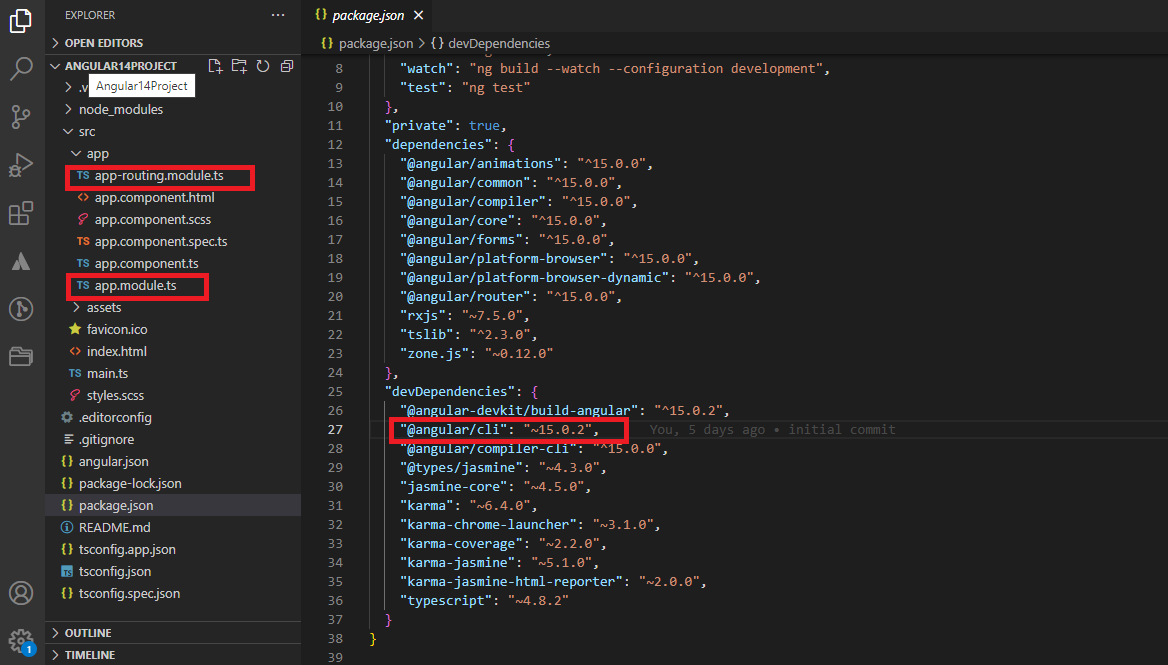
Please Identify that we are using Angular/CLI: 15.0.2. By default, we have an app routing module file and module file, and we are using it.
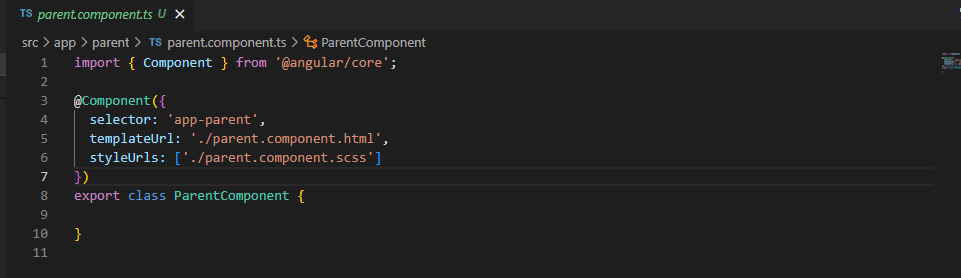
- create a new angular Component at the app level (example: parent component)
- command: ng g c parent
- create one Component inside the parent component (model: child component)
- command: ng g c child
- create one shared module at the app level (example: shared module)
- command: ng g m shared
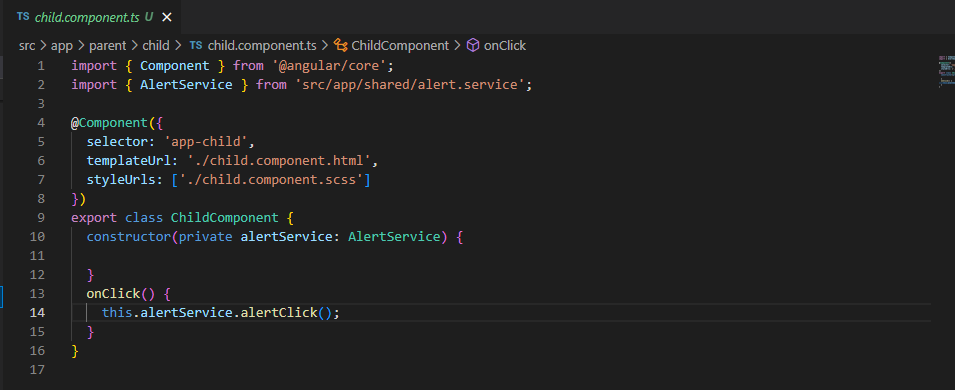
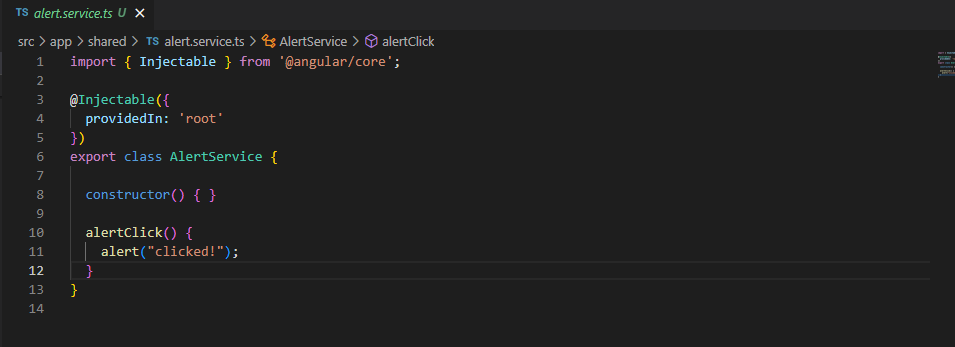
- create one service inside a shared module (for example – alert service)
- command: ng g s alert
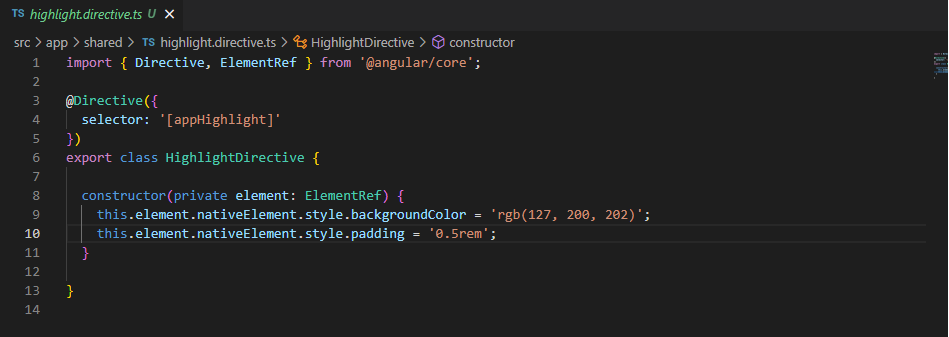
- create one Directive inside a shared module (example: highlight Directive)
- command: ng g d highlight
Once we create all the required files then, our application structure will look like this:
Inside App – we have a Parent component and a shared module.
Inside the Parent Component – we have a child component.
Inside the Shared module – we have an alert service and highlight Directive.
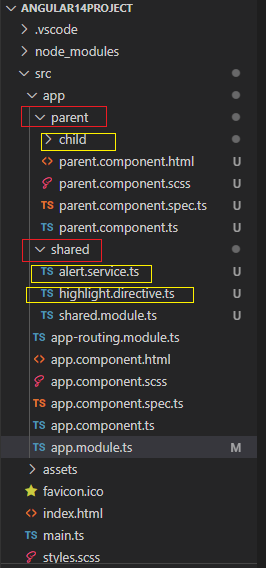
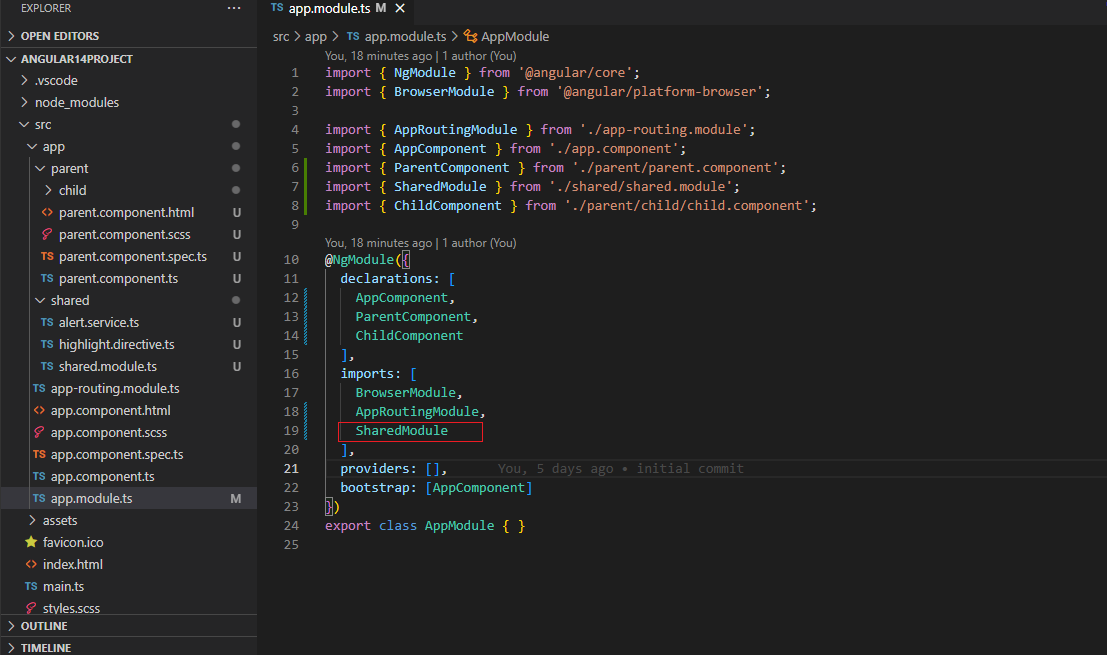
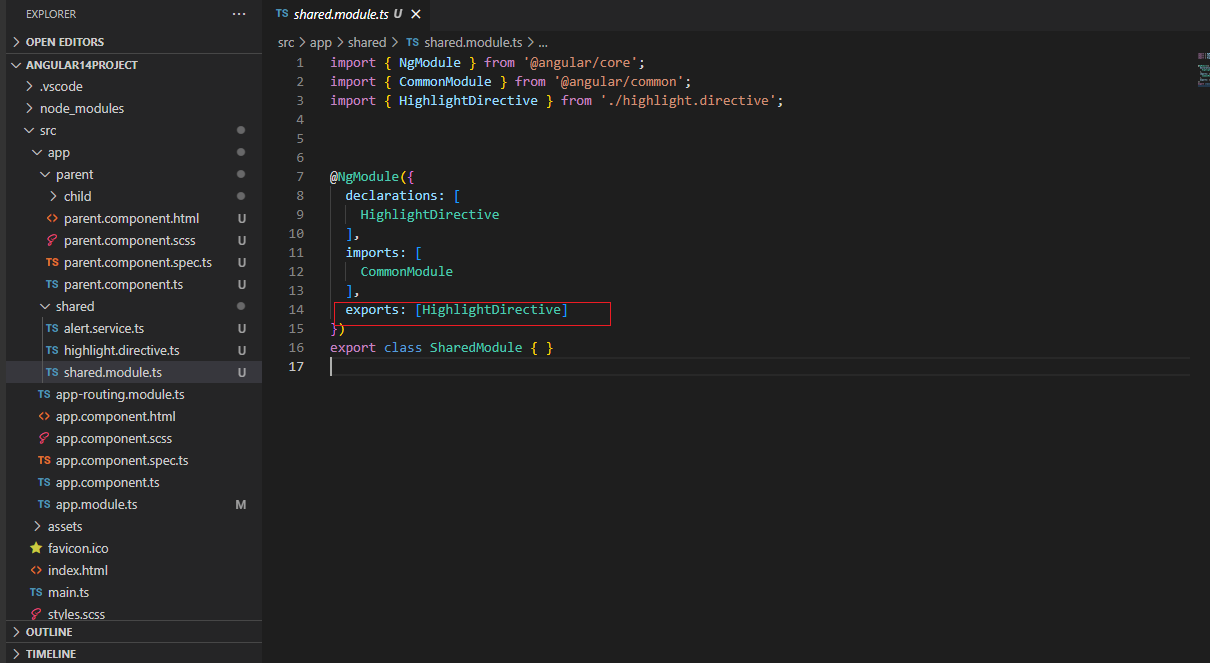
Ensure to include the shared module in the app module and export the highlight directive in the shared module. You can remove the alert service spec file and highlight the directive spec file, as we will not use them here.
Please refer to the below screenshots for the changes (highlighted in red color boxes):
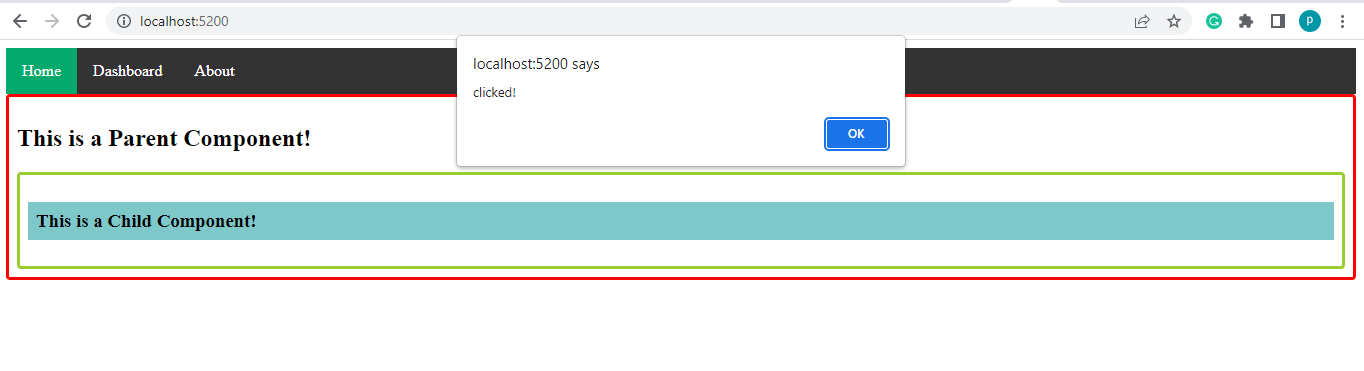
So, we have created one angular application. I have made some basic Html templates and shared screenshots for your reference below:

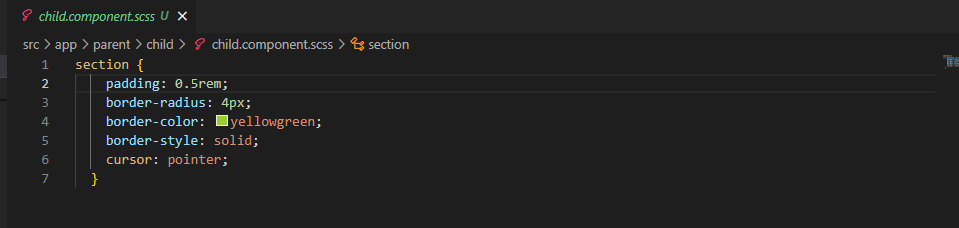

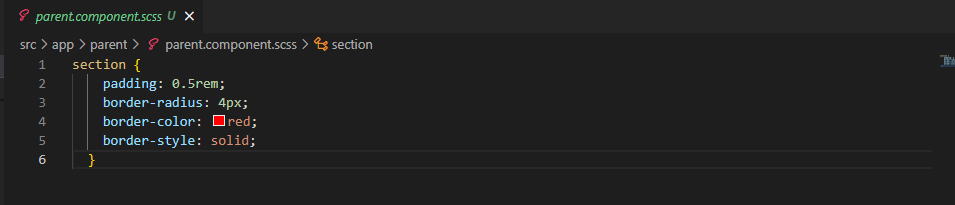
In the above screenshots, I have given some basic Html templates and connected them with bootstrapping Component (I.e., the app component). Please follow the same steps and compile the application with the below-mentioned command.
- Command: ng serve
Our view would look like this:
So far, we have successfully created a basic angular application (V15) with ng modules.
- Building a First Standalone Component
Converting a normal(module-based) Component into a standalone component is not so difficult; you have to follow three rules:
- The standalone property should be set to true in the component annotation.
- Remove the connection between the Component and the respective module.
- Add all the required dependencies in the imports array of the Component.
Follow the below steps:
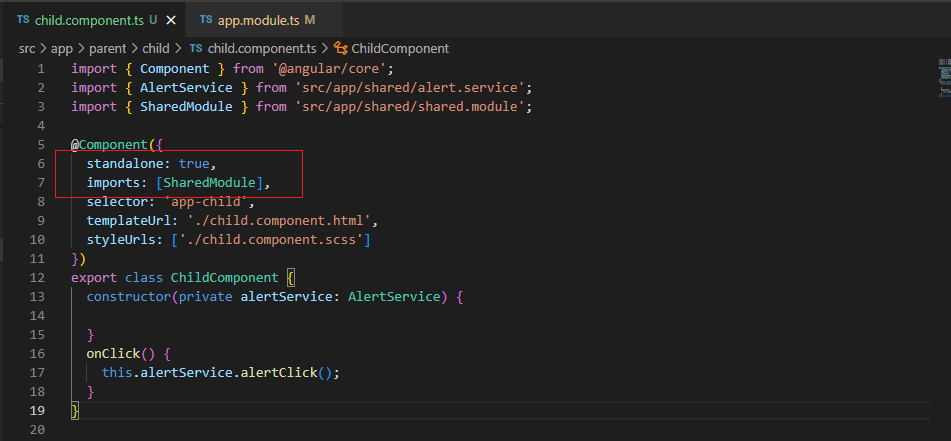
The Standalone property should be set to true in the child Component and import the shared module directly in the child component imports array (as it is a Standalone Component).
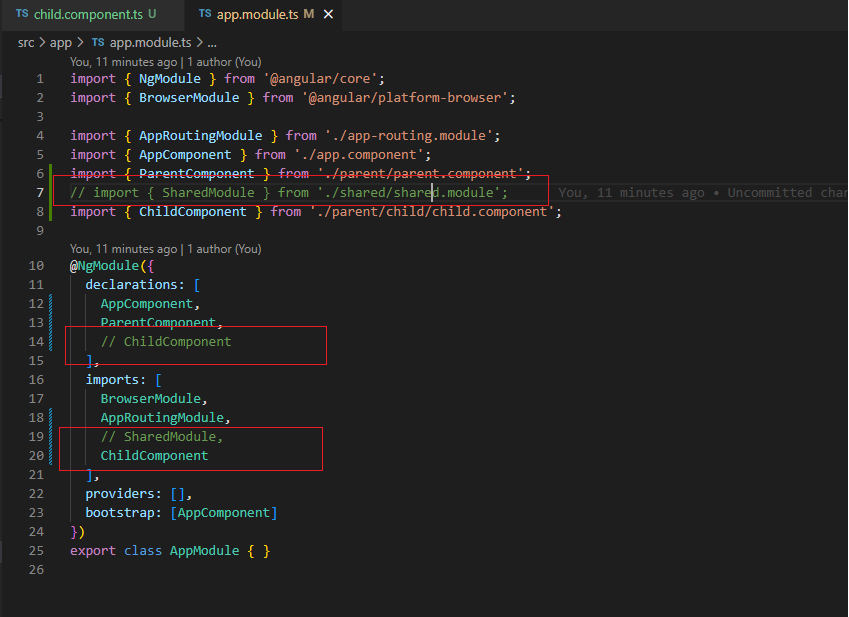
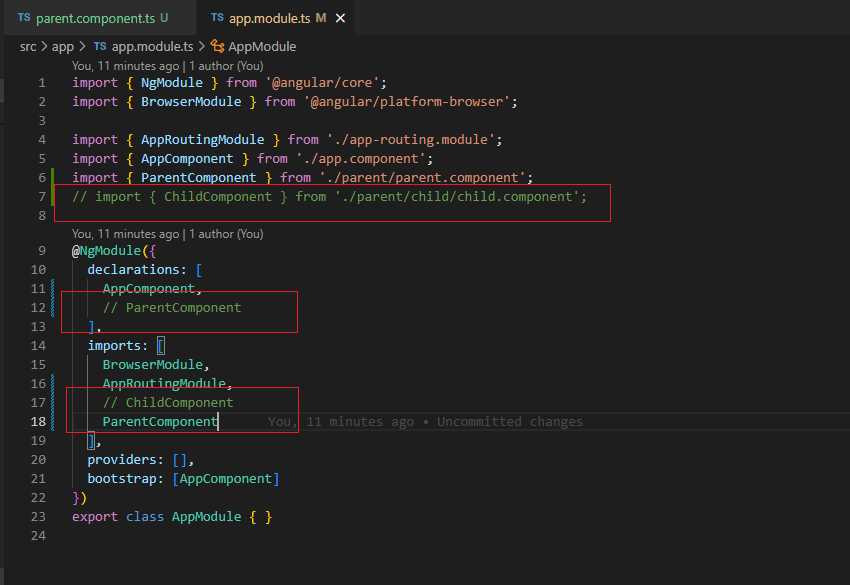
Remove the child Component from the declarations array of the app module file and add it to the imports array.
Remove the shared module from the imports of the app module file, as we have added it in the Standalone Component directly.
Please refer to the below screenshots for the changes (highlighted in red color boxes):
After successfully running all the above changes, you can see our application will run as earlier.
- Standalone Directives & Connecting Building Blocks
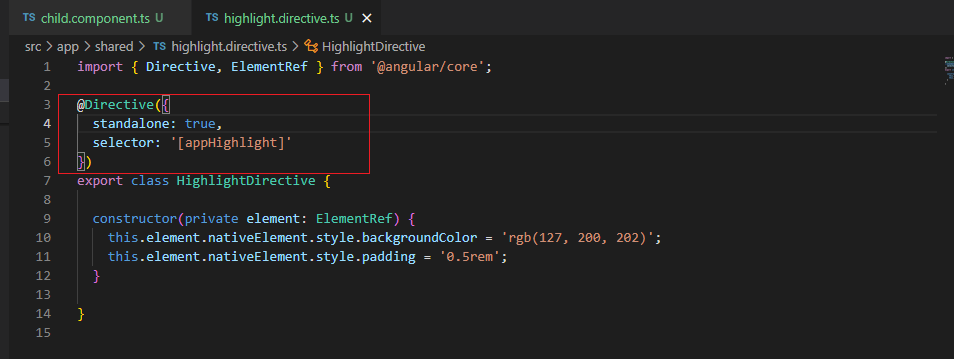
Rules to follow to convert a standard Directive to a Standalone Directive are:
- The Standalone property should be set to true in the Directive annotation.
- Remove the connection between the Directive and the respective module (if any).
- Add the Directive to the imports array of the Component.
Follow the below steps:
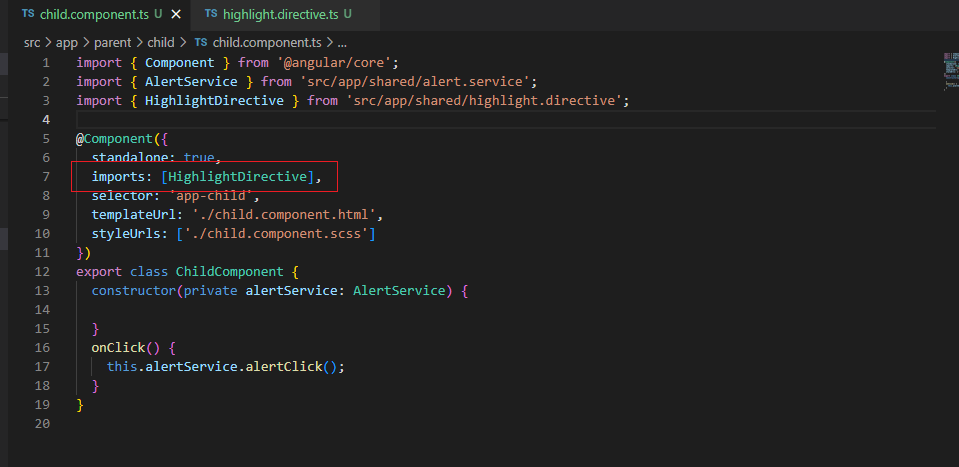
The Standalone property should be set to true in the highlight directive.
Import highlight directive to child Component imports array (as it is a Standalone component). Remove the shared module from the child Component imports array.
As we are directly calling the highlight directive in the child Component. We can now delete the shared module, as we no longer need it.
Please refer to the below screenshots for the changes (highlighted in red color boxes):
After successfully running all the above changes, you can see our application will run as earlier.
- Migrating another component
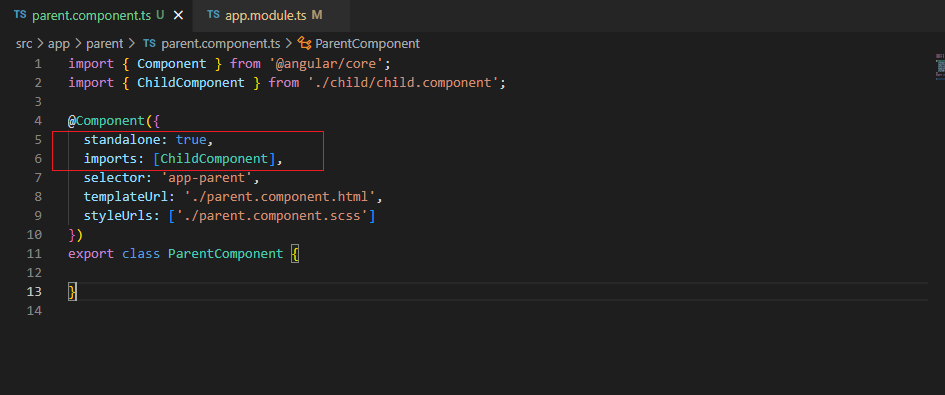
Similar to the child Component (which we made Standalone in the previous sections of this article), We can convert the Parent component into a Standalone part by setting its standalone property to true. You can use a standalone element for another component by passing it to the import’s property of that standalone Component.
Follow the below steps:
Include standalone property to true in Parent Component and import child component directly into imports array of Parent Component (as it is Standalone Component).
Remove the child Component from the app module imports array and add the Parent component imports array.
Remove the Parent Component from the app module declarations array, as we don’t need it anymore.
Please refer to the below screenshots for the changes (highlighted in red color boxes):
Now when you run the application, the application should run successfully.
- A Standalone Root Component
If you’d like to migrate a Root Component into a standalone component in angular 14 or 15, we must also change the bootstrapping code in the main Ts file.
Rather than bootstrapping a Component with the module, we will use a bootstrapping application function in our main Ts file and make the connection with the root Component.
Please use the below steps to bootstrap an application using a Standalone Component:
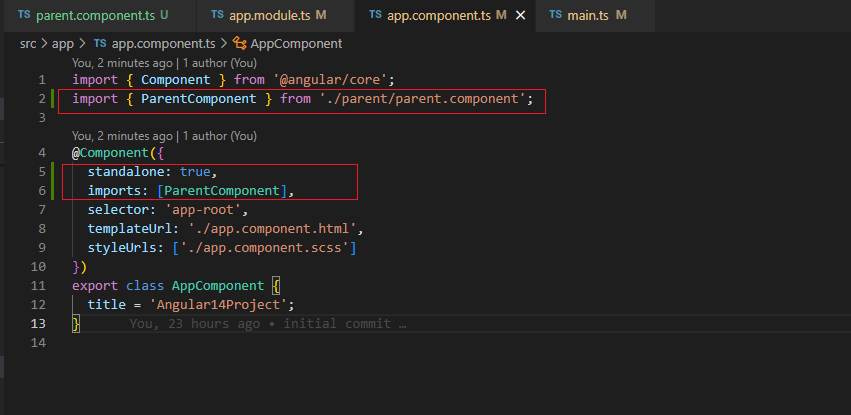
First and foremost, we must ensure our app Component is Standalone.
- The Standalone property should be set to true in the Component annotation.
- Remove the connection between the Component and the respective module.
- Add all the required dependencies in the imports array of the Component.
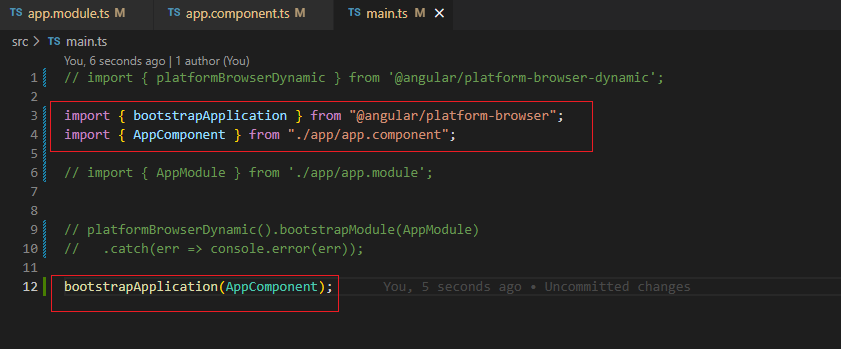
Then we have to include our root component (i.e., app component) in the main.ts file. Then eradicate the App module.
Follow the below steps:
Include the standalone property to true in the app component file and add the parent component in the import array of the app component.
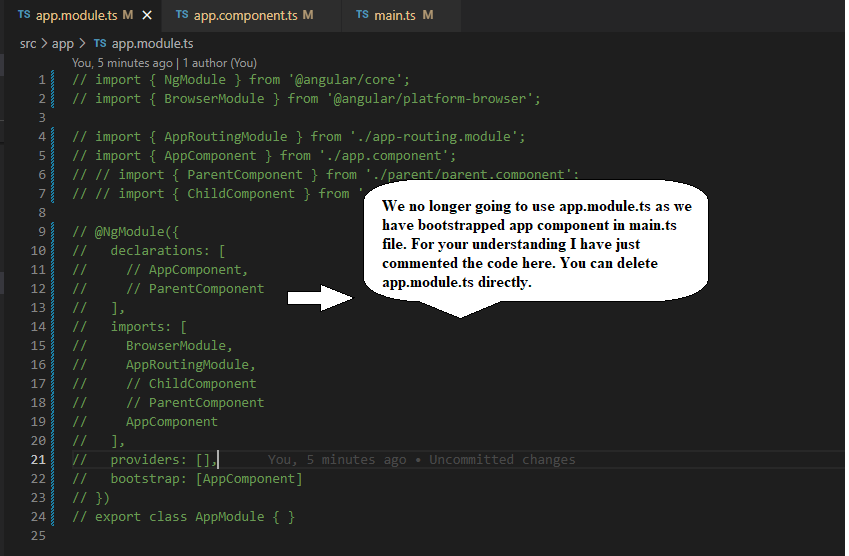
So, with this, we can now eradicate the app module. We don’t need it anymore. We can eliminate it, which is the significant benefit of standalone components.
Please refer to the below screenshots for the changes (highlighted in red color boxes):
When you run the application, it should bootstrap from App Component. Still, our view will remain the same.
So finally, we have successfully removed the connections of 2 module Ts files from our application, bootstrapped the Root Component, and made all the Components and directives Standalone and working as expected.
- Services and Standalone Components
We can connect Services to Standalone components in 2 ways. Let’s see them one by one.
Approach 1:
Follow the below Steps:
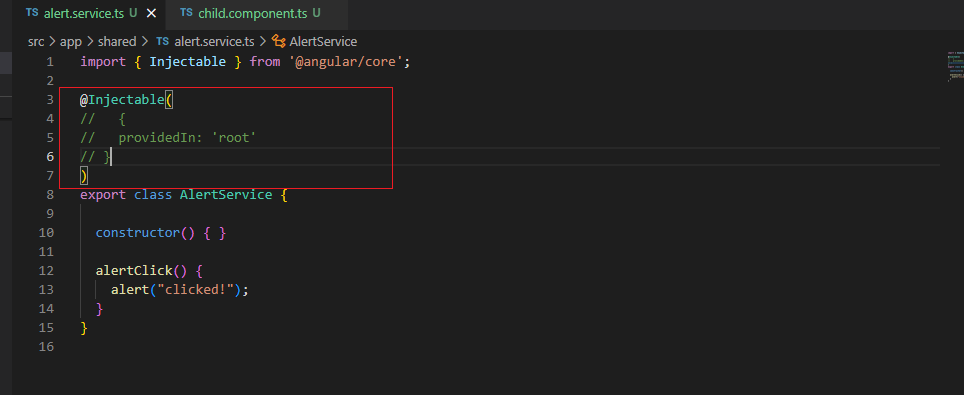
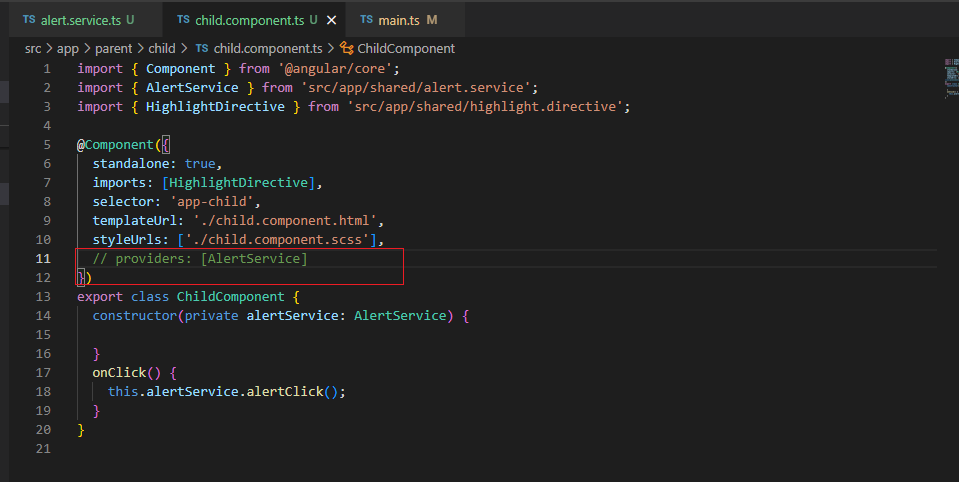
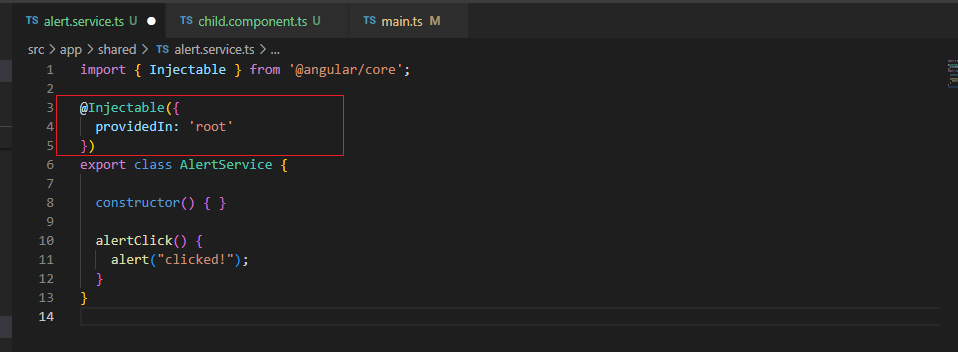
We can Remove the provide-In object from the Alert service Injectable annotation.
Add Alert service to providers Array of Child Component (a standalone component).
This is not a new behavior; we can do it with old versions of Angular.
Please refer to the below screenshots for the changes (highlighted in red color boxes):

We can use this Approach, which will work fine, but there is a limitation in that it creates multiple instances of the same service every time we call it in different components.
To overcome this issue, we can add service in one common place, which should do the trick. Let us see how we can achieve it in the second Approach.
Approach 2:
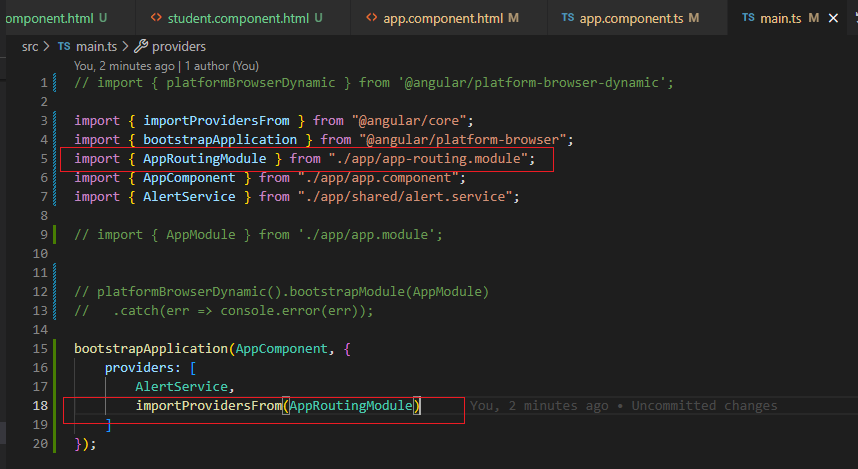
If we want to reuse a standard service without creating multiple instances, we must change our bootstrapping code in the Main Ts file.
Follow the below steps:
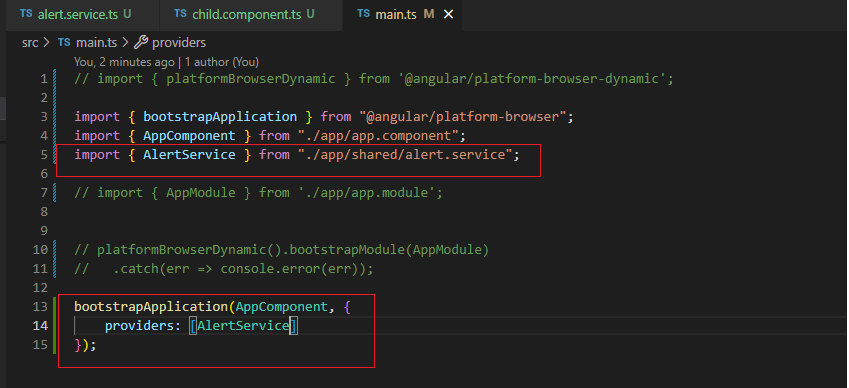
Include an object with a provider array in the bootstrap application function in the main Ts file. This will not create multiple instances.
Remove the Standard service from the Providers array in all other Components.
Please refer to the below screenshots for the changes (highlighted in red color boxes):
If you want to use any Service globally, then you can follow the Second Approach; otherwise, the most recommended way is to add the provide-In object in the Injectable annotation in the respective service Ts file and don’t include it in the components and the main Ts file, as shown in below:
If we save and check now, still our application is working as earlier.
So far, you have successfully:
- Bootstrapped the application with a Standalone C
- Configured and implemented multiple Standalone Components, directives, and services.
- Excluded module-based Components and eradicated module files.
- Routing with Standalone Components
Any application must have a variety of routes for the user to navigate different Components by changing the URL. This section lets us see how we can manage Routing with standalone components.
Please remember that we have made the root component (I.e., the App component) the Standalone Component.
Follow the below steps:
Let us create three new components in our application that can create routes and be Lazy- L.
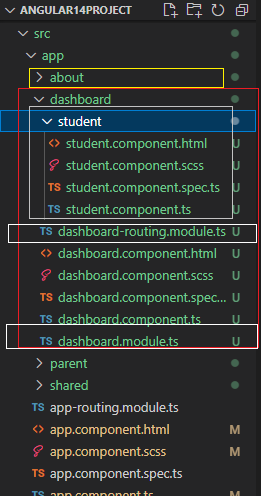
Once we create all the required files then, our application structure will look like this:
- Inside App – we have a Dashboard Component and About Component.
- Inside the Dashboard Component, we have the Student Component, dashboard module, and routing module Ts files.
Agenda:
Our agenda would be to:
- Navigate the home route and get Parent Component loaded.
- Navigate the about route and get the About Component loaded.
- Navigate the dashboard route and get Dashboard Component loaded.
- navigate the student route and get Student Component loaded
Follow the below steps:
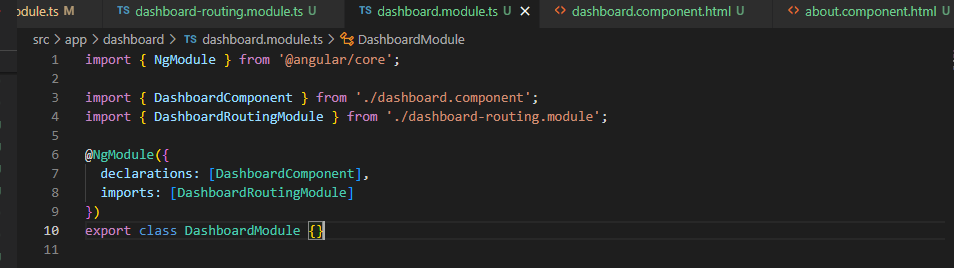
Create About, Dashboard, and Student Components by following the above-discussed structure. Ensure to include the Dashboard module and routing module files in the Dashboard Component.
Please refer to the below screenshot for the changes (highlighted in red, yellow, and white color boxes):
Add the below changes in individual files for Routing:
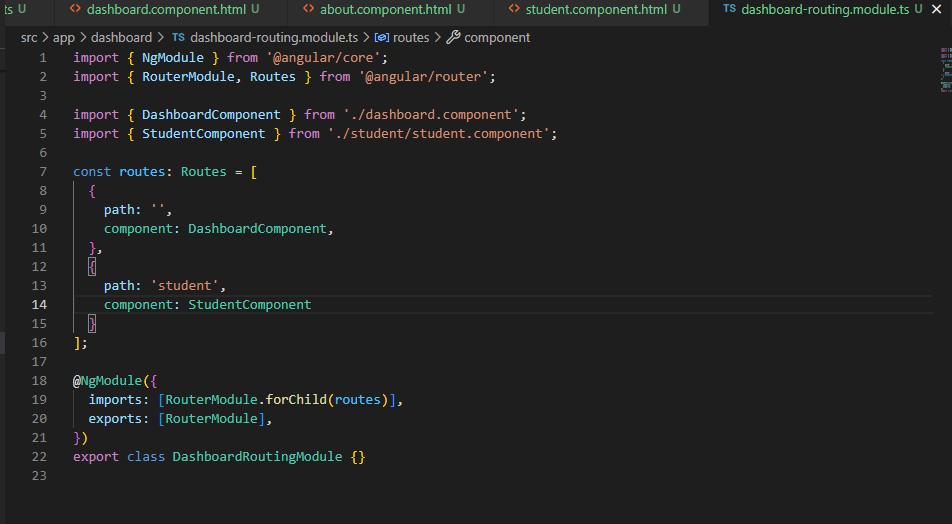
- Include student Component in dashboard routing module Ts.
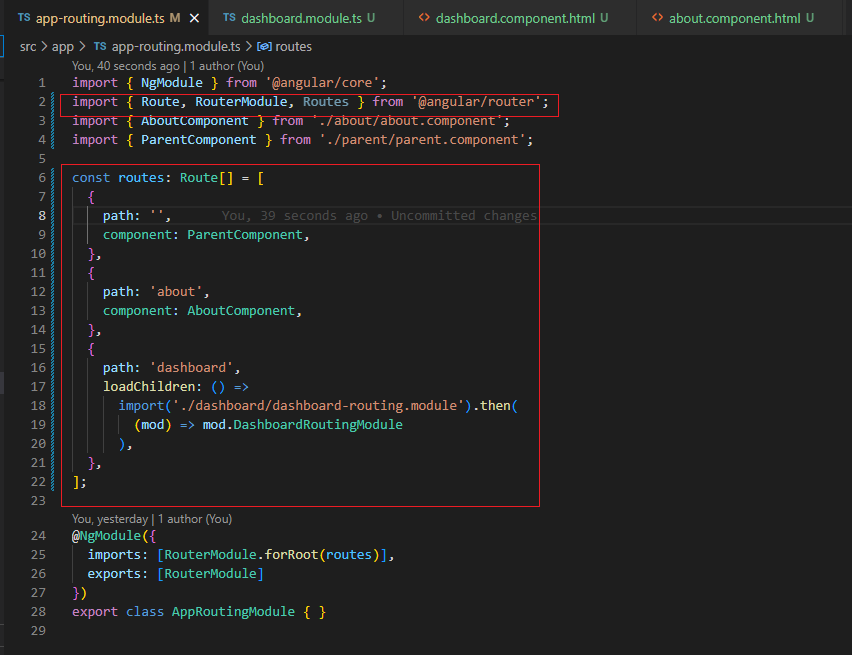
- Include the dashboard module and about Component in the app routing module Ts.
Please refer to the below screenshots for the changes (highlighted in red color boxes):
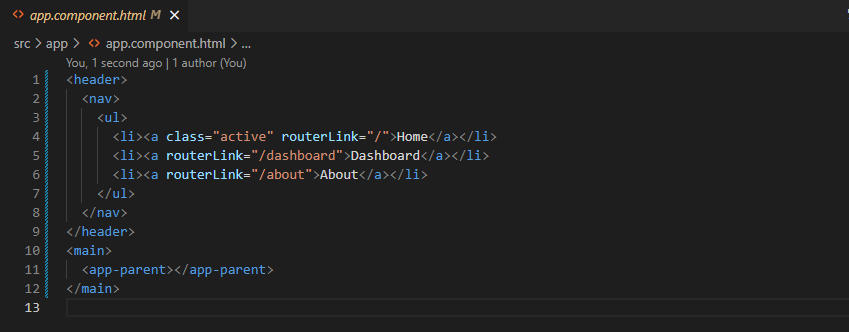
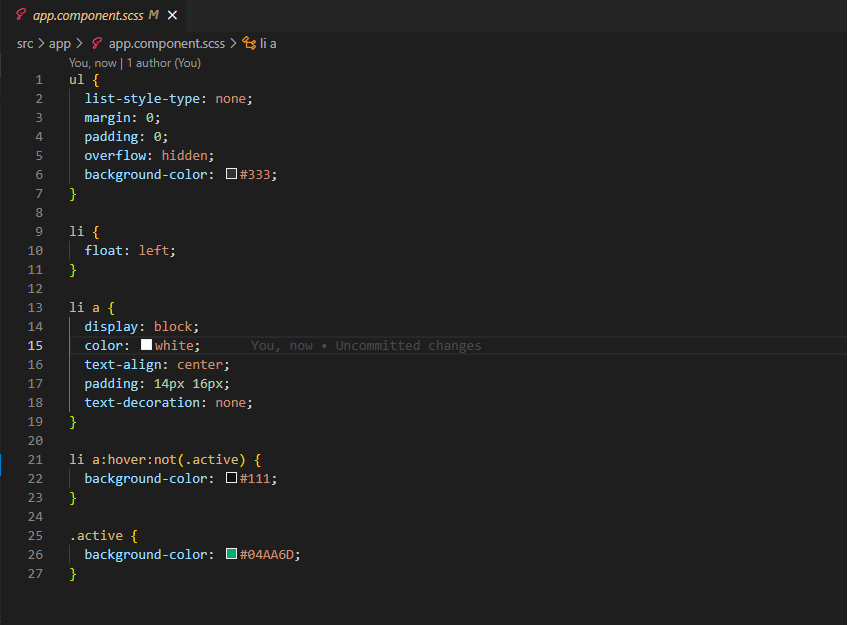
I have created some basic Html templates and shared screenshots for your reference below:


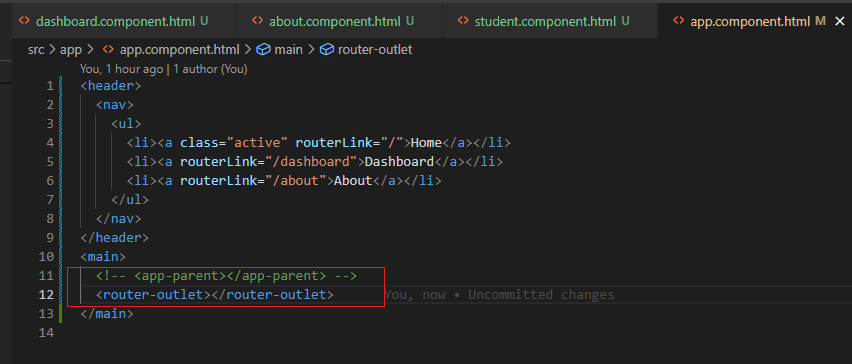
Include router outlet to app Component Html as shown below.
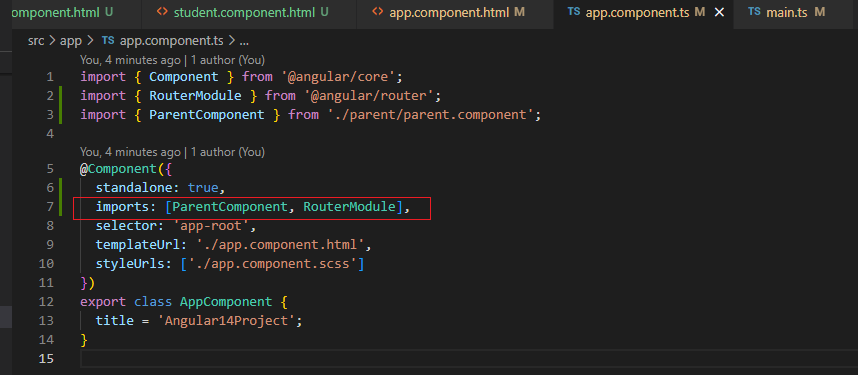
When dealing with Standalone root Components (i.e., app component), it does not know what to do with that router outlet and routes. So, we will get the below error:

Follow the below steps:
- Include router module to app component Ts file imports array as shown in the below screenshot.
We have an alternative for Router Module forRoot() dependency to set up the route in the application, I.e., importProvidersFrom utility from the angular core.
Follow the below steps:
- Include the utility which takes the app routing module as a parameter in the main Ts file.
Run the Application
On running the application, you should:
- Navigate the home route and get Parent Component loaded.
- Navigate the about route and get the About Component loaded.
- Navigate the Dashboard route and get Dashboard Component loaded.


- Lazy Loading
So far, you have successfully:
- I navigated the home route and got Parent Component loaded
- Navigate the about route and get the About Component loaded
- I navigated the dashboard route and got Dashboard Component loaded
- navigated the student route and got Student Component loaded
We must ensure all these components are standalone, and the dashboard and About pages should load lazily.
Remove the dashboard routing module and dashboard module Ts files.
Follow the below steps:
Include the standalone property to true in the About component file.
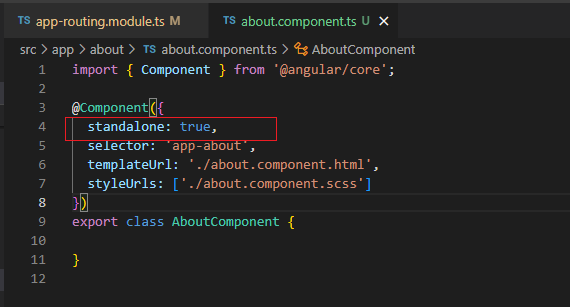
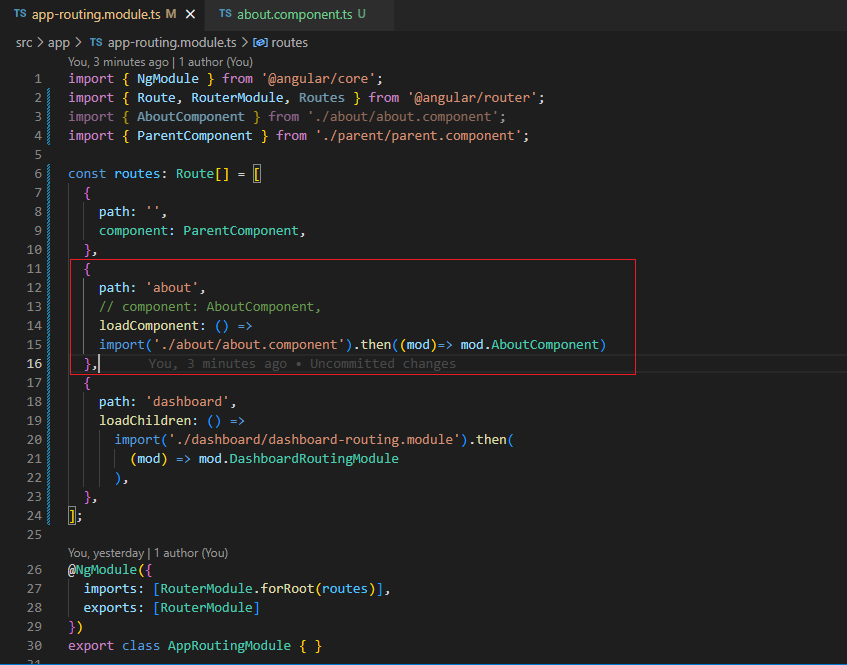
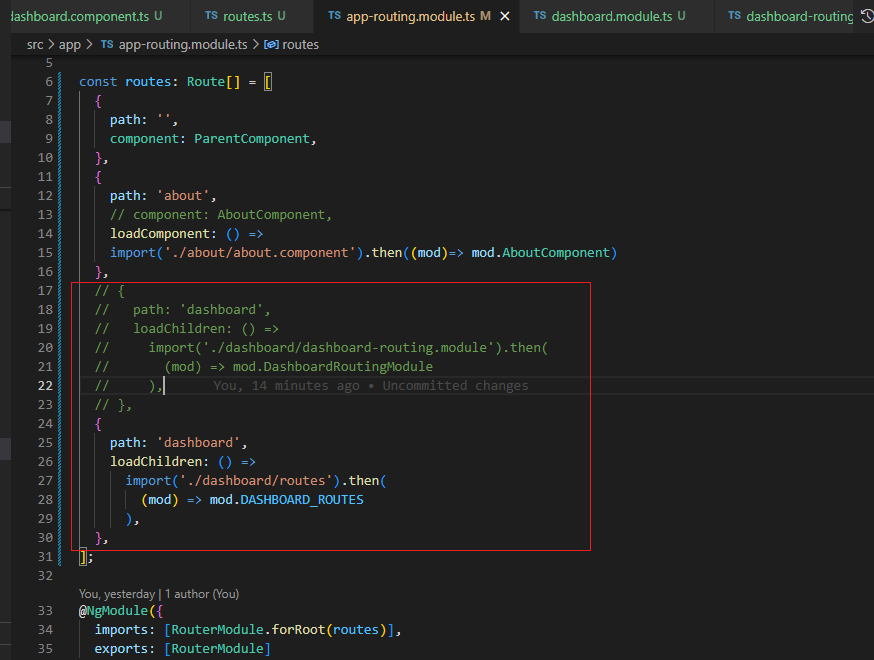
The load-Component statement is used to Lazy -Load the Standalone Component route, as shown below:
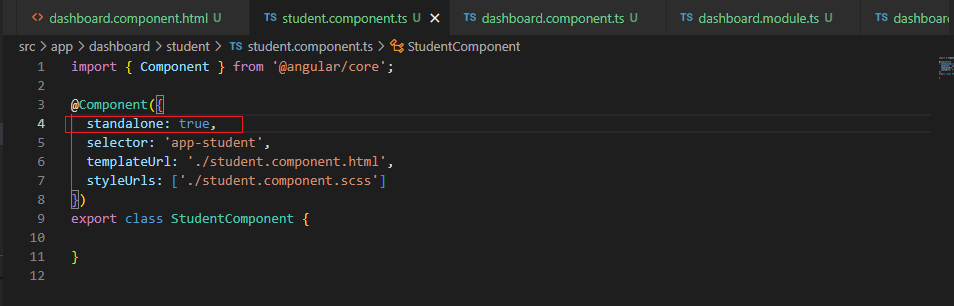
Include Standalone property to true in the Student Component file.
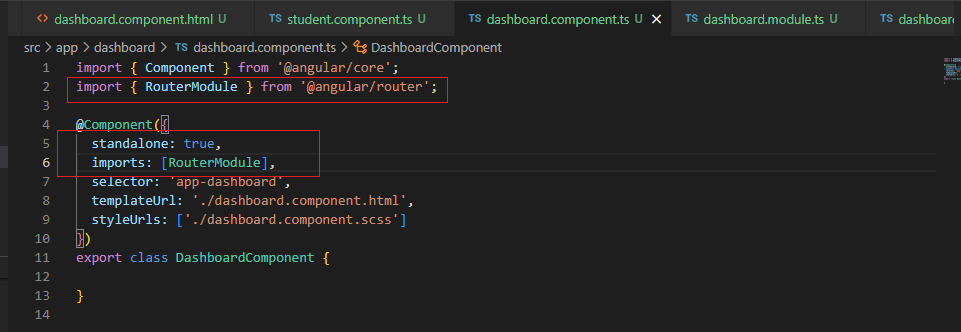
Include Standalone property to true in Dashboard Component file and Router Module from angular core in imports array.
Now we will create a constant file with name routes where we define all routes and export them as continuous.
We MUST remove the connection between the dashboard routing module and the app routing module for dashboard navigation and replace it with the routes constant we recently created.
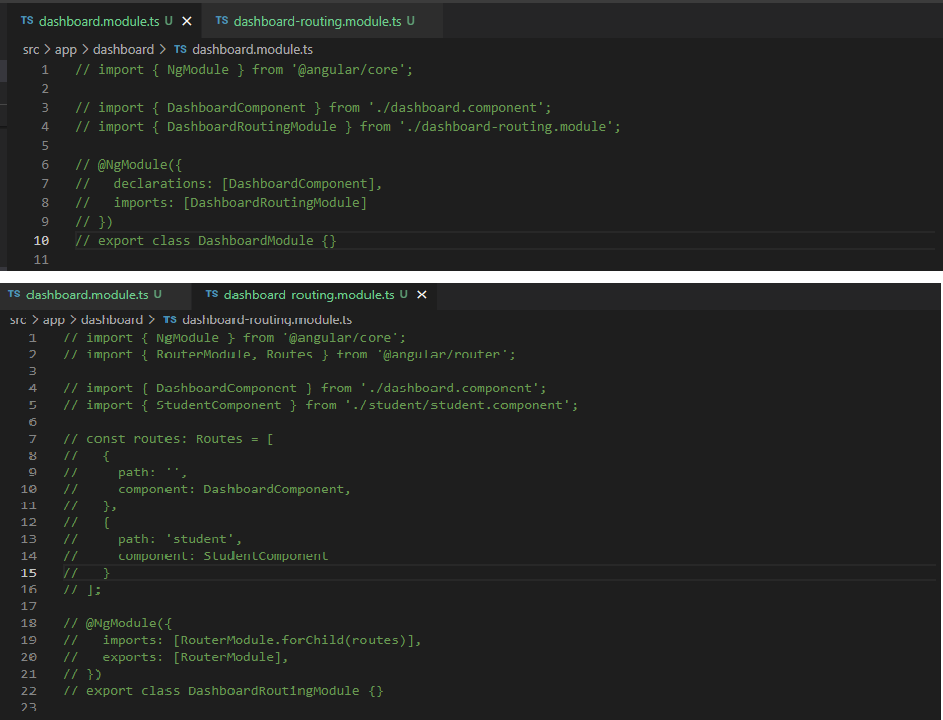
Once we make the above changes, we can remove the dashboard routing module and dashboard module, as we no longer use them in our application.
Create routes Ts file in the dashboard Component folder where we configure the routes with student route navigating to the student component as below:
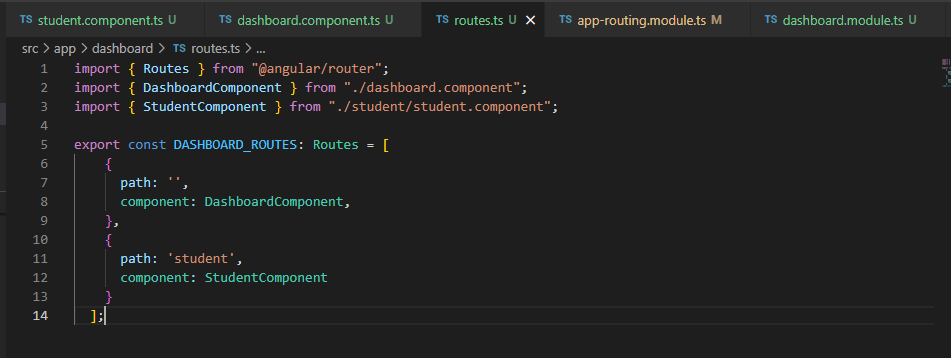
The Load Children method is used toLazy Load a child route when all the routed components are standalone. Here the above routing configuration is added inside the routes file.
Please refer to the below screenshots for the changes (highlighted in red color boxes):
You can remove the dashboard module and Routing module Ts files.
Run the Application
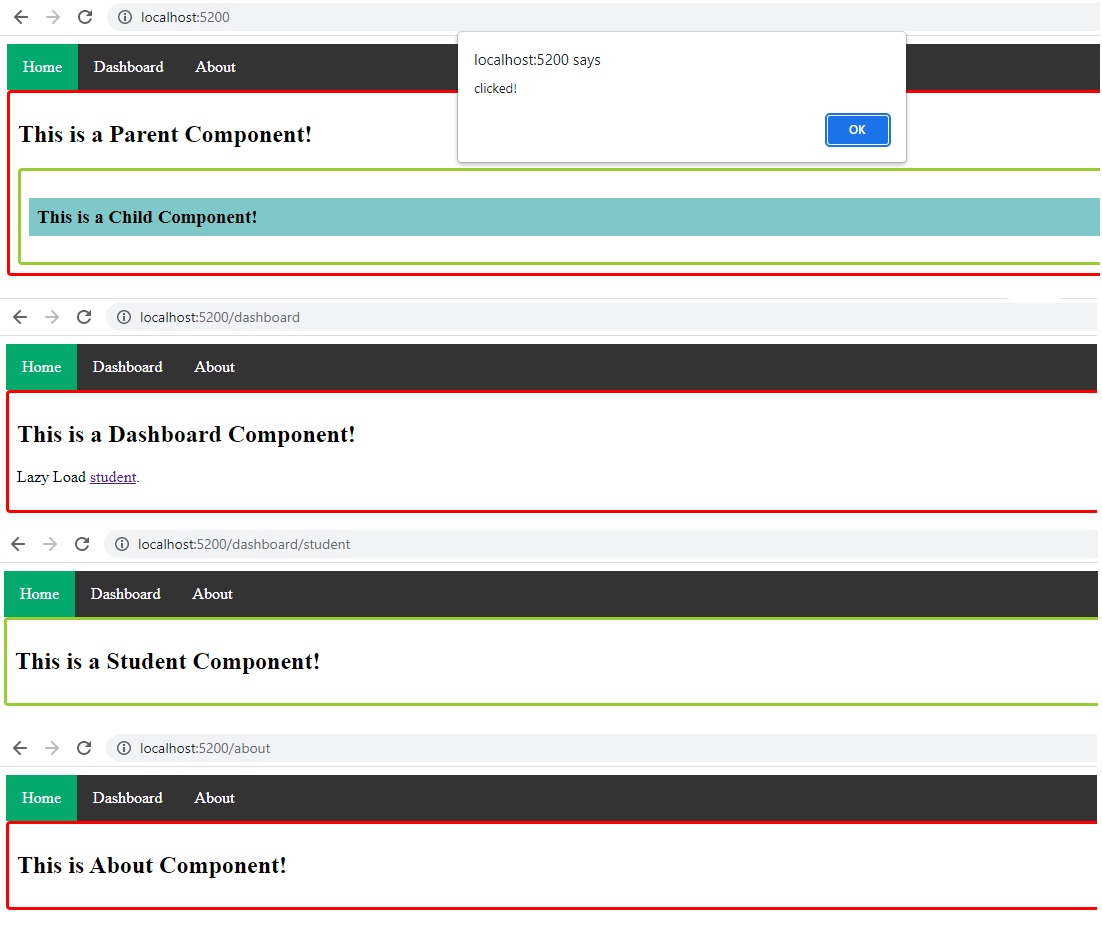
On running the application, you should:
- Navigate the home route and get Parent Component loaded.
- Navigate the about route and get the About Component loaded.
- Navigate the Dashboard route and get Dashboard Component loaded.
- Navigate the child route and get Child Component loaded.
- Navigate the student route and get Student Component loaded.
- All standalone components Loaded successfully.
- The root component (App component) Loaded successfully.
Wrap-up
You can see how easy it is to use a Standalone Component and that you must get started with one. Choose Angular 14 or 15 if you are starting a new Angular project and start the application with Standalone Components.
Please let me know your thoughts on the standalone Component and my article. Thank you.