
INTRODUCTION
- AWS Data Sync is a cloud data movement and discovery service that accelerates and simplifies data migrations to AWS and vice-versa.
- We can easily transfer data from on-premises to the cloud and, in the same way, from cloud to on-premises by creating data sync agents and tasks.
- It migrates your data, protects your data, archives your cold data, and manages your hybrid data workflows.
Prerequisites:
A Windows server with a shared folder where the data files are dropped from the client.
1.1 Download the image and deploy:
- Open the AWS console on Windows on the Prem server, where we have the data import files.
- Go to services on AWS console, select Data sync, and click on agents.
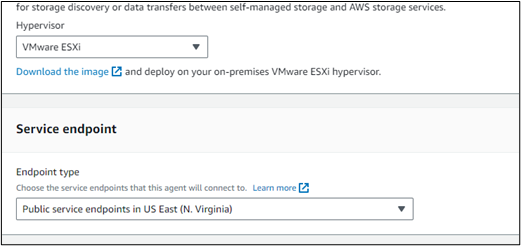
- Click on Create Agent and select VMware ESXi, as we are deploying a data sync agent on an on-premises Windows server.
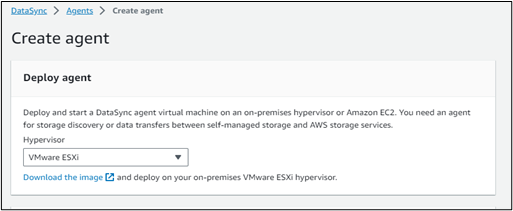
- Click on Download the image (you will have a zip file downloaded)
1.2 Install VMWare and configure:
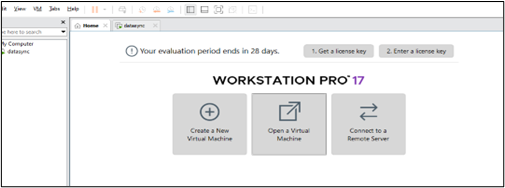
- Download and Install VMWare workstation pro on the Windows on-prem server.
- Once the VMWare is installed, open it and click on open a virtual machine.
- Once you click on open a virtual machine, it will redirect to a browser page where we need to select the file downloaded in step 1.1 (unzip the zip file and upload).
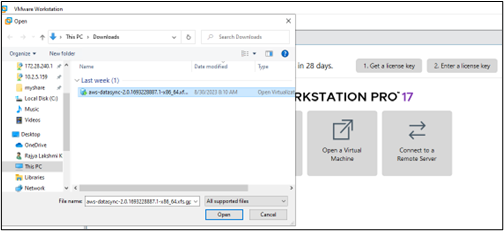
- Once you select the unzipped file, the data sync agent will be opened.
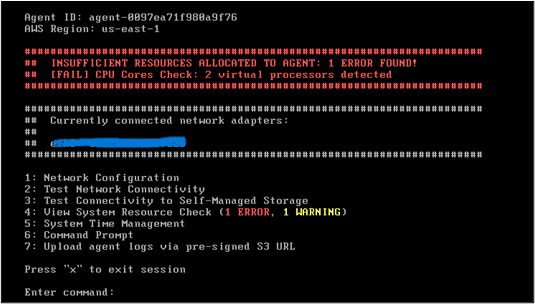
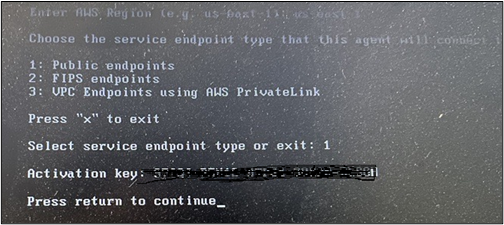
- Once the above page opens, check the network configuration and connectivity by giving the appropriate command numbers.
- Click on test network connectivity and type 1, which means public endpoints.
- Choose the appropriate region where your environment is running on AWS.
- After giving the region, it will give the activation key, which is used to create the Agent in AWS Data Sync.
1.3 Creating data sync agent in AWS console:
- On the AWS console, continue to step 1.1 after deploying the Agent on the Prem. Select the service endpoint and public service endpoints.
- And at the activation key tab, select manually enter agents’ activation key and give the activation key which we got in the VMware at step 1.2
- Then click Create Agent, and before creating the Agent, ensure that the VMware workstation has the data sync agent up and running to have the Agent in AWS in the available state.
2. CONFIGURATIONS ON ON-PREM SERVER END.
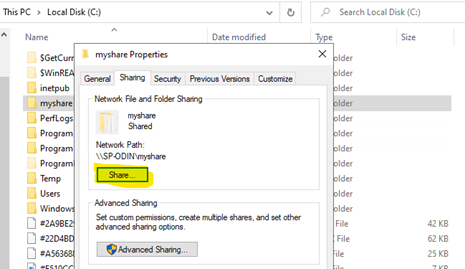
2.1 Configure the sharing and security options on the folder.
- Get the files which needs to be transferred to S3 into a folder in any of the drive.
- Click on folder properties and click on sharing option.
- Choose the people/user on the network to share the files in folder.
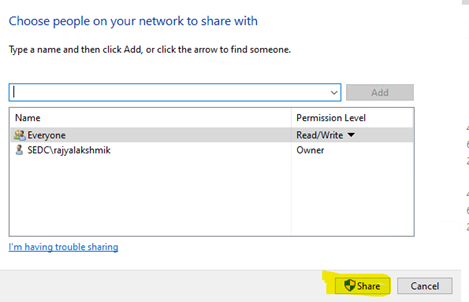
- Once these sharing properties are enabled, the user also allows all permissions to the same user in security settings.
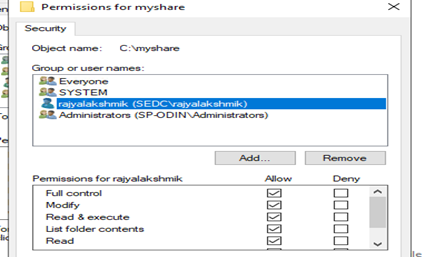
- The users mentioned in the screenshots are only for reference, need to include all the users who needs permissions to the folder to move the files.
3.1 Create source location in AWS Data Sync:
- Open the AWS console, and in services, select data sync and click on locations.
- Click on Create Locations and select the source location type from where the files come from (SMB in our case), the agent name that was already created, and in step 1.3
- Give the server static IP address and folder name from where files are moved and configured.
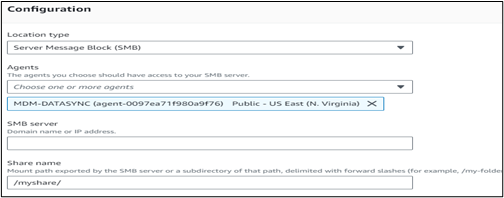
- Then, provide the Windows server credentials (username, password, and domain name, respectively) and create the source location.
3.2 Create destination location on AWS Data Sync:
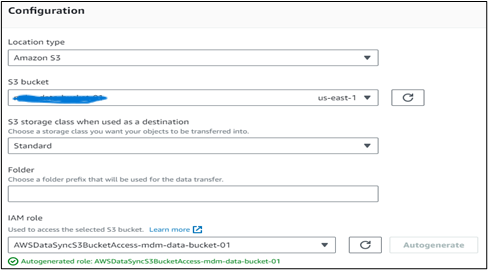
- Follow the same steps followed for creating source location by selecting the respective location type for destination location as s3 and provide the appropriate bucket and folder name where the files need to come.
4.1 Create a Data Sync task to migrate data from windows server to AWS S3:
- On the AWS Data sync console Click on tasks and click on create task.
- As we have locations already configured, select the existing location and select the source and destination location.
- Name the file migration task accordingly and configure data transfer configurations accordingly.
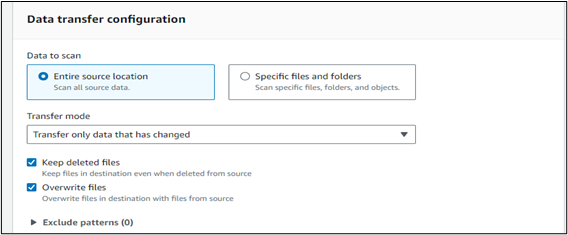
Data to scan: We will be selecting specific files and folders option in our case.
- The entire source location transfers all the files from the folder.
- Specific files and folders transfer only a few files from a few folders.
Transfer mode: We will be transferring only data that has changed.
- Transfer only data that has changed and migrated only the new files.
- Transferring all the data migrates all the data on every run.
Keep deleted files: even though files are deleted in the source folder, the destination folders keep the files undisturbed.

- Schedule the task based on the requirement, like daily once or hourly, or a custom schedule by mentioning the cron expressions.
- Then click on create task, and once created, run the task the task runs as per the schedule and migrates the files from source to destination.