
What is CI/CD?
Continuous Integration (CI) is a development practice that helps ensure that software components work together. Continuous Delivery (CD) is the ability to deploy your integrated code into Production without the need for human intervention.
This blog has detailed procedures on how you can achieve CI/CD with a .NET Core application.
People who read this blog should know the basics about Version Control, CI/CD Service, Build Scripts, Testing, Artifacts Storage, and Deployments:
Please refer link: https://docs.gitlab.com/ee/ci/
What will we cover?
- Setup GitLab Runner (Configure your own GitLab Runner with a Docker Executor on AWS EC2)
- Set up Variables and Add Environment Variables
- Setup GitLab CI/CD PIPELINE FOR .NET Core APPLICATIONS
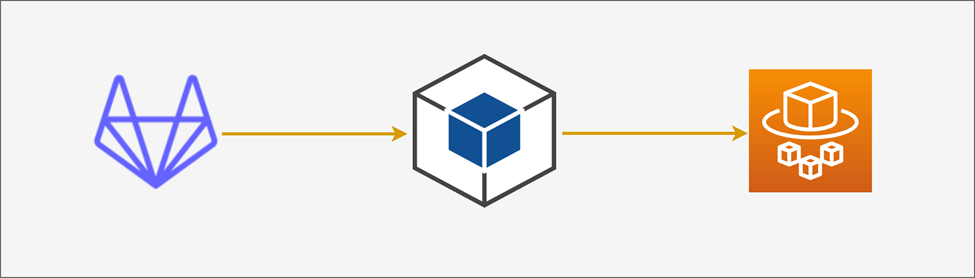
DEVOPS PIPELINE FLOW (Advanced Level):
- Developer: Commits code to the repository
- GitLab: GitLab, as CI/CD tool, will run a pipeline to deploy the application to the environment
- Pipeline: The pipeline consists of a series of steps defined in a configuration file (e.g., GitLab-ci.yml)
- ECR: Amazon Elastic Container Registry (ECR) is a managed Docker container registry. Please refer to the link to know more: https://aws.amazon.com/ecr/
- ECS Service: Amazon Elastic Container Service (ECS) is a managed container orchestration service. Please refer to the link to know more: https://aws.amazon.com/ecs/
This diagram provides a high-level overview of the process.:
How to Configure your own GitLab Runner with a Docker Executor on AWS EC2:
Here is an overview:
- Create an EC2 instance
- Install the GitLab Runner on the EC2 instance
- Install required dependencies
- Configure the GitLab Runner
Test on the lower environment before implanting in Production.
Step 1. Create an AWS account
Signup AWS free-tier account and create basic EC2 instances on the t2 family like t2.small or t2.micro.
Step 2. Create a new virtual machine
Create an EC2 instance from the AWS console and add key pair to connect to the EC2 instance. Reference link: https://docs.aws.amazon.com/efs/latest/ug/gs-step-one-create-ec2-resources.html
Step 3. Connect to EC2 instance:
Reference the below link: https://docs.aws.amazon.com/AWSEC2/latest/UserGuide/connect-linux-inst-ssh.html
Step 4. Updating dependencies
| sudo yum -y update |
Step 5. Installing Git
| sudo yum install -y git |
Verify that Git has been installed by running.
| git –version |
Step 6. Installing Docker
| sudo amazon-linux-extras install -y docker |
The next step is to add the ec2-user user to the docker group:
| Sudo usermod -aG docker ec2-user |
Verify using the below command if the “docker” user is added to the group:
| groups ec2-user |
Configure the docker daemon to start automatically:
| Sudo systemctl enable docker |
Restart EC2 instance:
| sudo reboot |
After the restart, try the following command (without sudo!)
| docker run hello-world |
Step 7. Installing the Gitlab Runner
Download the GitLab-runner package:
| curl -LJO “https://gitlab-runner-downloads.s3.amazon.com/latest/rpm/gitlab-runner_amd64.rpm” |
Install the package:
| Sudo rpm -I gitlab-runner_amd64.rpm |
Step 8. Configuring the GitLab CI Runner
Execute this command which asks for below information:
| Sudo gitlab-runner register |
This will start a short configuration wizard with the following steps:
- Enter the GitLab instance URL
- Enter the registration token
- Enter a description for the runner
- Enter tags for the runner
- Enter optional maintenance notes for the runner
- Enter an executor
- Enter the default docker image
Now let’s verify that the service is running by using the commands:
| Sudo gitlab-runner status |
Step 9. Enabling the privileged mode
Edit the config. toml and flip the privilege from false to true.
To open the config. toml file, run the command:
| sudo vim /etc/gitlab-runner/config..tool |
Setup Variables and Add Environment Variable:
Variables store information, like passwords and secret keys, that you can use in job scripts. Refer link: https://docs.gitlab.com/ee/ci/variables/
GitLab CI/CD PIPELINE FOR .NET Core APPLICATIONS:
1. # .gitlab-ci.yml 2. stages: 3. – build 4. – test 5. – deploy 6. variables: 7. # Define any environment variables here 8. DOCKER_REGISTRY: 9. APP_NAME: 10. DEV_ENV_NAME: 11. DOCKER_TLS_CERTDIR: “” 12. DOCKER_HOST: “” 13. TASK_DEFINITION_NAME: 14. CLUSTER_NAME: 15. SERVICE_NAME: 16. # Build stage: Restores NuGet packages and builds the .NET Core application 17. build: 18. stage: build 19. script: 20. – dotnet restore 21. – dotnet build –configuration Release 22. # Test stage: Runs unit tests 23. test: 24. stage: test 25. script: 26. – dotnet test –no-restore –verbosity normal 27. # Deploy stage: Deploys the application on to the environment 28. # dev or QA) 29. deploy: 30. stage: deploy 31. update_service: 32. image: docker: stable 33. stage: update_service 34. services: 35. – docker:dind 36. before_script: 37. – apk add –no-cache curl jq python3 py3-pip 38. – pip3 install –no-cache-dir awscli 39. – docker –version 40. – export AWS_ACCESS_KEY_ID=$AWS_ACCESS_KEY_ID 41. – export AWS_SECRET_ACCESS_KEY=$AWS_SECRET_ACCESS_KEY 42. – export AWS_DEFAULT_REGION=$AWS_DEFAULT_REGION 43. – IMAGE_TAG=”$(echo $CI_COMMIT_SHA | head -c 8)” 44. – echo $IMAGE_TAG 45. script: 46. # Add deployment commands here 47. # For example, you could use ‘dotnet publish’ and ‘scp’ to publish the app to a 48. server 47. – aws ecr get-login-password –region “${AWS_DEFAULT_REGION}” | 48. docker login –username AWS –password-stdin $DOCKER_REGISTRY 49. – docker build -t $APP_NAME . 50. – docker tag $APP_NAME:latest $DOCKER_REGISTRY/$APP_NAME:$IMAGE_TAG 51. – docker push $DOCKER_REGISTRY/$APP_NAME:$IMAGE_TAG 52. – echo $DOCKER_REGISTRY/$APP_NAME:$IMAGE_TAG 53. – TASK_DEFINITION=$(aws ecs describe-task-definition –task-definition 54. “$TASK_DEFINITION_NAME” –region “${AWS_DEFAULT_REGION}”) 55. – NEW_CONTAINER_DEFINTIION=$(echo $TASK_DEFINITION | jq –arg IMAGE 56. “$DOCKER_REGISTRY/$APP_NAME:$IMAGE_TAG” ‘.taskDefinition | 57. .containerDefinitions[0].image = $IMAGE | del(.taskDefinitionArn) | del(.revision) | 58. del(.status) | del(.requiresAttributes) | del(.compatibilities) | del(.registeredAt) | 59. del(.registeredBy)’) 60. – echo “${NEW_CONTAINER_DEFINTIION}” 61. – echo “Registering new container definition…” 62. – aws ecs register-task-definition –region “${AWS_DEFAULT_REGION}” –cli-input-json 63. “$NEW_CONTAINER_DEFINTIION” 64. – echo “Updating the service…” 65. – echo “${TASK_DEFINITION_NAME}” 66. # update service 67. – aws ecs update-service –cluster “${CLUSTER_NAME}” –service “${SERVICE_NAME}” 68. –task-definition “${TASK_DEFINITION_NAME}” 69. rules: 70. – if: ‘$CI_COMMIT_BRANCH == “develop”‘ 71. – if: ‘$CI_PIPELINE_SOURCE == “push”‘ 72. – if: ‘$CI_PIPELINE_SOURCE == “merge_request_event” |
Below is a detailed explanation of the .gitlab-ci.yml file
The .gitlab-ci.yml is a GitLab CI/CD configuration file, defining stages: build, test, and deploy
- Build stage:
– The first step runs `dotnet restore`, which restores NuGet packages required by the .NET Core application.
– The second step runs `dotnet build –configuration Release`, which builds the .NET Core application in Release configuration.
- Test stage:
– The step runs `dotnet test –no-restore –verbosity normal`, which executes unit tests for the .NET Core application. The `–no-restore` option indicates that the restoration of NuGet packages is not required before running tests.
- Deploy stage:
– The `deploy` stage is responsible for deploying the application to the desired environment. It uses AWS ECS to deploy a Docker container.
– The `before_script` section sets up the environment for the deployment process. It installs required tools like `curl`, `jq`, `python3`, `pip`, and the AWS CLI.
– The deployment process is as follows:
– The script logs in to the AWS ECR using the AWS credentials provided in the GitLab CI/CD environment variables.
– It builds a Docker image for the application using `docker build`, tagging it with the latest commit SHA (shortened to 8 characters) as the image tag.
– The Docker image is pushed to the AWS ECR repository with the tagged image.
– The script fetches the current task definition of the service from AWS ECS and updates its container image to the newly built Docker image.
– The updated task definition is then registered with AWS ECS.
– Finally, the service in the AWS ECS cluster is updated with the new task definition, triggering the deployment of the new Docker container.
- Rules:
– The `rules` section defines when this pipeline is executed based on certain conditions.
Refer link for detailed information: https://docs.gitlab.com/ee/ci/jobs/job_control.html
Some parts of the configuration file contain placeholders for environment-specific variables, such as `$DOCKER_REGISTRY`, `$APP_NAME`, `$TASK_DEFINITION_NAME`, `$CLUSTER_NAME`, and `$SERVICE_NAME`. These variables should be defined in the GitLab CI/CD settings to be used during the pipeline execution.
Summary: This article teaches us how to deploy your .NET application using GitLab CI/CD onto Amazon ECS.
References:
- https://docs.aws.amazon.com/codedeploy/latest/userguide/tutorial-ecs-deployment.html
- https://docs.gitlab.com/runner/install/
- https://aws.amazon.com/ecs/
- https://docs.aws.amazon.com/AWSEC2/latest/UserGuide/concepts.html
- https://docs.aws.amazon.com/AmazonECR/latest/userguide/what-is-ecr.html
- https://about.gitlab.com/install/