Purpose of the Article: How to create static website and provide security to the website using AWS Services
Intended Audience: Cloud – Managed services – IT Infrastructure – network and server
Tools and Technology: Azure
Keywords: AWS S3, AWS Cloud Front, AWS Route 53, AWS Certificate Manager
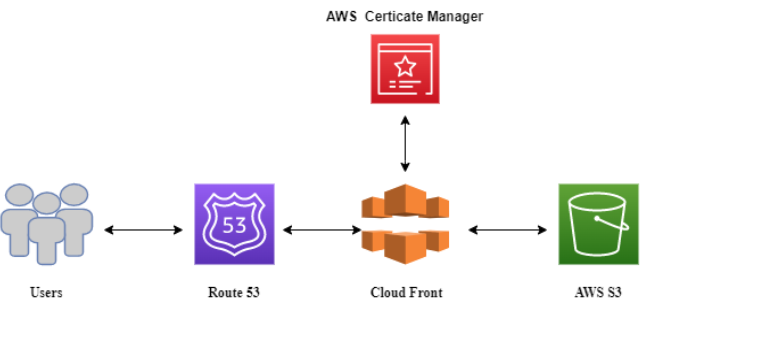
In this article, we are hosting a static website in an S3 bucket and setting up a custom domain using Route 53. Then we will configure a Cloud Front to link it with our custom domain and secure the whole connection using an SSL Certificate and AWS Certificate Manager.
Below is the Flow Diagram:
Pre-requisites:
- AWS Account.
- A registered domain like GoDaddy / similar provider.
High-Level Steps:
- Create an S3 Bucket and upload a sample website.
- Configure Route 53 to redirect requests to S3.
- Set up Cloud Front Distribution and link with the custom domain.
- Secure the connection via SSL Certificate and AWS Certificate Manager.
S3 Bucket
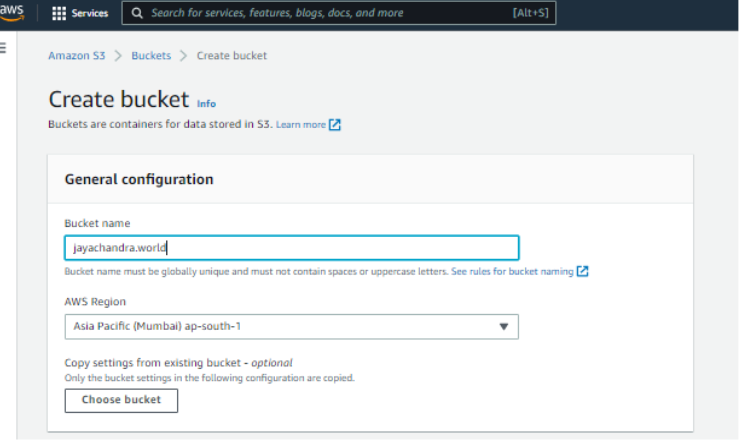
Step 1: Create a bucket with the name same as your actual domain name.
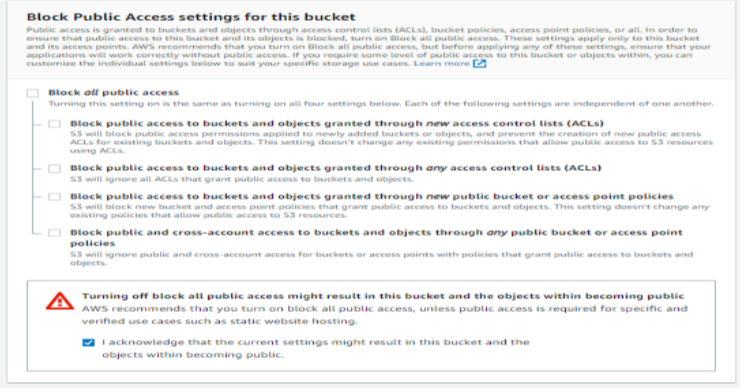
Step 2: Uncheck the block of all public access and acknowledge it so that resources in this bucket can be accessed via the Internet.
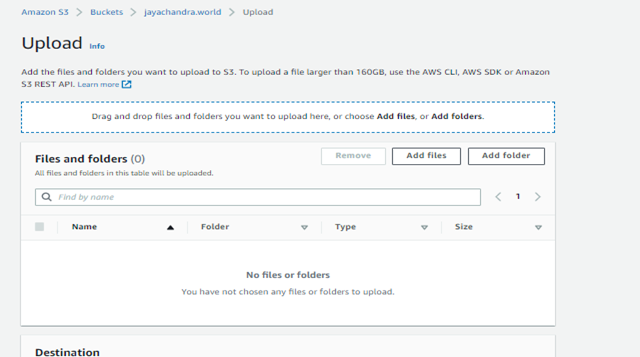
Step 3: Upload a sample website and click on Jayachandran. world -> Objects -> Upload -> Add Files.
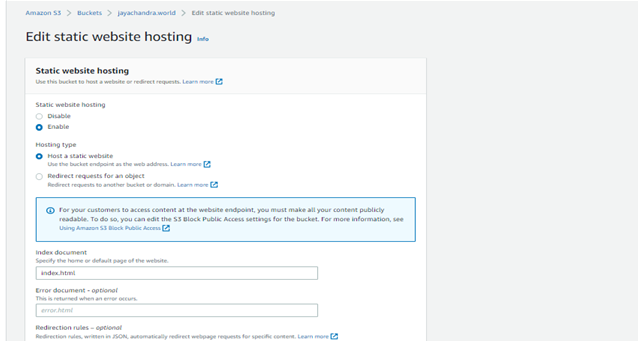
Step 4: Open the bucket you just created from the console and click on properties -> Scroll down completely -> Click on edit “Static Website Hosting” -> Select as below and click on save changes.
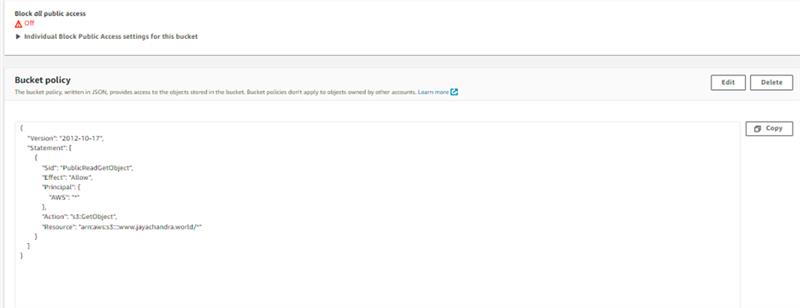
Step 5: Finally, edit the bucket policy to allow anyone to access resources under our bucket with this policy. Change the resource URL as per your domain.
S3 Bucket setup has now been finished. The website can now be accessed. It would be through a public URL provided by AWS S3. We will use Route 53 and Cloud Front to achieve our Goal.
Route 53
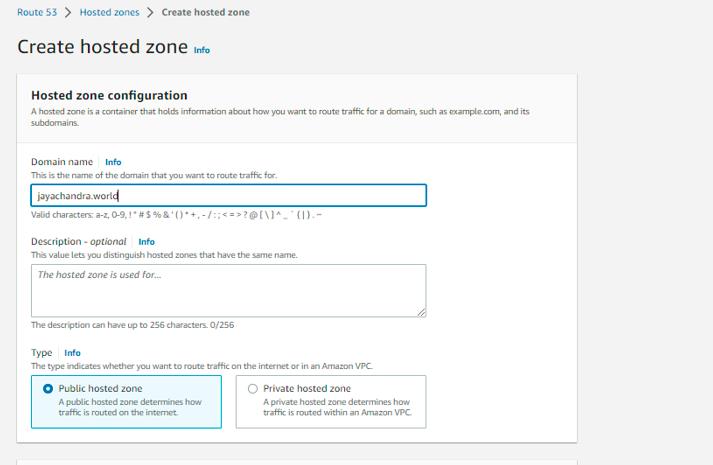
Step 6: Search for Route 53, click on Hosted Zones in the left panel, and create a hosted zone. Then automatically, two records will be created, i.e., NS and SOA.
Copy all four values under NS Type and update the same on the GoDaddy website.
AWS Certification Manager
Step 7: Search for Certification Manager in AWS Console.
Note: Select AWS North Virginia (US-East-1). Cloud Front recognizes only this region as its ACM Certificate.
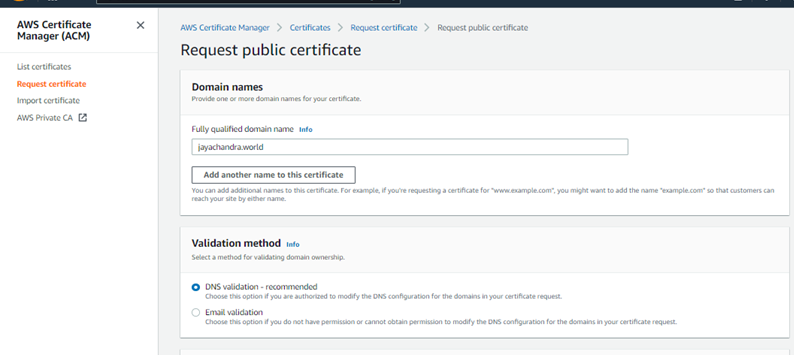
Certificates -> Request -> Select “Request a Public Certificate” and click on next.
Fill in the domain name and click on Request.
On the next screen, you will see the certificate status is “pending validation.” For it to get validated, it needs to be linked it with the Route 53 records, and we can do that by clicking on the “Certificate ID.”

Create a record in Route 53 button under domains.
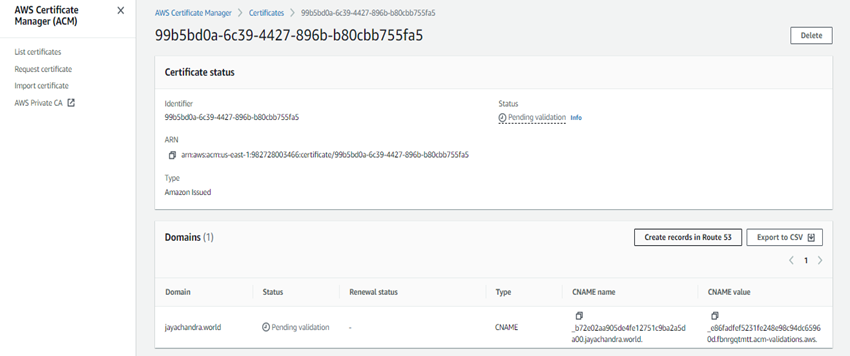
Then click on create. It will take some time to validate.

Cloud Front Distribution
Step 8: Search for Cloud Front and click on Distribution -> Create Distribution.
- For the Origin domain, go back to your S3 management console, click on bucket name -> Properties -> Static Website Hosting, then copy the Endpoint URL and paste the URL inside the Origin Domain Name field.
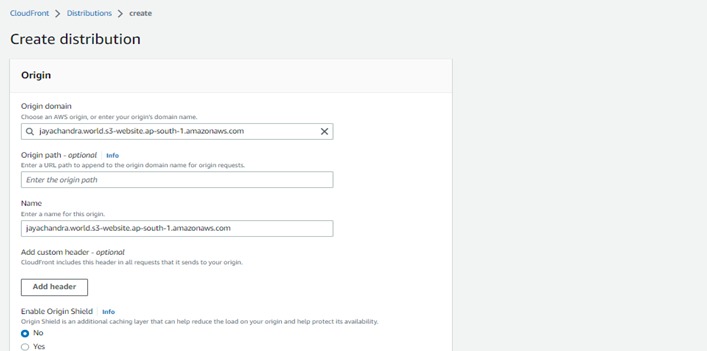
- In the Viewer protocol policy, choose Redirect HTTP to HTTPS.
- Enter the Alternate Domain Name
- Under settings, choose Custom SSL Certificate for CloudFront SSL encryption. Click into the field below – the SSL certificate you provisioned earlier should be offered to you. Choose it and click on Create Distribution.
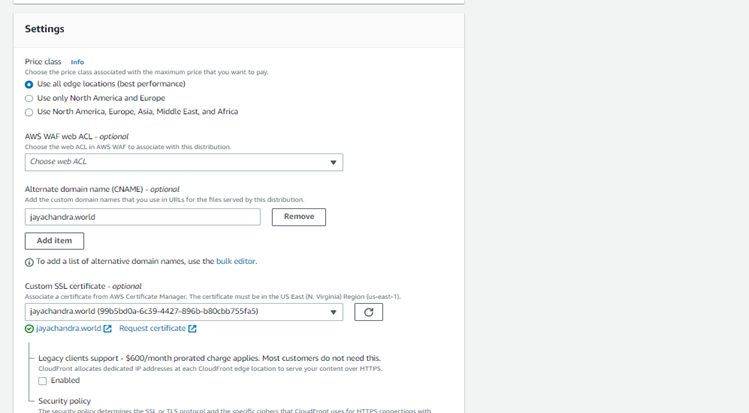
- This will take 10-20 minutes to provision. Now the final step is to create a record in Route 53.
Route 53 (Revisited)
Step 9: Search for your hosted zone on Route 53.
- Now, Click -> Create a record -> Choose Simple routing, click Next, and then Define new record.
- Click the dropdown menu at Value/Route traffic and choose Alias to CloudFront distribution.
- Choose the distribution you provisioned previously.
Note: In this case, my provisioned distribution is Jayachandra.world.s3-website.ap-south-1.amazonaws.com.
| Currently, the US East (N. Virginia) is the only available region. As we provisioned an SSL Certificate via the AWS Certificate manager. |
- Click Create Records.
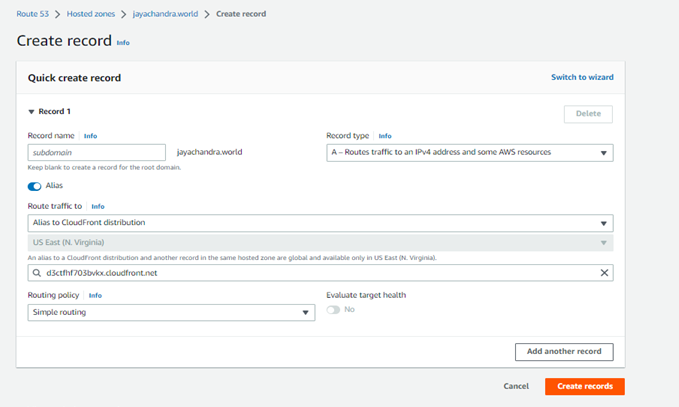
Here we are at the final step. Now wait a few minutes to get the DNS records propagated, and then try to load your domain.
If everything goes smoothly with the above steps, you should be able to see your site distribution via CloudFront.
Author Bio:

Jaychandra Narayanasetti
Sr Specialist
My name is Jayachandra, I have more than 6 years of experience in the IT industry. I have done a lot of work on the infrastructure side in VMware, Azure, and AWS.


