Summary:
This article is about Kafka installation on windows, important concepts used and integration with python.
Objective:
- Introduction to Kafka
- Kafka Installation on Windows
- Kafka Integration with Python
APACHE KAFKA INTRODUCTION:
Apache Kafka is a real-time messaging system that receives data from various source systems and makes it available to target systems. It is an open-source application. It is mainly used for processing and ingesting data in real time. Important concepts to know in Kafka are:
Topics:
Topics are data streams belonging to a particular category used to build real-time data pipelines.
Partition:
Topics are split into partitions. Messages within each section are ordered.
Producers:
Producers publish messages/data to topics, knowing which partition to send the message to.
Consumers:
Consumers retrieve data from servers in which Kafka producers publish messages.
KAFKA INSTALLATION ON WINDOWS:
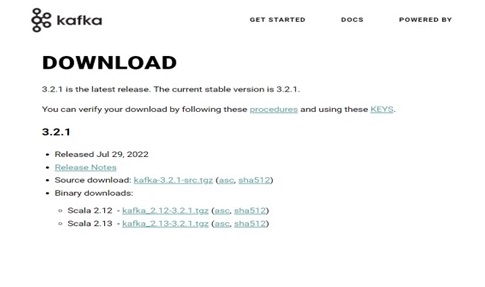
Download Kafka from the official site kafka.apache.org

Follow the below steps for installation:
Step1: Select the binary files from the downloaded folder.
Step2: Extract the folder to the path where you want to keep it.
Step3: Go to config inside the Kafka folder and open the zookeeper.properties file. Copy the Kafka folder path against DataDir. It is the directory where snapshots or log info are stored. Also, make maxClientCnxns as 1. A single zookeeper can handle the number of active connections to the host.

Step4: Open the config folder in server.properties, scroll down to log.dirs, and paste the path. To the Kafka path and add /Kafka-logs.

Make the local host port 2181. You can edit the timeout connection as per the requirement.

Now the zookeeper and server configurations are complete.
Step5: Open the command prompt and change the path to the Kafka folder directory, as shown below. Using the following command, start the zookeeper server.
.\bin\windows\zookeeper-server-start.bat .\config\zookeeper.properties

Step 6: Open the other command prompt and change the path to the Kafka folder directory, as shown below. Using the following command, run the Kafka server.
.\bin\windows\kafka-server-start.bat .\config\server.properties

Kafka is ready to run and stream data now.
Step 7: Create a topic in the Kafka server using the below command.
.\bin\windows\kafka-topics.bat –bootstrap-server localhost:9092 –topic TestTopic –create partitions 1 –replication-factor 1
KAFKA INTEGRATION WITH PYTHON:
To integrate Kafka with Python, install module given below in the Python interpreter.
pip install kafka-python
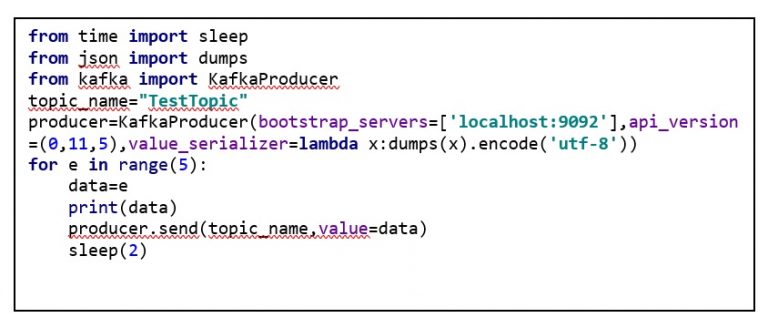
Import necessary packages from the modules. Provide the topic name created and the Kafka server name in the bootstrap_servers to connect to the Kafka server.
Execute the below script in any of the Python IDE:

KafkaProducer function will insert data into the Kafka topic. The consumer will connect to the Kafka server and consumes the messages.
On executing the Python script, the Kafka server is activated, and the tdata is produced into the server.

Open the other command prompt and execute the below command to start the consumer.
.\bin\windows\kafka-console-consumer.bat –bootstrap-server localhost:9092 –topic TestTopic –from-beginning
Consumer output:

Author Bio:

Sai Laharika Pothina
Specialist- Data Engineer
I am an AWS and Python Data Engineer. Passionate to explore and learn new tools and technologies.


