
Purpose of the article: This blog explains about the process of how to extract data from PostgreSQL to Snowflake using Python and Storage Integration and Azure Blob as External stage.
Intended Audience: This article is intended for developers working with PostgreSQL and Snowflake data migration, and those using Azure Blob as staging. It will also benefit developers working with Snowflake external stages and those utilizing the Snowflake COPY command, external stages, and file formats, as well as PostgreSQL data extraction developers.
Tools and Technology: Python, Snowflake, Azure, PostgreSQL,
Keywords: PostgreSQL Data extraction, Snowflake External stage, Snowflake Copy Command, Snowflake Storage Integration, Storage Integration, PostgreSQL Data migration.
This post explains how to automate data migration from PostgreSQL to Snowflake utilizing Python, Snowflake Storage integration, and Azure Blob as the data staging layers. In addition, we’ll go over the setup, data extraction, and loading stages to ensure a seamless and efficient migration.
To utilize the script, ensure you have following:
- Python3 installed in your system.
- Required Python libraries: Snowflake-connector-python, pandas, Azure-storage-blob.
- Access to PostgreSQL, Snowflake, Azure Blob.
Load PostgreSQL data to Snowflake via Python script, stage using Azure Blob, and utilize IAM instead of Azure Credentials with these steps.
Step1: Extract Data from PostgreSQL:
To extract data from PostgreSQL using the psycopg2 Python package, first gather the server information, host, port, user credentials, and password.
					def connect_postgres (host, dbname, user, password, port=5432):
    try:
        conn = psycopg2.connect(
        host=host,
        dbname=dbname,
        user=user,
        password=password,
        port=port
    )
    return conn
except Exception as e:
    print(f"Error connecting to PostgreSQL: {e}")
    return None
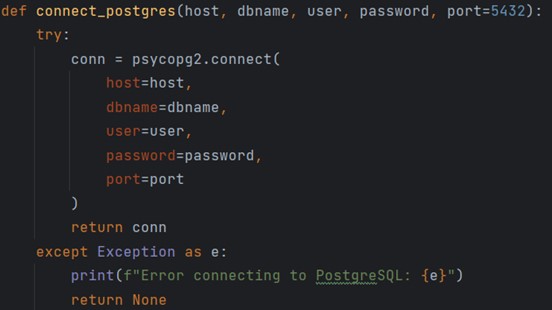
5432 is the Default port number.
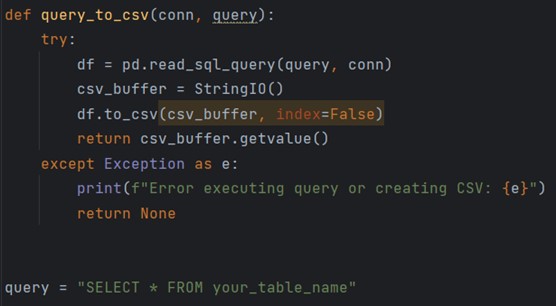
Once the connection is established, execute the SQL query to extract data, storing the CSV data in an in-memory buffer using StringIO. This ensures the CSV file is entirely in memory and not stored on disk.
					def query_to_csv(conn, query):
    try:
        df = pd.read_sql_query(query, conn)
        csv_buffer = String10()
        df.to_csv(csv_buffer, index=False)
        return csv_buffer.getvalue()
    except Exception as e:
        print (f"Error executing query or creating CSV: {e}")
        return None

query = "SELECT * FROM your_table_name"
Step2: Load CSV file to Azure Blob:
To load the CSV file Azure Blob, we require:
- Connection String.
- Container Name.
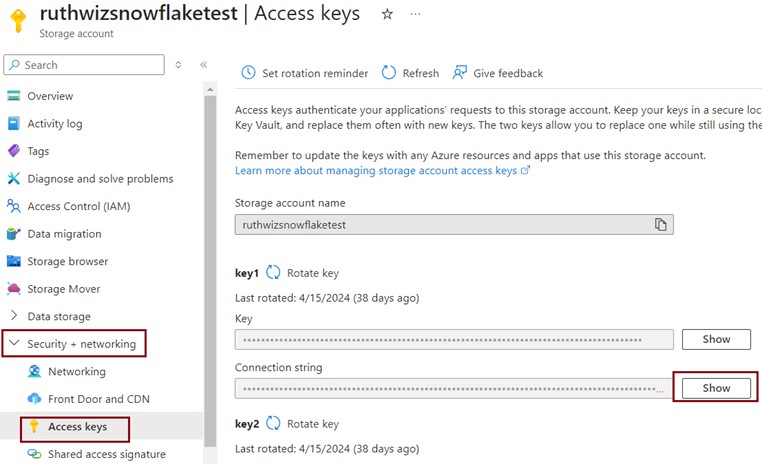
Connection String:
Log into Azure, search for Storage Account, select your account, go to Security + Networking, and select Access Keys. Select Key1 or Key2 and click on “Show” to display the Connection String.
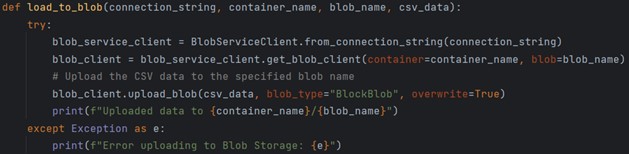
Once you have the connection-string, pass it to the function below, which will then load the CSV file into the respective container.
					def load_to_blob (connection_string, container_name, blob_name, csv_data):
    try:
        blob_service_client = BlobServiceClient.from_connection_string (connection_string)
        blob_client = blob_service_client.get_blob_client(container-container_name, blob=blob_name)
        # Upload the CSV data to the specified blob name
        blob_client.upload_blob (csv_data, blob_type="BlockBlob", overwrite=True)
        print(f"Uploaded data to {container_name}/{blob_name}")
except Exception as e:
    print("Error uploading to Blob Storage: {e}")
Step3: Setting up storage integration:
Storage integration is a mechanism that allows seamless connectivity and data transfer between a data storage service and data warehouse or other platform services.
To create Storage Integration, we should have,
- Azure Tenant ID
- Storage allowed location URL (BLOB Container URL).
Get Azure Tenant ID:
Login to your Azure account and Search for “Microsoft Entra ID”. You can find this id under overview.

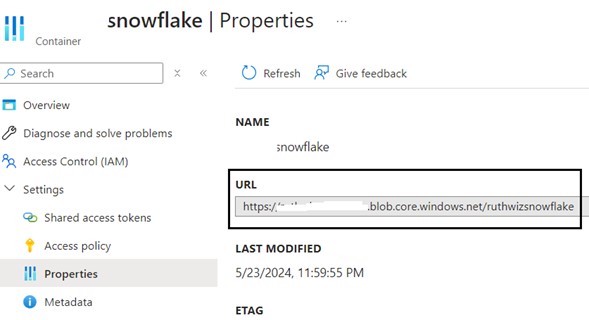
Get storage allowed location:
Go to your Azure storage container, click the three dots in the top-right corner, select ‘Container Properties’, and find the container’s URL.
Creating storage integration in Snowflake:
After obtaining the Tenant ID and Container URL, execute the following command to create a storage integration for securely accessing Azure Blob Storage.

Granting Permissions:
To complete the setup of storage integration between Snowflake and Azure Blob Storage, you need to grant the necessary permissions. This process involves two key steps:
- Authenticating the Azure Consent URL.
- Assigning Roles for the Snowflake Multi-Tenant App.
Step 1: Authenticating the Azure Consent URL:
After creating the storage integration in Snowflake, you need to authenticate it with Azure. Follow these steps:
Trigger the DESC STORAGE INTEGRATION <integration-name> command in Snowflake.
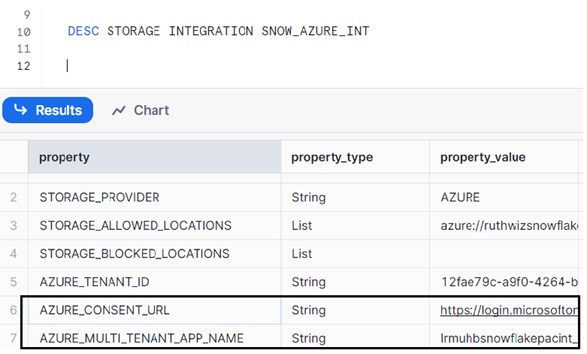
Copy the Azure Consent URL provided and Open the URL in a web browser where you logged into your Azure account so that it authenticates automatically.
Step 2: Assigning roles for the Snowflake Multi-Tenant App:
Next, you need to assign appropriate roles to the Snowflake multi-tenant app in Azure. Here’s how:
- From the DESC STORAGE INTEGRATION <integration-name> output, note the multi-tenant app name.
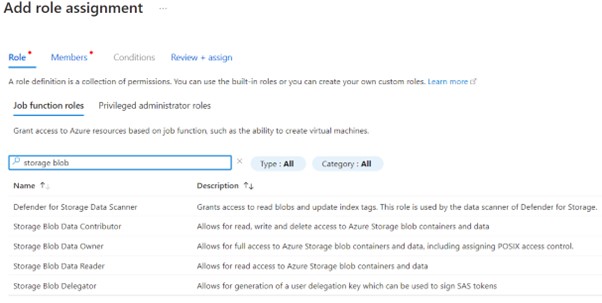
- Navigate to the Azure container properties and select “Access Control (IAM)”. Click on Add to Add the role assignment.
- Choose the role “Storage Blob Data Contributor” and click on Next.
- Under ‘Members’ section, click on “Select Member”, in the search bar. Enter the first few characters of “Azure Multi-Tenant App Name” copied from Snowflake and select the member from the result.
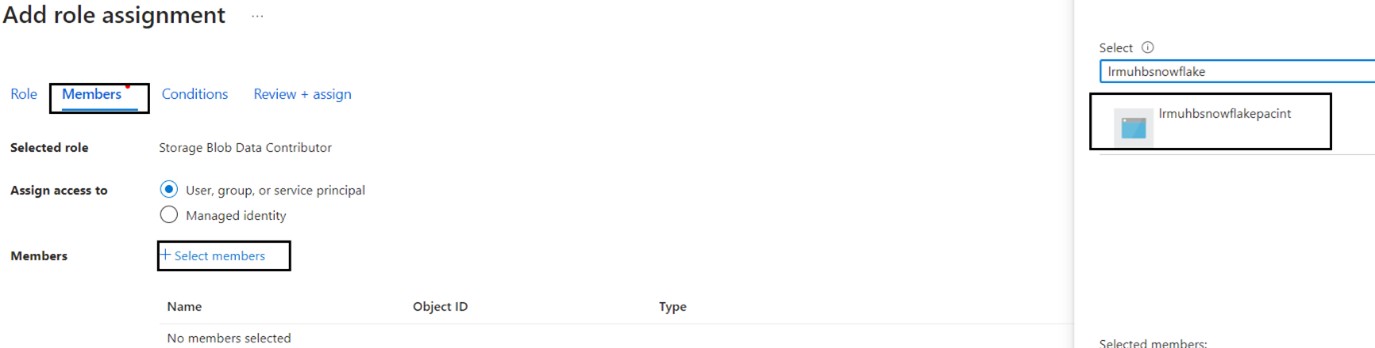
- Save the changes to assign the role.
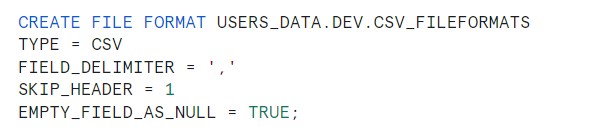
Step 4: Creating File Format:
After setting up storage integration and granting permissions, the next step is to create a file format in Snowflake, The file format specifies the structure of the data file you are processing.
Utilize the command below to create your file format, and execute it in Snowflake:
Step 5: Creating External Stage:
Use the command below to create your external stage. modify the placeholders with your specific values

- URL: Provide the URL of your Azure Blob Storage container.
- STORAGE_INTEGRATION: Provide the name of the storage integration you created earlier.
- FILE-FORMAT: Provide the name of the file format you created earlier.
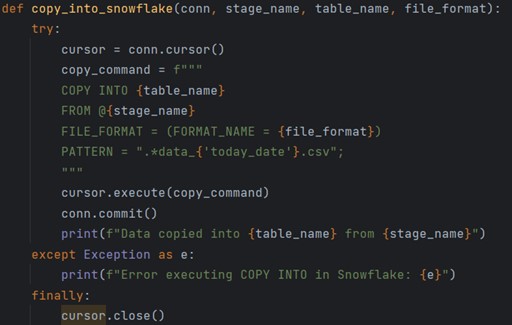
Step 6: Executing Copy INTO Command Using Python:
After setting up Storage Integration, File Format, and External Stage, execute the COPY INTO command to load data from Azure Blob Storage into the Snowflake table. The setup is one-time, but the COPY INTO command triggers when a new file is added to Azure Blob Storage, automatable with Python.
					def copy_into_snowflake (conn, stage_name, table_name, file_format):
    try:
        cursor = conn.cursor()
        copy_command = f"""
        COPY INTO {table_name}
        FROM @{stage_name}
        FILE_FORMAT = (FORMAT_NAME= {file_format})
        PATTERN = ".*data_{'today_date'}.csv";
        """
        cursor.execute(copy_command)
        conn.commit()
        print(f"Data copied into {table_name} from {stage_name}")
    except Exception as e:
        print(f"Error executing COPY INTO in Snowflake: {e}")
    finally:
        cursor.close()
The Python script orchestrates a seamless data pipeline by connecting to PostgreSQL and Snowflake databases, extracting data, transforming it into CSV format, uploading to Azure Blob Storage, and finally loading into Snowflake tables using the COPY INTO command. This streamlined process automates data transfer, ensuring efficient handling and integration across multiple platforms.
Author Bio:

Ruthwiz Reddy
Associative Software Engineer - Data Engineering-Analytic
I'm Ruthwiz Reddy Yandapalli, and I've been an Associate Software Engineer in Data Engineering at MOURI Tech for more than a year. Possess solid experience with AWS Services, Snowflake, and Python and SQL programming languages.