
Purpose of the article: This blog explains the process of developing a serverless S3 file downloader with Python, AWS API Gateway, and Lambda.
Intended Audience: This blog will assist you in creating a secure web page for downloading multiple files at once from an S3 bucket using AWS Lambda and API Gateway.
Tools and Technology: Python and AWS services (S3, IAM, Lambda, and API Gateway).
Keywords: S3, Lambda, S3 Files Download, API Gateway, S3 Files Download using API, S3 Files Download using Lambda.
Architecture:

AWS S3: Scalable object storage service generally used for storing and reacquiring any amount of data at any time, from anywhere on the web.
AWS IAM (Identity and Access Management): Provides secure and managed access to AWS services.
AWS Lambda: Serverless compute service that executes code in response to events and handles the file download logic.
AWS API Gateway: A fully managed service that allows you to create and manage RESTful APIs. Servers as the HTTP endpoints through which clients can invoke Lambda functions.
Steps for creation:
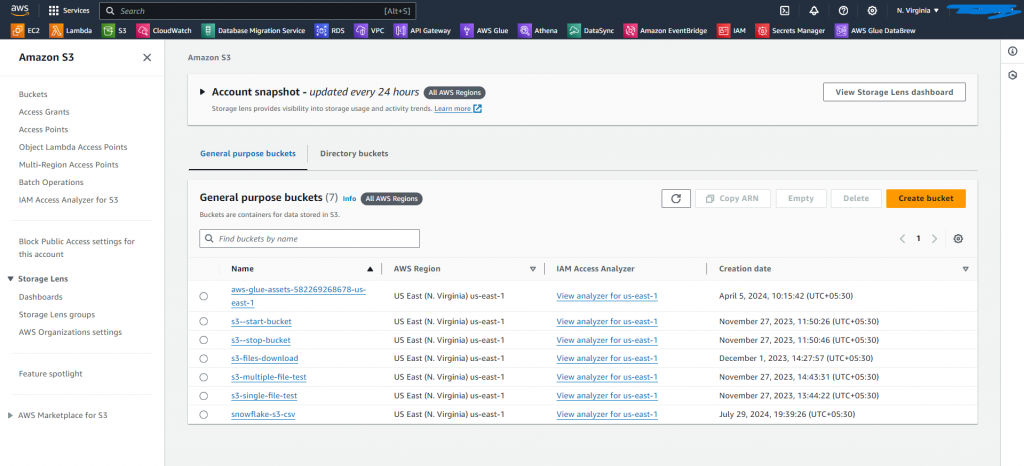
Step – 1: Set up an S3 bucket to store the objects (files):
- Access the AWS interface and navigate to S3.
- Create a new bucket then configure its settings and permissions.
- Complete the creation and upload files as needed.
Step – 2: Create an AWS IAM Role to execute the Lambda Function.
- Access the IAM service and create a role in the AWS services.
- Choose your AWS service and Lambda use case.
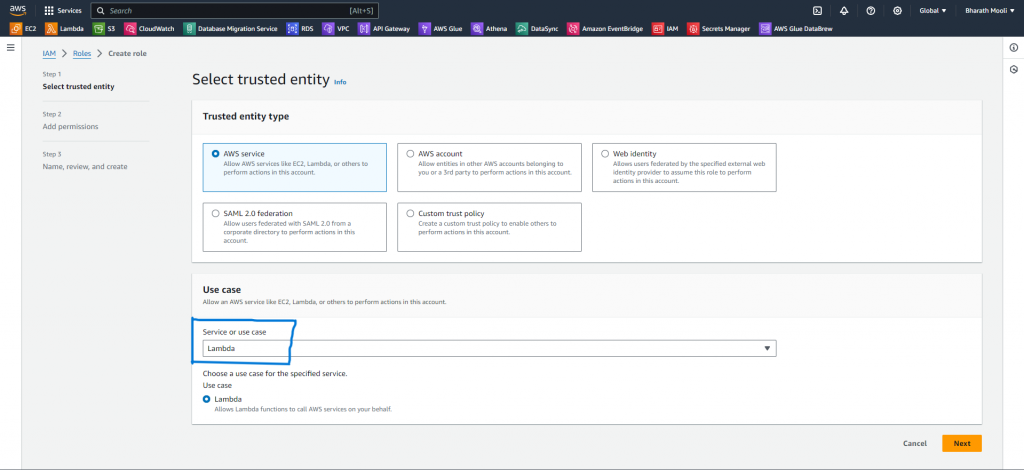
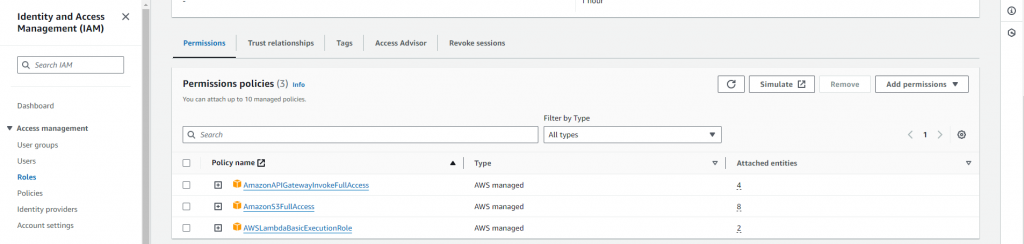
- Add permissions: AWSLambdaBasicExecutionRole, AmazonS3FullAccess, and AmazonAPIGatewayInvokeAccess.
- Create a role with a specified name, and a description (optional).
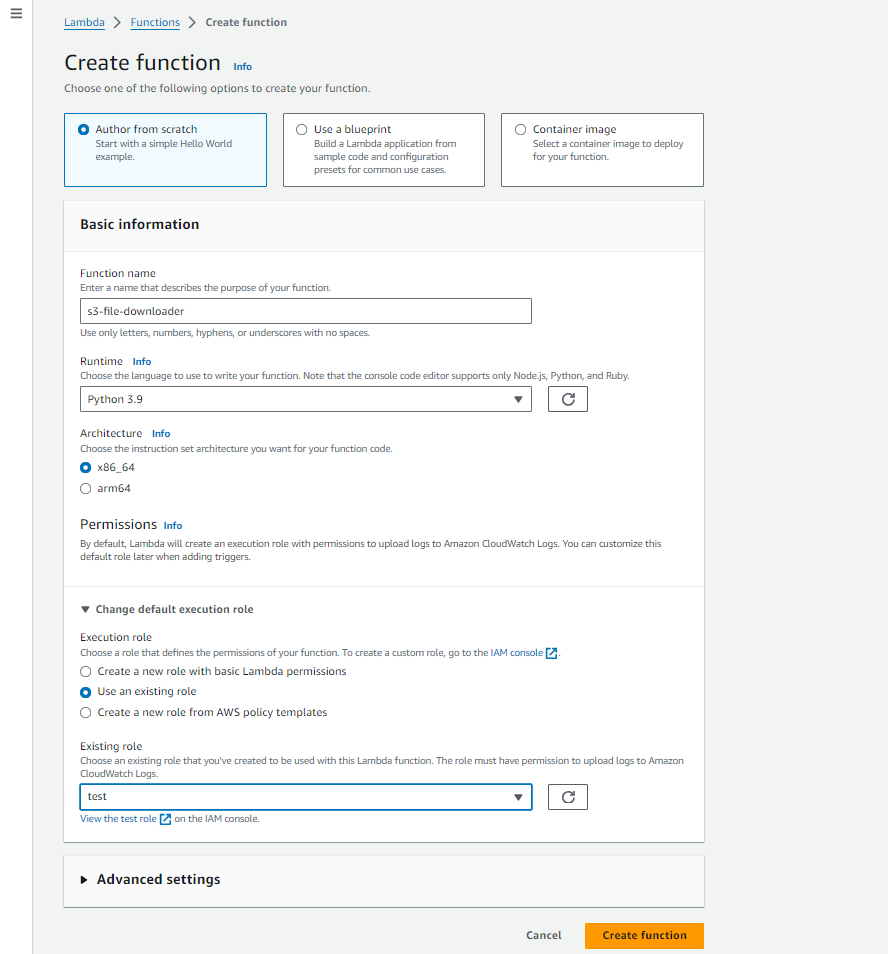
Step – 3: AWS Lambda Function Creation.
- Navigate to the AWS Lambda Function and click on ‘Create’ function.
- Provide the function name as you want and select the Python runtime.
- Use the IAM role existing created in Step 2.
- Write a customized code to access S3 files and to generate pre-signed URLs.
- Create an environment variable and pass the key as “BUCKET NAME” and value as “<s3-bucket-name>”.

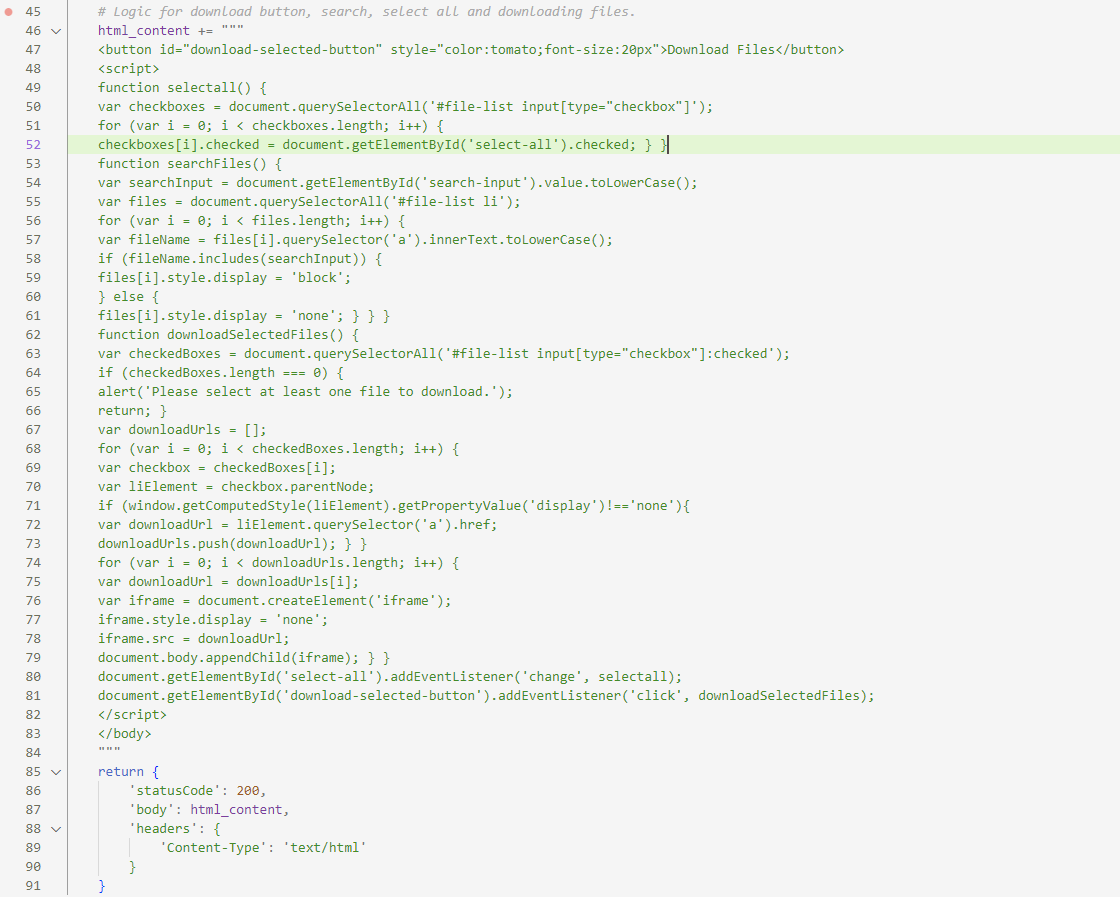
- Paste the following code into the lambda code terminal.
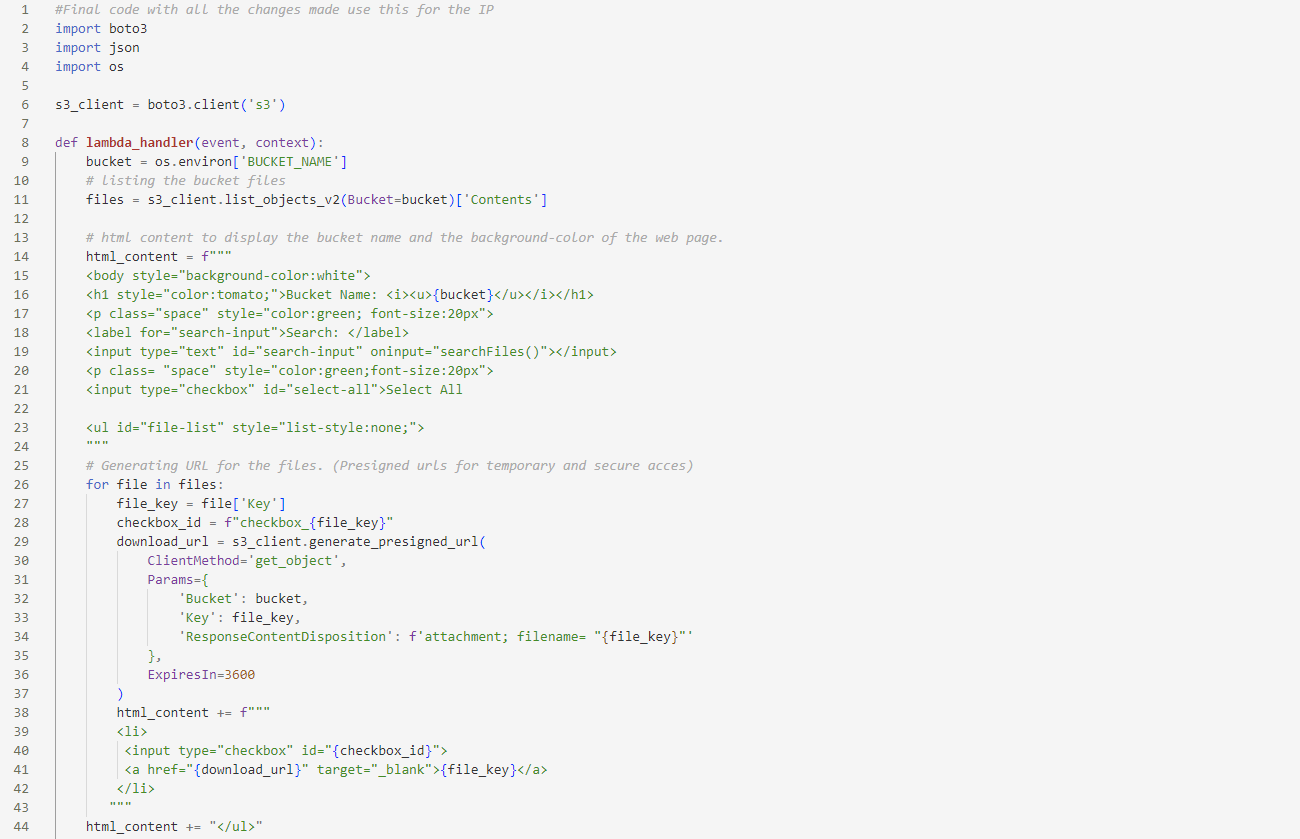
					#Final code with all the changes made use this for the IP
import boto3
import json
import os

s3_client = boto3.client('s3')

def lambda_handler(event, context):
    bucket = os.environ [ 'BUCKET_NAME']
    # listing the bucket files
    files = s3_client.list_objects_v2(Bucket-bucket)['Contents']

    # html content to display the bucket name and the background-color of the web page.
    html_content = f"""
    <body style="background-color:white">
    <h1 style="color:tomato;">Bucket Name: <i><u>{bucket}</u></i></h1>
    <p class="space" style="color:green; font-size:20px">
    <label for="search-input">Search: </label>
    <input type="text" id="search-input" on input="searchFiles()"></input>
    <p class="space" style="color:green; font-size:20px">
    <input type="checkbox" id="select-all">Select All

    <ul id="file-list" style="list-style:none;">
    """

    #Generating URL for the files. (Presigned urls for temporary and secure acces)
    for file in files:
        file_key file['key']
        checkbox_id = f" checkbox_{file_key}"
        download_url = s3_client.generate_presigned_url(
            ClientMethod='get_object',
            Params={
                'Bucket': bucket,
                'key': file_key,
                'ResponseContentDisposition': f'attachment; filename="{file_key}"'
            },
            Expires In-3600
        )
        html_content += ƒ"""
        <li>
            <input type="checkbox" id="{checkbox_id}">
            <a href="{download_url}" target="_blank">{file_key}</a> </li>
            """
    html_content += "</ul>"
					# Logic for download button, search, select all and downloading files. html_content +=
<button id="download-selected-button" style="color:tomato; font-size: 20px">Download Files</button>
<script>
function selectall() {
var checkboxes=document.querySelectorAll('#file-list input[type="checkbox"]');
for (var i = 0; i < checkboxes.length; i++) {
checkboxes[i].checked = document.getElementById('select-all').checked; } }
function searchFiles() {
var searchInput = document.getElementById('search-input').value.toLowerCase();
var files = document.querySelectorAll('#file-list li');
for (var i = 0; i < files.length; i++) {
var fileName = files[i].querySelector('a').innerText.toLowerCase();
if (fileName.includes (searchInput)) {
files[i].style.display = 'block';
} else {
files[i].style.display = 'none'; } } }
function downloadSelectedFiles() {
var checkedBoxes = document.querySelectorAll('#file-list input[type="checkbox"]: checked');
if (checkedBoxes.length === 0) {
alert('Please select at least one file to download.');
return; }
var downloadUrls = [];
for (var i = 0; i < checkedBoxes.length; i++) {
var checkbox = checkedBoxes[i];
var liElement = checkbox.parentNode;
if (window.getComputedStyle(liElement).getPropertyValue('display') !== 'none'){
var downloadUrl = liElement.querySelector('a').href;
downloadUrls.push(downloadUrl); } }
for (var i = 0; i < downloadUrls.length; i++) {
var downloadUrl = downloadUrls[i];
var iframe = document.createElement('iframe');
iframe.style.display = 'none';
iframe.src=downloadUrl;
document.body.appendChild(iframe); } }
document.getElementById('select-all').addEventListener('change', selectall);
document.getElementById('download-selected-button').addEventListener('click', downloadSelectedFiles);
</script>
</body>
"""

return{
    'statusCode': 200,
    'body' : html_content,
    'headers': {
    'Content-Type': 'text/html'
    }
}
- The above code snippet will first retrieve the bucket name from the environment variables provided in the Lambda function.
- Next, it will access the files from the specified S3 bucket and then create a web page to display all the files in the bucket.
- Additionally, the code will also include following functionalities like search, select and download.
Step – 4: Create a Restful API in API Gateway:
- Navigate to AWS API Gateway console in AWS services.
- Create REST API: Click on the “Create API” option and select “REST API” as the type and then click on continue.
- Define API Details: Name the API then select “REGIONAL” as the endpoint type and click on create the API.
- Configure Resource: Create a resource with a path name that corresponds to your API URL.
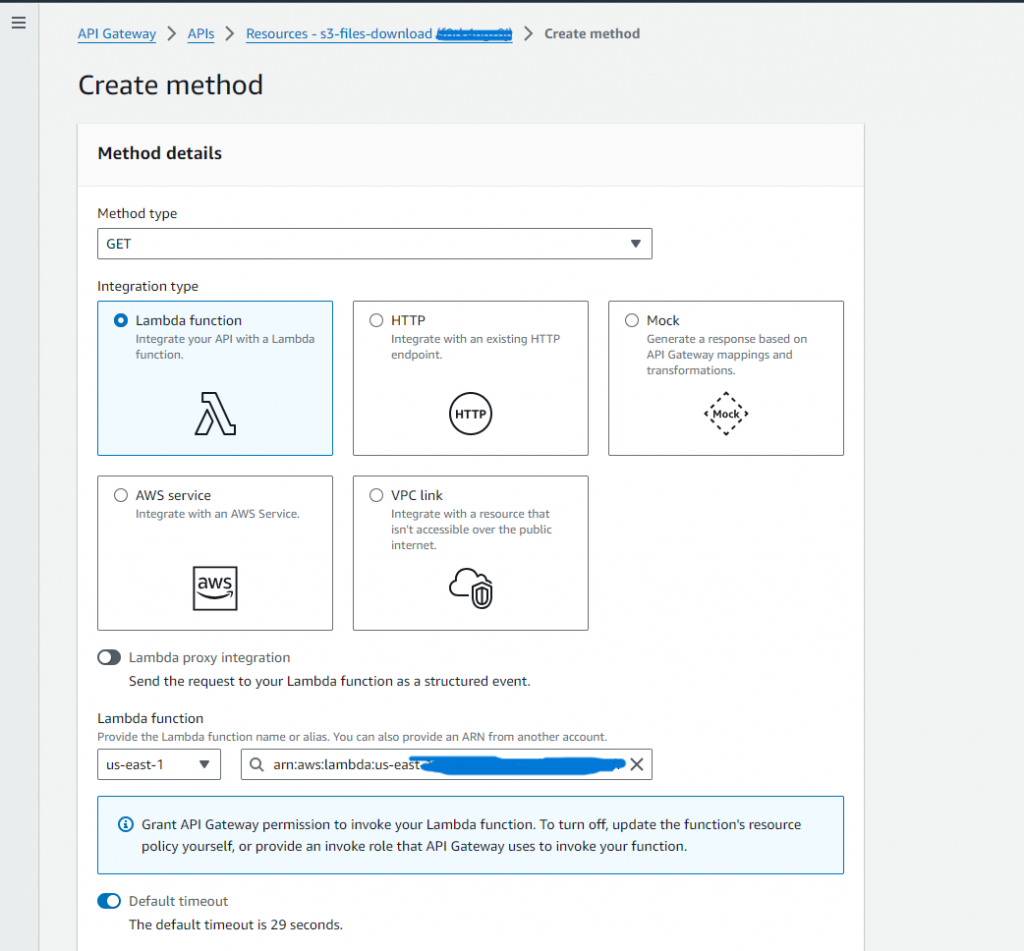
- Add Method: Create a “GET” method to access binary content.
- Integration with Lambda: For optimal handling, use the “Lambda Function” as the integration type with Lambda Proxy Integration.
- Select the Lambda function for processing the requests.
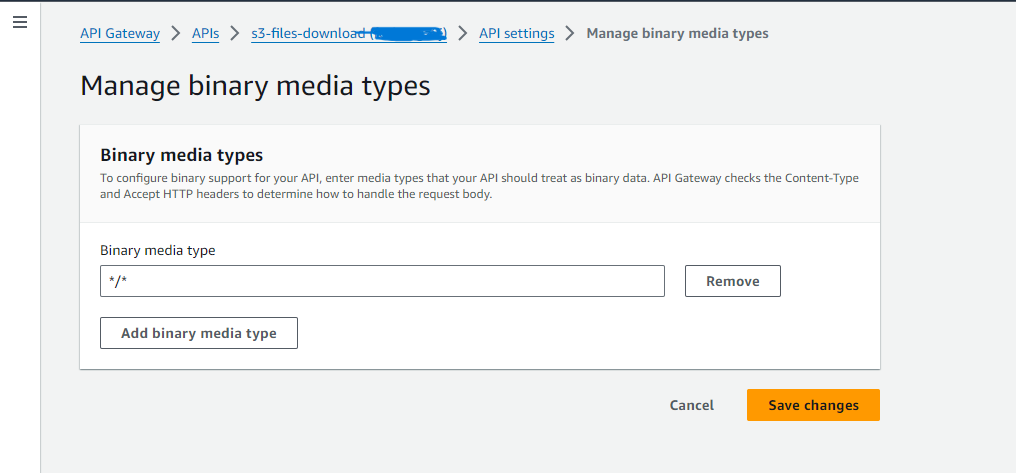
- Enable Binary Media Types: Configure binary media types in the API Settings.
- Deploy the API: Return to “Resources” tab.
- Then select the “Deploy API” from the “Actions” menu.
- Define Stage: Choose a stage name and deploy. Then API invoke URL will be generated.
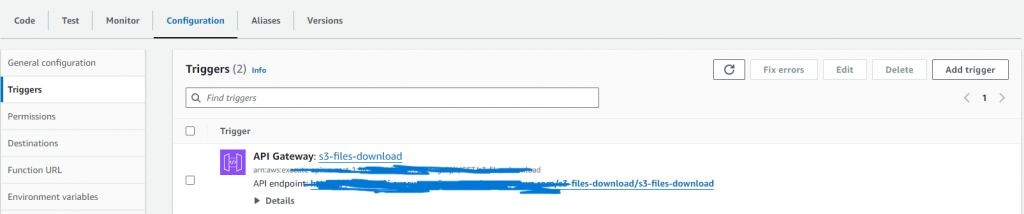
Step – 5: Navigate to AWS Lambda Service:
- Navigate to the Lambda service in the console and select your function.
- Configuration: Click on the “Configuration” tab.
- Click on the “Triggers” section.
- Copy the API endpoint.
Output:
URL Link: https://<api-id>.execute-api.<region>.amazonaws.com/<resource name>/<stage name>
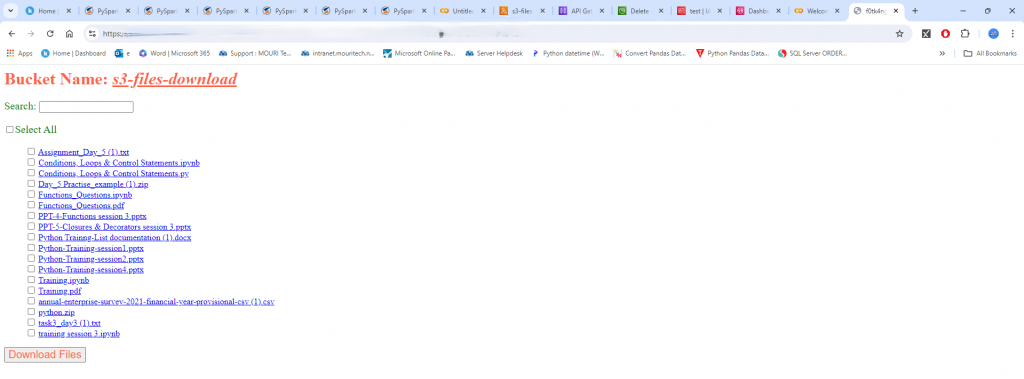
Instead of manually navigating the S3 console, the API gives a streamlined directory view of all documents within the bucket. Say goodbye to tedious record searches and slow, one-via-one downloads! The downloader lets you incontinently search for the specific files you want and download them all in bulk, a time-saving characteristic no longer to be had inside the fashionable AWS S3 console. It integrates seamlessly with pre-signed URLs for secure sharing that keeps your bucket out of sight.
References:
- https://sayed-imran.medium.com/aws-api-gateway-and-s3-integration
- https://www.geeksforgeeks.org/how-to-upload-and-download-files-from-aws-s3-using-python/
- https://medium.com/geekculture/use-s3-bucket-with-api-gateway
- https://medium.com/@meriemiag/secure-file-uploads-and-downloads
- https://docs.aws.amazon.com/AmazonS3/latest/userguide
Author Bio:

Bharath Sai Kumar Reddy MOOLI
Associate Software Engineer - Advanced Analytics
I’m Bharath Sai Kumar Reddy MOOLI, and I've been with MOURI Tech for 1+ years as Associate Software Engineer in Data Engineering. Have a good history with AWS Services and expertise in Python and SQL coding language.